Setting up various displays, 1 the data display – Furuno GP-150-DUAL User Manual
Page 43
6-1
6. SETTING UP VARIOUS DISPLAYS
6.1 The Data Display
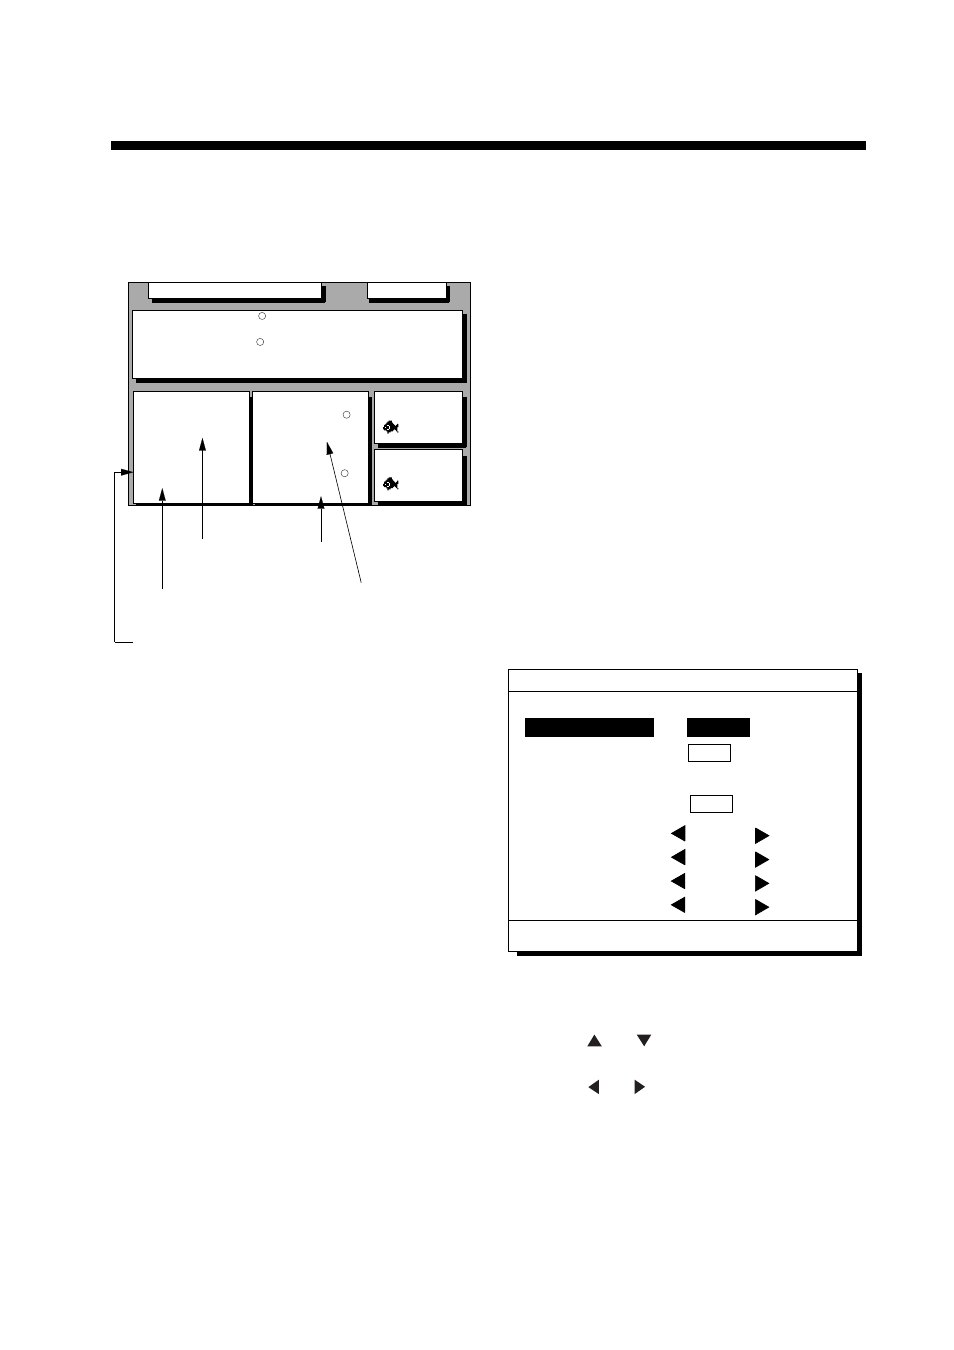
The user may select what data to display in
four locations on the data display.
JAN 12, 2005 23:59’59" U
12 23.456’ N
123 23.456’ E
POSITION
RNG
31.23
nm
SOG
12.3
kt
BRG
223.4
COG
123.4
TO : 001
MARINE
POINT1
NEXT
: 002
MARINE
POINT2
User-defined
display data #1
User-defined
display data #2
User-defined
display data #4
User-defined
display data #3
User-defined
display window
WGS84
D3D
100m
SAFE
Figure 6-1 Data display
The data the user may display are;
•
Altitude (ALT)*
•
Average course (AVR COG)
•
Average speed (AVR SPD)
•
Course (COG)
•
Course error (dCOG)
•
Cross track error (XTE)
•
Depth (W.DPT)#
•
ETA to waypoint (ETA)
•
Range to waypoint (RNG)
•
Bering to waypoint (BRG)
•
Route time-to-go (RT.TTG)
•
Speed (SOG)
•
Time-to-go to waypoint (TTG)
•
Total route distance (RT.DIST)*
•
Trip distance (TRIP)
•
Trip elapsed time (TRIP TM)
•
Water temperature (W.TMP)#, and
•
Velocity to destination (VTD)*
•
ETA to route
*ALT: Displayed only in 3D position fixing.
*RT. DIST: Total distance from current
position to ultimate destination. Appears
when following a registered route or a
cursor-created route.
*VTD: When following a route, plus or minus
appears next to indication to denote which
direction the route is being traversed.
# Requires external sensor.
1) Press
MENU ESC, 9 and 1 to display the
PLOTTER SETUP menu.
PLOTTER SETUP
Bearing Ref.
Auto
(07
° W)
Man
(00
° E)
ENT:Enter
MENU:Escape
Memory Apportion
Mag Variation
True
Trk = 1000 / 2000Pt
Mag
R.L
G.C
Calculation
User defined #1
SOG
User defined #2
COG
User defined #3
RNG
User defined #4
BRG
Figure 6-2 PLOTTER SETUP menu
2) Press or to select one of four of
"User defined" (#1, #2, #3, #4).
3) Press or to select data to display.
4) Press the
NU/CU ENT key. To select the
data to display at other user defined
displays, repeat steps 2 and 3.
5) Press the
MENU ESC key.