Using your range 22 – Heartland Toledo XT User Manual
Page 22
Using your Range
22
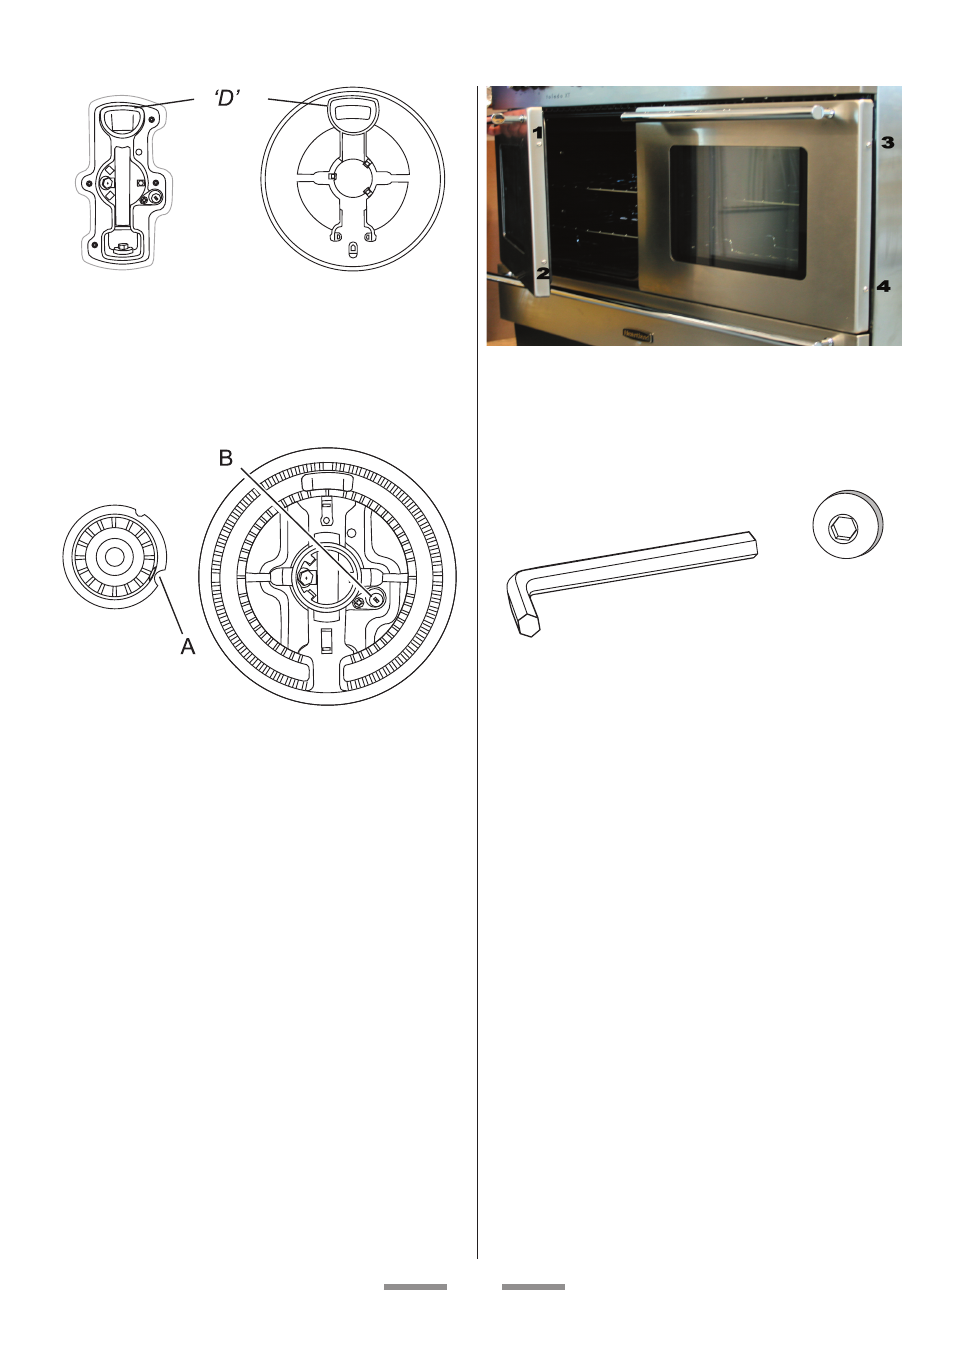
Turn the head until the ‘D’ matches the one on the
burner base. Turn the head over and place it on the
burner base.
To fit the small inner burner, find the larger electrode
notch in the burner rim. Line this up with the white
ignition electrode and place the inner burner on the
large base ring.
A electrode notch
B ignition electrode
Now fit the two trim rings, making sure that they are
sitting down properly.
Control Panel and Doors
The control panel and control knobs should only be
cleaned with a soft cloth wrung out in clean hot soapy
water -
but take care that no surplus water seeps
into the appliance. Wipe with a clean dampened
cloth then polish with a dry cloth. The oven doors
should only be cleaned with a soft cloth wrung out in
clean hot soapy water.
Models with window doors
The oven door is triple glazed but the oven door front
panel can be taken off so that the inside faces of the
glass panels can be cleaned.
If necessary move the range forward to gain access
to the sides of the doors (see the ‘Moving the range’
section of these instructions).
The door front panel is held by four fixing screws, two
on each side:
The fixing screws have a recessed hexagon socket in
the head. A hexagon key to fit the screw is supplied
in the instruction pack.
Open the oven door slightly and use the key to
remove the front panel fixing screws from the door
sides (two each side).
Carefully lift off the outer door panel. The inside face
of the glass panels can now be cleaned - take care
not to disturb or wet the door insulation. Please note
that the door is triple glazed but the inner two panels
are fixed. Do not try to remove the glass from the
door.
After cleaning carefully refit the outer door panel and
replace the side fixing screws.
Ovens
Some of the oven lining panels can be removed for
cleaning and for cleaning behind. They can also be
put into a dishwasher. Remove the racks first.
The side panels of either oven can be removed.
Each side of the oven is fixed with four fixing screws.
You don’t have to remove the screws to remove the
oven linings. Lift each side panel upwards and they
will slide off the screws. Then pull them forwards