ARM Electronics IP540_620MDVANVP User Manual
Page 24
24
12) It is connected to IP newly set up, in 20 seconds after window of [3-11] appears.
13) Check Video of IP540/IP620MDVAIVP referring to ‘
1. Video Check
’ as soon as it is connected to IP
newly set up.
14) Go to Network Setting Page of Administrator’s Page as per 4), 5), 6), 7) of ‘
Static IP Setup
’.
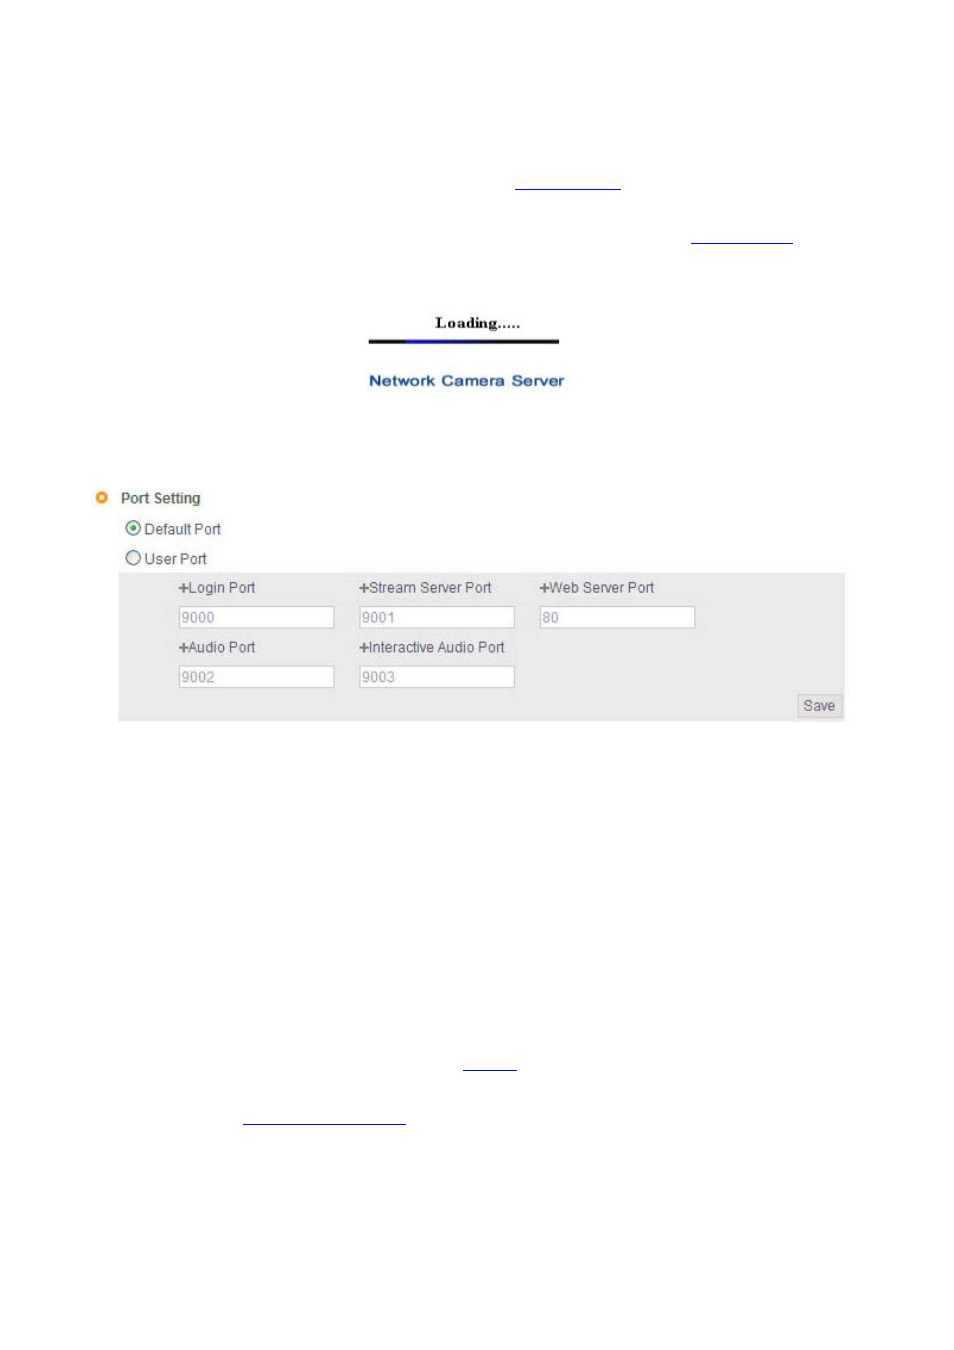
Pic. 3―11 IP Change loading Page
Pic. 3―12 Port Setting
15) Set Port in Port Setting Page of [Pic.3-12]. It is required to set each different Port for many
IP540/IP620MDVAIVP Servers under 1 Router.
16) Click ‘Save’ Button to save set value.
17) Remove LAN Cable (Cross Cable) connected between IP540/IP620MDVAIVP and PC.
18) Connect IP540/IP620MDVAIVP to Network with LAN Cable (Straight Cable).
19) Connect PC to Network with LAN Cable (Straight Cable).
20) Port-Forward the port designated to use IP540/IP620MDVAIVP, in IP Sharing Device. Refer to
manual of IP Sharing Device for details.
21) Check 1 (local check)
Run Web Browser and input IP address of IP540/IP620MDVAIVP in URL and click ‘Enter’. If you
changed Web Server Port, you must input ‘
http://IP
Address: Port Number’. For example, If you set
IP address of IP540/IP620MDVAIVP to 192.168.0.100 and changed Web Server port to 81, you
must input
Http://192.168.1.100:81
.