Aiphone RAX R24/A User Manual
Page 16
Attention! The text in this document has been recognized automatically. To view the original document, you can use the "Original mode".
ELECTRICAL
GANG BOX
(F) RA-B and RA-C Flush Mount Installation
RA-B/RAC
PANEL
RA-B/RA-C
UNIT
CIJ
□□□□
□□QO
□aon
SCREW lx 4)
1. Separate the RA-B/RA-C panel from the RA-B/RA-C
unit.
2. Attach the RA-B/RA-C unit to electrical box with the
supplied screws.
3. Replace the RA-B/RA-C panel to the unit with the
2 screws.
In N. America, please specify either BOWERS
703-SPL,
RACO
952,
APPLETON
3G-5075
or
equivalent.
RA-B/RA-C FLUSH-MOUNTING GUIDE
, 112 (4-7/16")
4.5 (3/16")
SCREW
(4, 3/16" DIA.)
205
(
8
-
1/16
Vj
9.2
(3/8")
, DIA.
195
(7-11/16")
240
(9-7/16"
85 (3-5/16")
^
^..........
^ BOSS '
30 (1-3/16")
62 MIN
(2-7/16")
90
(3-9/16")
rm
194
(7-5/8")
203
(
8
" )
140
(5-1 /2")
MINIMUM
MAXIMUM
1
209
(8-1/4")
RA-B/RA-C SIDE & BACK VIEW
When RA-B/RA-C are fulsh-mounted to wall, be sure that
two holes be opened for the bosses of 9.2 (3/8") diameter
and protruding 4.5 mm (3/16").
Notes on installing station units;
(1) Avoid to locate the station unit in such places as closely surrounded by wall or other things, which may interfere with
voice-switching to function properly.
(2) Keep the station unit away from the paging speakers to avoid acoustic feedback in paging mode.
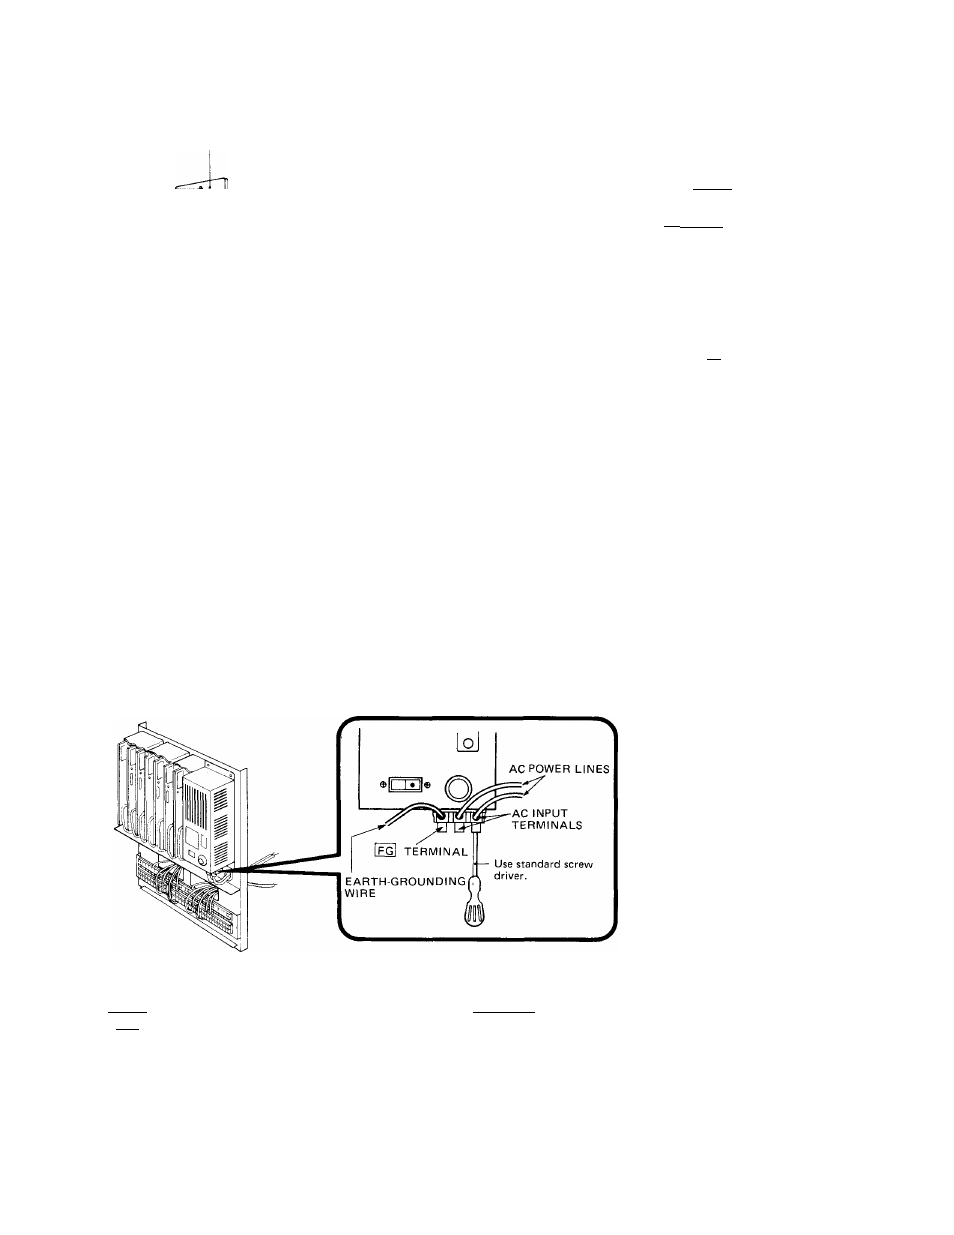
(G) Connecting AC Power Line and Grounding Wire
□
a| RAX-8,
RAX-.16,
RAX-24
~ EARTH-GROUNDED
As shown using standard screw driver, connect AC power line to |AC INPUT) terminals, and earth-ground wire to
IFG| terminal.
-14-