Aiphone RAX R24/A User Manual
Page 14
Attention! The text in this document has been recognized automatically. To view the original document, you can use the "Original mode".
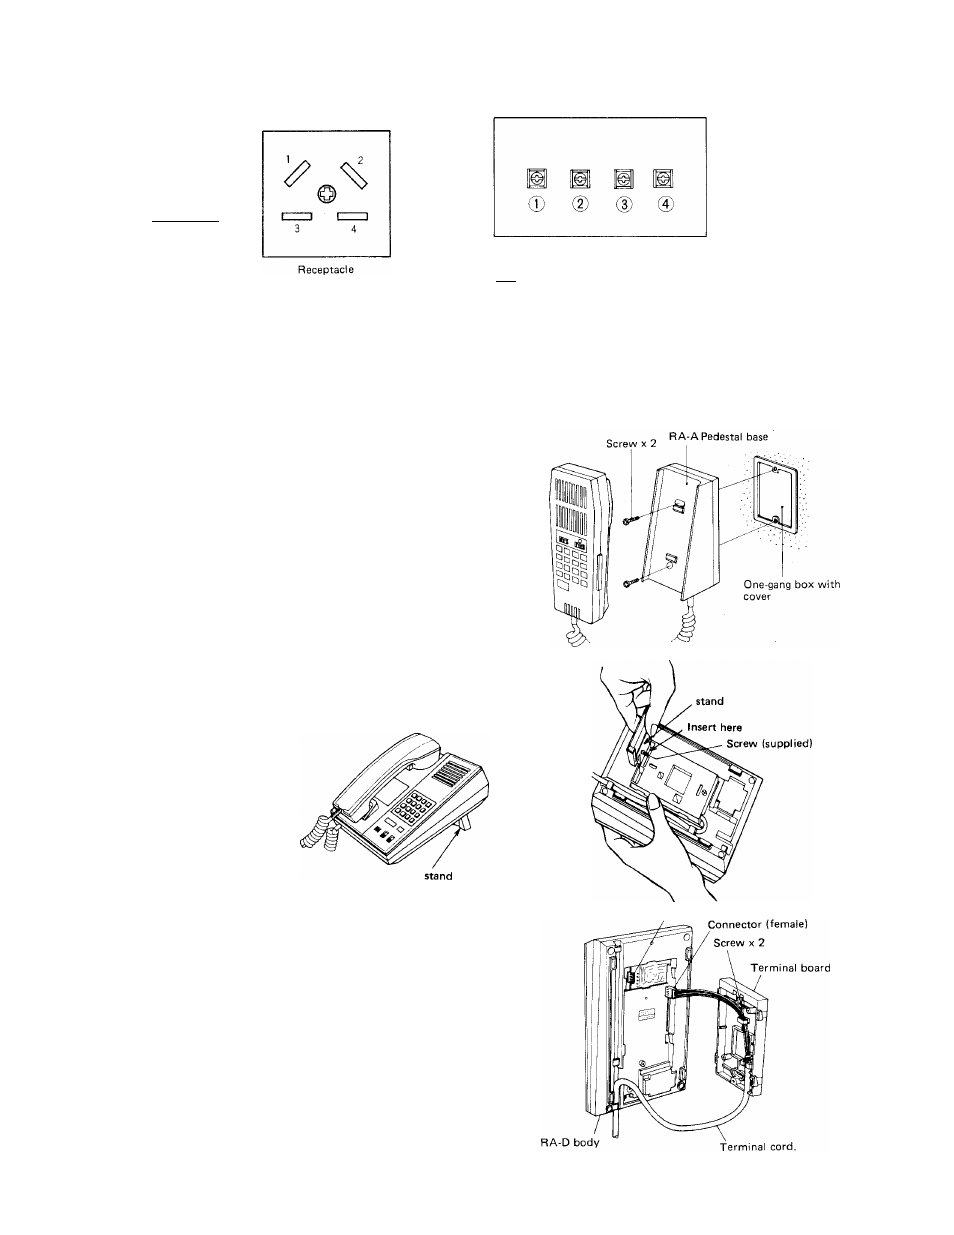
(C) Connecting Station Unit
RA-A, RA-D
RA-B/RA-C
(2) (1)
I------ 1 I------~l
(4)
(3)
“T7'
4P plug
4P plug.........................Plug into the receptacle.
Receptacle ................. Connect to Terminal section
of the Central Exchange Unit.
[n ' [U ' [H ' 0 Connect to each number terminal
assigned on the Terminal section
of the Central Exchange Unit.
|~T| , [
2
] , 0,0 :
Connect to each number
terminal assigned on the
Terminal section of
RAX CEU.
(D) RA-A Wall Mounting Installation
1. Unscrew the RA-A pedestal base and separate the
cover from the chassis.
2.
Reversely replace the cover to the chassis and
mount the RA-A pedestal base to one-gang box
with cover or to wall with the provided screws.
(E) RA-D Mounting Installation
For desk top use;
As shown, just insert the stand and fix with a screw provided.
For wall mounting;
RA-D is primarily designed for desk top use, but may
practically be used for wall mount (surface mount).
Remove a screw fixing terminal board. Slide down terminal
board, pull off 4P connector and separate terminal cord
from the chassis.
Attach terminal board to the wall with two screws. As
shown, pull out terminal cord either from top or bottom of
the unit. Attach connector and fit the unit onto the
terminal board.
Connector (male)
-12-