Replacing the printer, Removing printer – Welch Allyn PROPAQ CS User Manual
Page 99
Service Manual
Repair procedures
95
Replacing the printer
This section provides instructions on removing and installing the printer mechanism and
Printer Main Board. These two components are provided as a replacement unit called the
Printer Assembly.
Removing printer
Remove the Printer Assembly according to the following instructions.
1.
Remove any printer paper.
2.
Open the Expansion Module (
3.
Remove the Expansion Module front panel (
“Replacing Expansion Module front
4.
Disconnect the front panel button cable from the front of the Printer Main Board.
5.
Carefully remove the plastic shield from the rear of the Expansion Module Chassis.
Set this shield aside.
6.
Disconnect the battery cable and printer cable from the rear of the Printer Main
Board.
7.
Lay the Chassis on its back.
8.
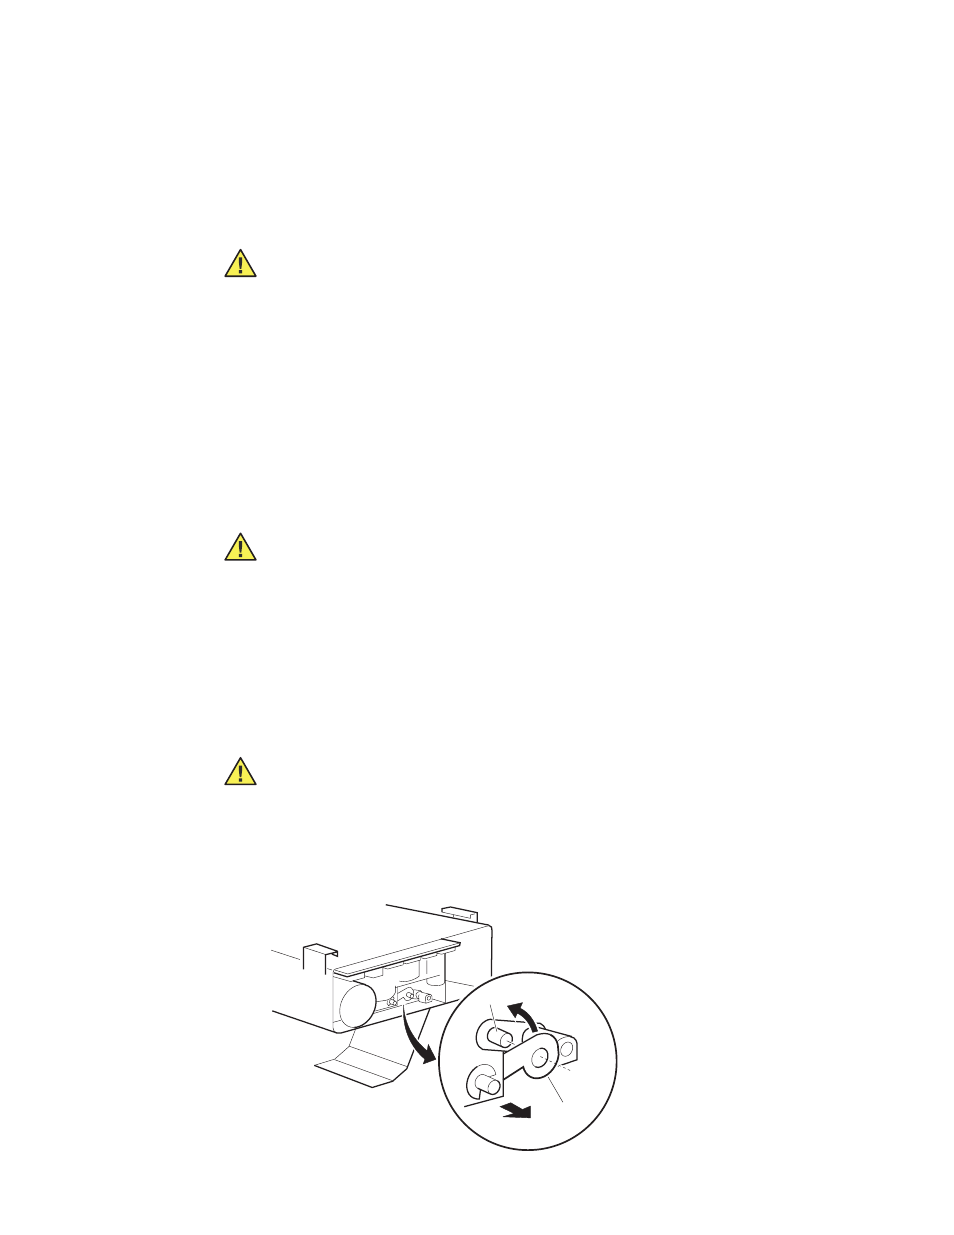
Completely open the paper door.
9.
Carefully slide the Printer Assembly out the front of the Chassis. The Printer
Assembly fits snugly, requiring some force to slide it out, and the door latch
mechanism must be rotated counter-clockwise after it disengages from the printer
door pin (see below).
removing printer
Caution Do not attempt to separate the printer mechanism from the Printer
Main Board. Replace these as a unit.
Caution When removing the shield in the next step, be careful not to tear it.
The shield is held in place by double-sided adhesive pads.
Caution As you remove the Printer Assembly from the Chassis in the next step,
rotate the printer door latch mechansim counter-clockwise to clear the Chassis.
0696-49
Print Head
Latch
Door
Pin