Replacing the fuse, Replacing the fuse -4, Figure 5-3: replacing the fuse -4 – High End Systems DL1 User Manual
Page 64
5-4
General Maintenance and Troubleshooting
DL.1 User Manual
Replacing the Fuse
Warnings: Disconnect power before servicing.
Replace fuses with the specified type and rating only.
Equipment surfaces may reach temperatures up to 130° C (266° F).
Allow the fixture to cool before handling.
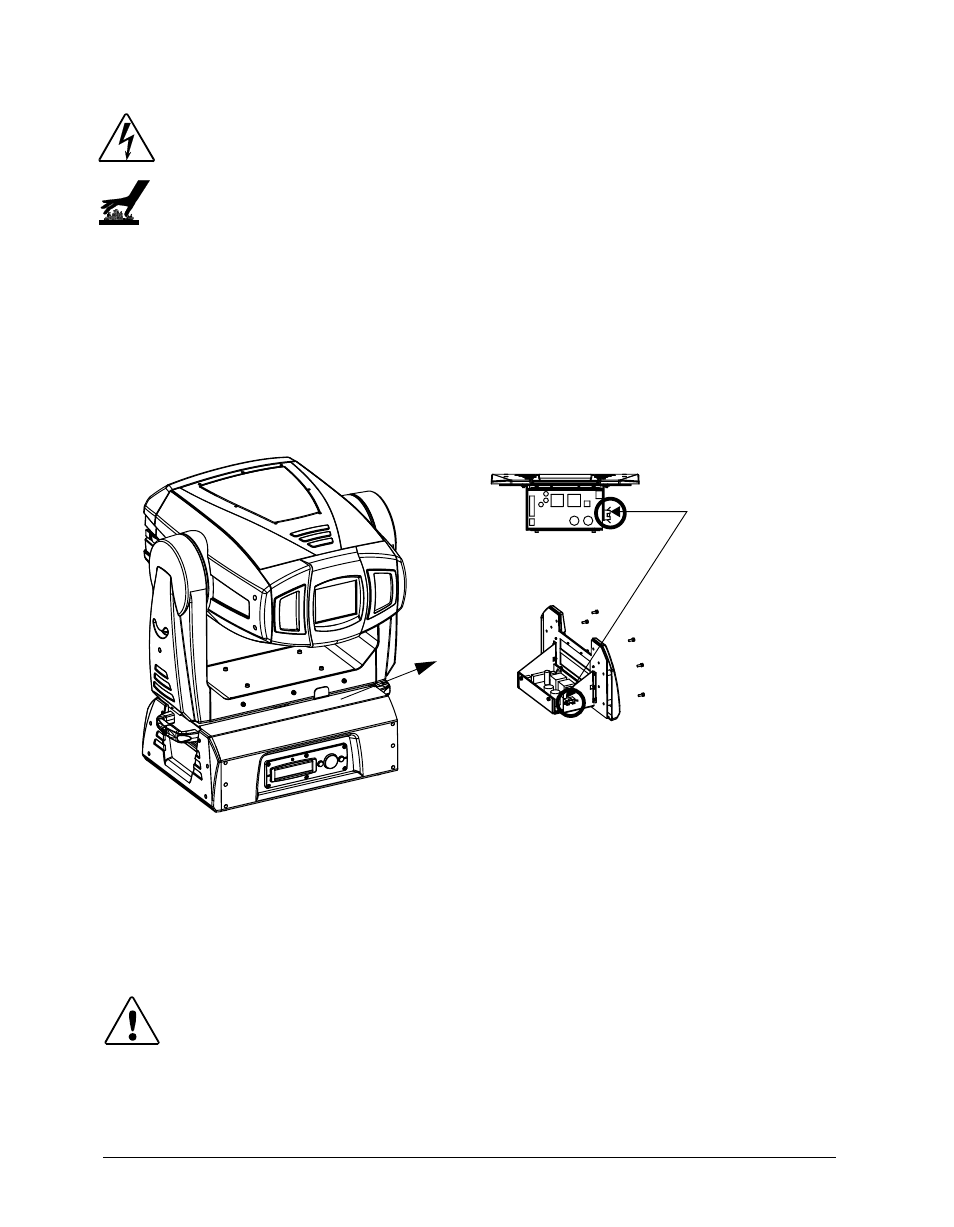
The DL.1 has one user-serviceable fuse which controls mains voltage to the fixture.
To replace a fuse:
1. Disconnect power to the fixture. If the fixture has been operating, allow the
fixture to cool before handling.
2. Remove the six M4 socket cap screws from the motor power supply side of the
fixture, as shown in Figure 5-2:
3. Slide the side assembly out.
4. Locate the fuse holder (circled in Figure 5-2).
5. Remove the fuse from the fuse holder.
6. Replace the fuse with a 5A, slow-blow fuse only.
7. Replace the side assembly.
Caution: Make sure you align the assembly properly when inserting;
damage to the fixture can result from improper alignment.
8. Replace the six M4 socket caps that secure the side assembly to the fixture.
Top view
Fuse
Figure 5-3 Replacing the Fuse