English – Hoshizaki KM-1300SAH-E User Manual
Page 6
6
ENGLISH
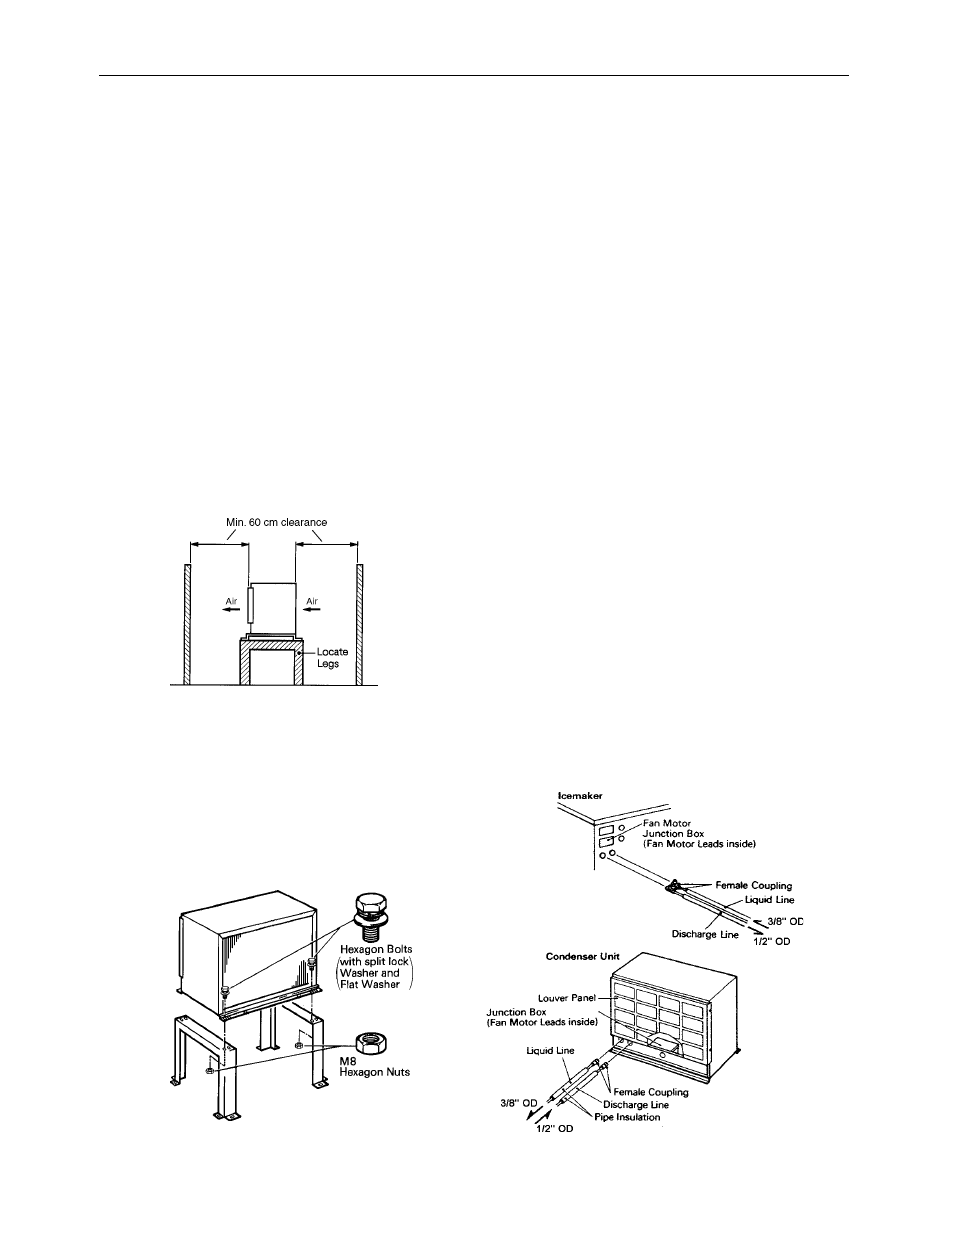
• Preferably a dry and well ventilated area with 60 cm
clearance on both front and rear for ease of mainte-
nance and service should they be required.
• Normal condenser ambient temperature: -28°C to
+50°C. Temperatures not within this operating range
may affect the production capacity of the icemaker.
• The maximum line length for the standard refrigerant
charge is 20 meters.
• The absolute maximum line length is 30 meters and
will require an additional refrigerant charge. Please
contact your nearest Hoshizaki office listed in the
Instruction Manual for guidance.
• The Condenser should not be installed more than 10
meters above the height of the icemaker or more than
3 meters below it measured from fitting to fitting.
Note: If the recommended guidelines of the installation
are exceeded, the icemaker performance may
be reduced.
Fig. 6
[c] INSTALLATION
1) Secure the Legs to the condenser unit with eight
M8 x 16 mm. Hexagon Bolts and M8 Nuts as shown
in the illustration. See Fig. 7.
Note: Locate the Legs symmetrically.
Fig. 7
Fig. 7
Fig. 7
Fig. 7
Fig. 7
2) Eight mounting holes are provided to secure the
Condenser to the site surface (bolts not supplied).
3) Install enough length of the two copper tubings
between the icemaker and condenser unit. Pre-
charged tubes have fitted Aeroquip couplings. Avoid
excess loops or coils to eliminate oil traps or crimps
in the tubing. Both tubes should always be sepa-
rately insulated. See Fig. 8.
• A connector kit “OS-QUICK” is available for field-
fabricated lines from HOSHIZAKI EUROPE.
• R-404A precharged tubing kits, available as optional
equipment also from HOSHIZAKI EUROPE, are
recommended.
4) Line sets fabricated in the field should be leak tested
and evacuated before connection to the icemaker/
condenser through the charging ports on the
Aeroquip couplings and charged with R-404A refrig-
erant vapor to a pressure of 15-30 PSIG (1-2 bar).
Note: Factory fabricated tubing kits are precharged and
do not need to be evacuated.
5) Remove the plastic caps protecting the couplings.
Lubricate the coupling threads and O-rings with
clean refrigerant oil of a type suitable for R404A.
6) Connect and tighten the couplings onto the icemaker
and Condenser as follows until they bottom out and
then a further 1/4 turn to ensure a good brass-to-
brass contact.
Icemaker discharge refrigerant line:
1/2" OD tubing to “DIS” of condenser unit
Icemaker liquid refrigerant line:
3/8" OD tubing to “LIQ” of condenser unit
Fig.
Fig.
Fig.
Fig.
Fig.
8
88
88