Initial settings – Epson Optio 430 User Manual
Page 10
16
Getting Star
ted
Initial Settings
When you turn the camera on for the first time, the initial settings
screen will be displayed.
You can set the following items and save the settings.
● Display Language
You can choose the language in which the menus, error mes-
sages etc. are displayed from the following: English, French,
German, Spanish, Italian and Japanese.
● City
You can choose the name of the city in which you will use the
camera from 62 cities.
See p.81 for the list of cities and code names.
● DST
You can set to summer time.
● Date and Time
You can set the present date and time. The date and time that
you set here becomes the Home Time.
You can skip this operation by pressing the Menu button. In this
case, the initial settings screen will be displayed again when you
next turn the camera on.
z
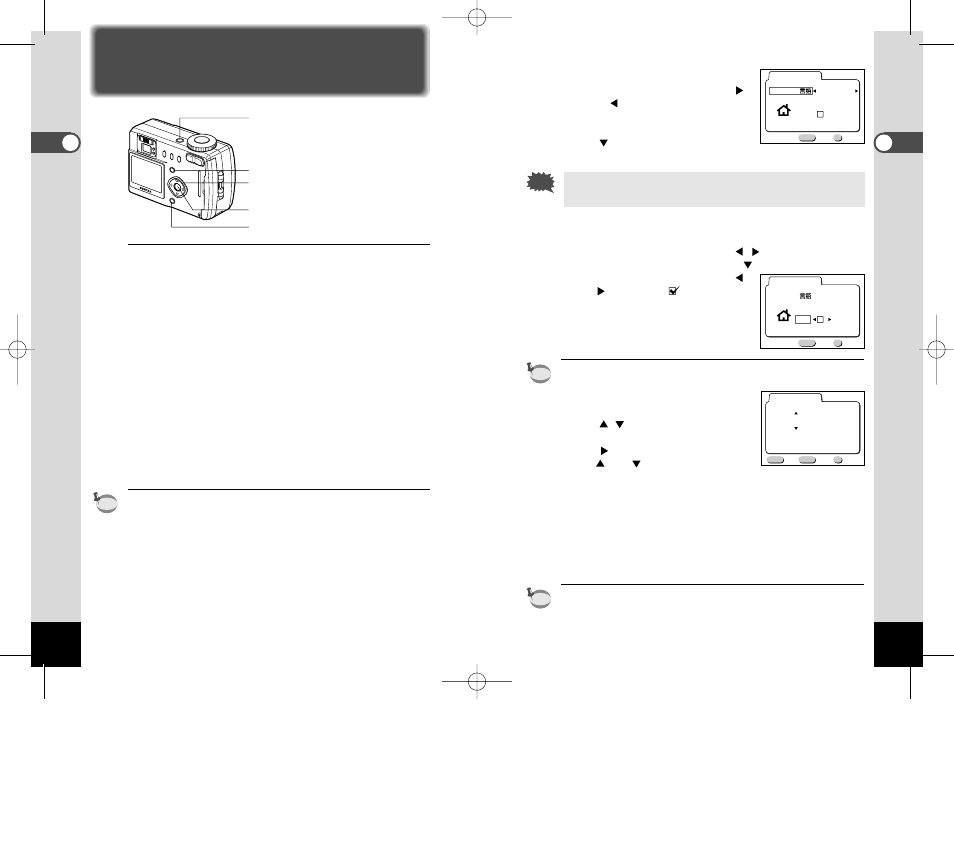
Turn the camera on.
1. Press the power switch.
The camera will turn on and the initial settings screen will
be displayed on the LCD monitor.
memo
17
Getting Star
ted
x
Select the display language.
1. Use the four-way controller (
or
) to select the display lan-
guage.
2. Press the four-way controller
(
).
If you skip this operation, the menus and error messages
etc. will be displayed in English.
c
Select the nearest city in the time zone in which you will
use the camera.
1. Use the four-way controller (
) to select the city.
2. Press the four-way controller (
).
3. Use the four-way controller (
) to enable (
) if you live
in a area with summer time.
4. Press the OK button.
The screen for setting the date
and time will be displayed.
See p.81 for the list of cities and code names.
v
Set the date and time.
1. Press the four-way controller
(
) to change the month.
2. Press the four-way controller
(
).
and
will be displayed
above and below the day.
3. Repeat Steps 1 and 2 to change the [day] [year] [hour]
and [minutes] and select the 12-hour or 24-hour dis-
play format with the Display button.
4. When you have finished the settings, press the OK but-
ton when the clock reaches 00 seconds.
The screen confirming the settings will be displayed and the
camera is ready to take a picture.
You can change the settings after they have been made.
Refer to “Changing the Display Language” (p.76), “Setting the
World Time” (p.74) and “Changing the Date/Time” (p.73).
memo
memo
Caution
Display button
MENU
OK
Exit
Ok
Initial setting
Language/
English
DST
City
NYC
MENU
OK
Exit
Ok
Initial setting
Language/
English
DST
City
NYC
MENU
OK
Exit
Date Adjust
1 / 1 / 2001
0 : 00
Ok
12/24
DISP
Menu button
Power switch
OK button
Four-way controller
KB320(01-17)E.QE33 9/12/01 2:27 PM Page 16