Epson PhotoPC 3100Z User Manual
Page 57
Using Other Included Software
57
For Windows users
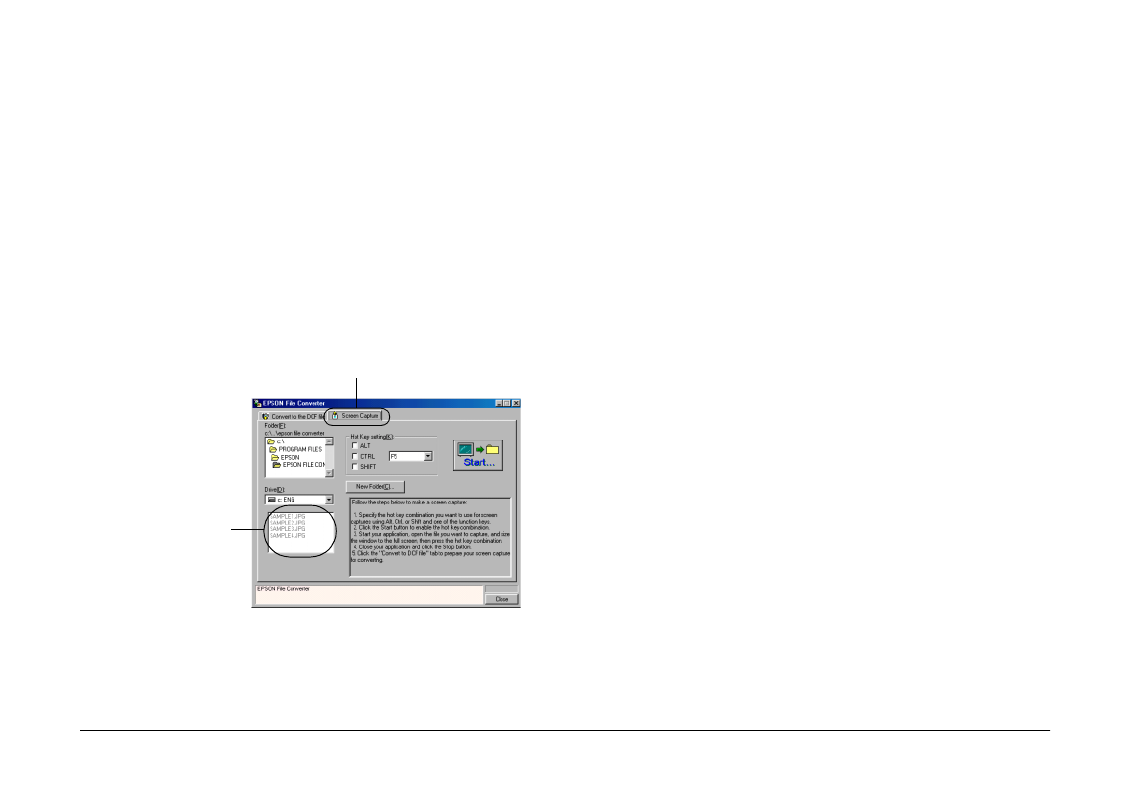
To make screen shots using EPSON File Converter,
follow these steps.
1.
To open EPSON File Converter, click Start, point
to Programs, then to EPSON Camera and then
to EPSON File Converter, then click EPSON File
Converter
. The Convert to the DCF file menu is
displayed.
2.
Click the Screen Capture tab. The Screen
Capture menu is displayed.
3.
Using the Drive list box and Folder list, specify the
folder in which you would like to save the screen
captures.
If you need to create a new folder for the images,
click New Folder and type a folder name.
Note:
To select a folder located on a network drive, you may
need to map the drive before opening EPSON File
Converter. For details, see your Windows
documentation.
4.
Using the Hot Key settings, specify the key
combination that you will press to make screen
captures. Select the ALT, CTRL, or SHIFT check box,
then select a key from the hot key list. The default
hot key is the F5 key.
5.
Click Start to register the key combination. When
the key combination is registered, the Start button
changes to a Stop button. The key combination
remains registered only for the current session.
Press the Stop button to erase the hot key
combination.
file name box
Screen Capture tab