Fig.1 fig.2 – Sealey CPS01 User Manual
Page 3
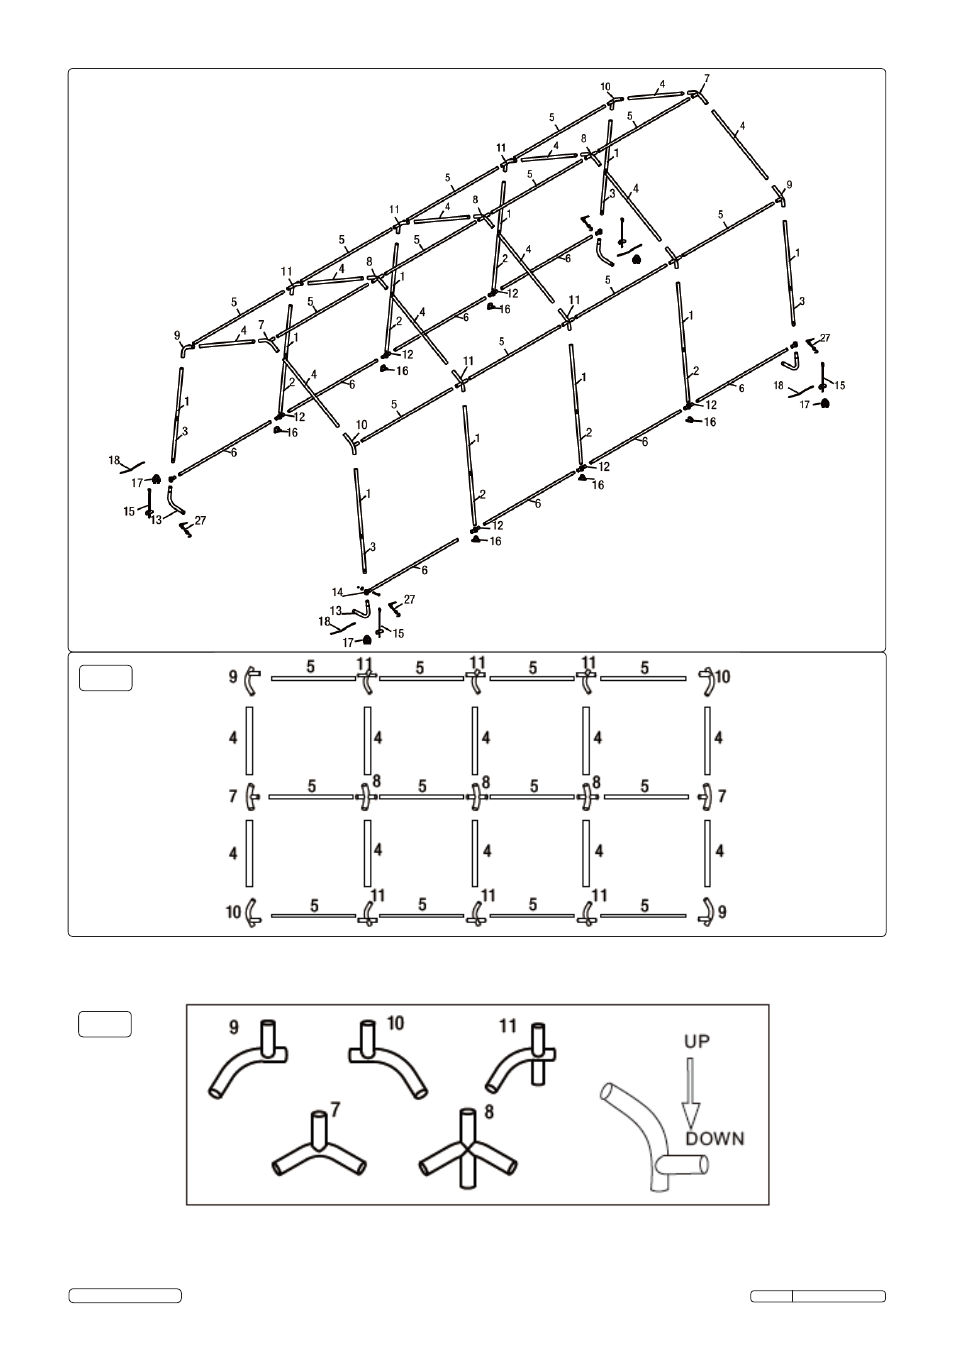
fig.1
fig.2
4.2.
Preparing the Roof Parts
4.2.1. Select a level and suitable location for the shelter. Layout the roof parts as as shown in fig.1.
4.2.2. Please pay attention to the differences in the 5 connectors as shown in fig.2.
Note: 1. When installed the welded socket for the cross rail must be below the bend.
2. Parts 9, 10, 11 are side bend connectors with a sharp bend.
3. Parts 7 and 8 are top bend connectors with a sloping bend.
CPS01 Issue: 1 - 19/12/14
Original Language Version
© Jack Sealey Limited
See also other documents in the category Sealey For the car:
- CPS02 (4 pages)
- PB397 (1 page)
- CPS03 (4 pages)
- AK422 (1 page)
- VS9201 (1 page)
- TA111 (2 pages)
- TA125 (3 pages)
- TA130 (2 pages)
- PP100 (6 pages)
- PPLK (2 pages)
- PPVT (4 pages)
- PP7 (6 pages)
- TA050 (2 pages)
- TA126 (2 pages)
- TA131 (2 pages)
- VS207 (2 pages)
- TA303 (5 pages)
- MM18 (5 pages)
- TM103 (6 pages)
- TA320 (36 pages)
- MM20 (2 pages)
- MM405 (2 pages)
- BT101 (2 pages)
- BT101 (3 pages)
- BT101 (2 pages)
- BT101 (2 pages)
- BT101 (5 pages)
- BT101 (2 pages)
- TA101 (4 pages)
- BT101 (4 pages)
- BT101 (2 pages)
- TA200 (6 pages)
- TA201 (4 pages)
- TA202 (4 pages)
- TA300 (4 pages)
- TA203 (6 pages)
- TA302 (4 pages)
- TA330 (38 pages)
- TA311 (3 pages)
- TM103 (8 pages)
- TA304 (7 pages)
- TM102 (7 pages)
- VS2071 (2 pages)
- VS2072 (1 page)