Maintenance – Sealey SM2502 User Manual
Page 6
WARNINg! ensure the drilling/milling machine is unplugged from the mains power supply before attempting any maintenance.
6.1
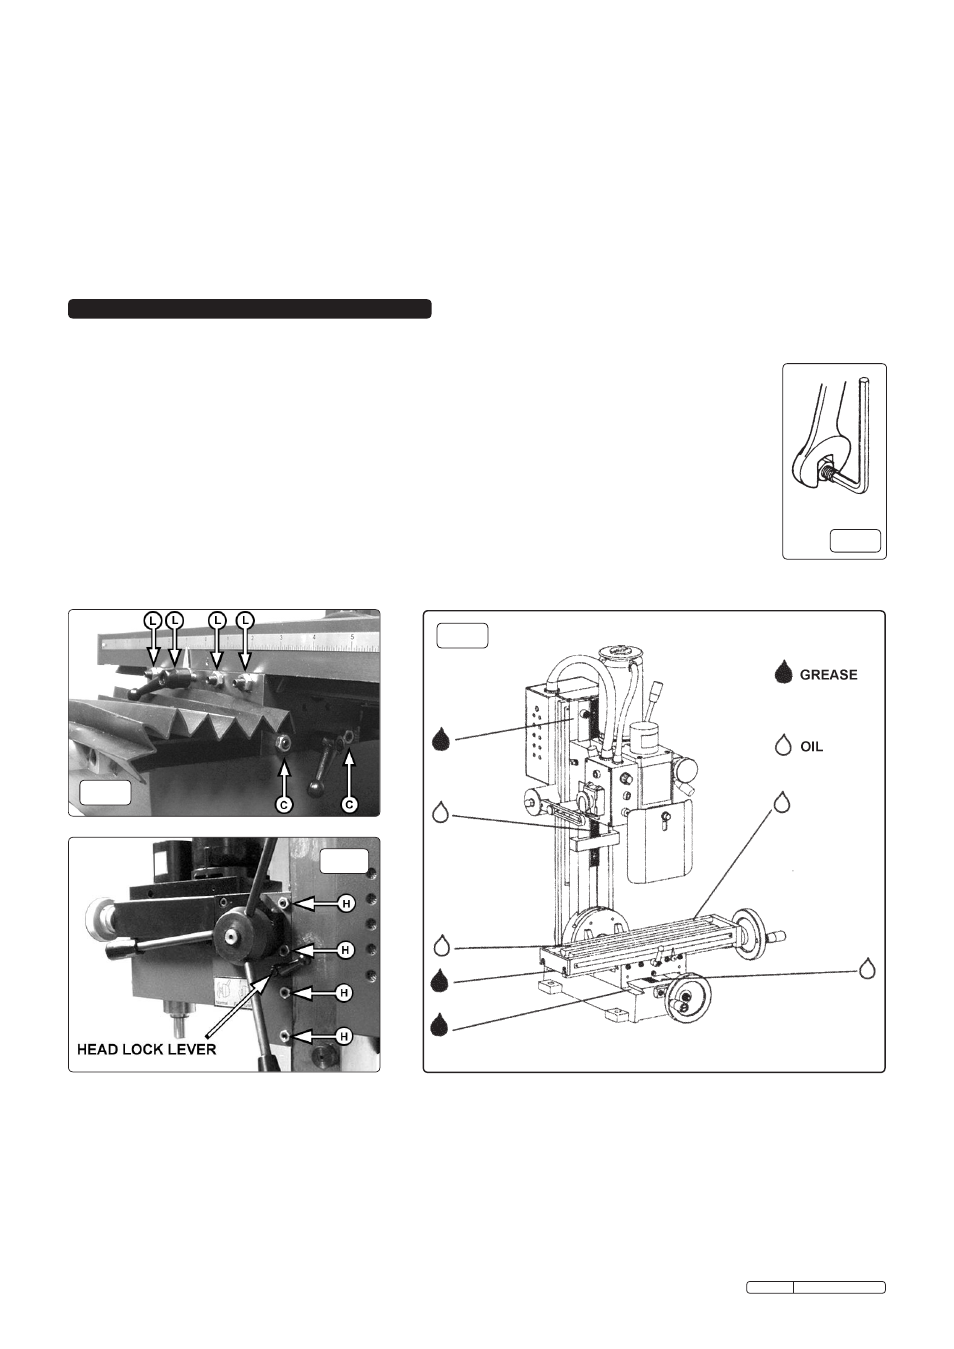
lubricate the machine before every use. See lubrication points on fig.10.
6.2
clean the machine after each use.
6.3
clean and coat the cross lead screw with oil weekly.
6.4
lubricate the bearing,worm and worm shaft monthly.
6.5
check that the table is horizontal periodically.
6.6
Adjust the accuracy of the cross feed, longitudinal feed and head travel on a monthly basis. Any wear or slack
can be taken up by adjusting the position of the appropriate mitre strip. to do this use a hex key and spanner as
shown in fig.8. Adjust the longitudinal feed using the adjusters marked ‘l’ in fig.7. loosen the locking nuts on all
four adjusters and back them off. Advance the adjusters until they are felt to make firm contact with the mitre
wedge, ensuring that they are all tightened to the same torque. operate the feed wheel to check the movement of
the bed but do not force the movement. Back off the adjusters by an eighth of a turn and tighten the locknuts.
check that the table movement is smooth. If the movement is still tight, back the adjusters off a further eighth turn
and tighten the adjuster nuts.
6.6.1 Adjust the cross feed using the two adjusters marked ‘c’ in fig.7.
6.6.2 Adjust the head movement using the four adjusters marked ‘H’ in fig.9
6.6.3 check that the column is vertical and that the column pivot nut is tight.
6. MAINTeNANCe
5.3
Mounting the chuck and arbor. If the milling cutter and arbor are currently mounted, remove them by loosening the arbor bolt by two
turns and giving it a tap with a rubber mallet. the arbor bolt appears at the top of the spindle shaft and can be accessed by removing
the cap. ( See fig.3-4 & 4-A ). ensure that the milling cutter and arbor are supported as they are removed (
Wear protective gloves.)
Insert the chuck arbor into the bottom of the spindle shaft and retain it with the arbor bolt. do not over tighten. the drill chuck is a
shallow taper fit onto the end of the drilling arbor. using the chuck key open the jaws of the chuck until they withdraw inside the chuck
body. Place a piece of wood onto the bed and position the chuck on it below the spindle shaft. using the drill feed, wind the spindle
shaft down until the arbor enters the chuck. exert firm but not excessive downward pressure on the chuck to retain it on the arbor.
5.4
drill bits. ( not supplied ) Insert an appropriate drill bit into the chuck and tighten the chuck with the chuck key.
5.5
Attaching the workpiece. the main bed of the machine has 3 inverted ‘t’ slots in it for fixing the workpiece or any vice/clamping
arrangement used to hold the workpiece. the dimensions of the slots are shown in fig.5 in order to choose appropriate fixings. A 42
piece clamping kit is available as an optional extra.
Part no. SM2502cK.
5.6
drilling guard. When drilling ensure that the guard is in place ( See fig.3-8 ).
5.7
Speed control and ON/OFF operation. refer to Sections 4.9 to 4.14 for the operation of the main on/off switch and speed
setting.
fig. 7
fig.9
fig. 8
fig.10
Original Language Version
SM2502 Issue: 2 - 17/12/09