LeMond g-force UT User Manual
Page 10
10
SETTING UP YOUR BIkE
Taking a moment to learn how to correctly fit your
g•force UT digital
will make your workouts a
more pleasant experience. The design of the
g•force UT digital
provides more seat and handlebar
adjustability than any other upright bike available. Making full use of these feature will give you the
most comfortable ride possible and ensure maximum exercise efficiency. Using the bike in an incorrect
position can result in unnecessary discomfort and increase the risk of injury.
!
WARNING: DO NOT ATTEMPT TO MAKE ANY ADJUSTMENTS TO THIS EQUIPMENT WHILE
SITTING OR STANDING ON THE BIKE. DISMOUNT THE BIKE PRIOR TO MAKING ALL
ADJUSTMENTS.
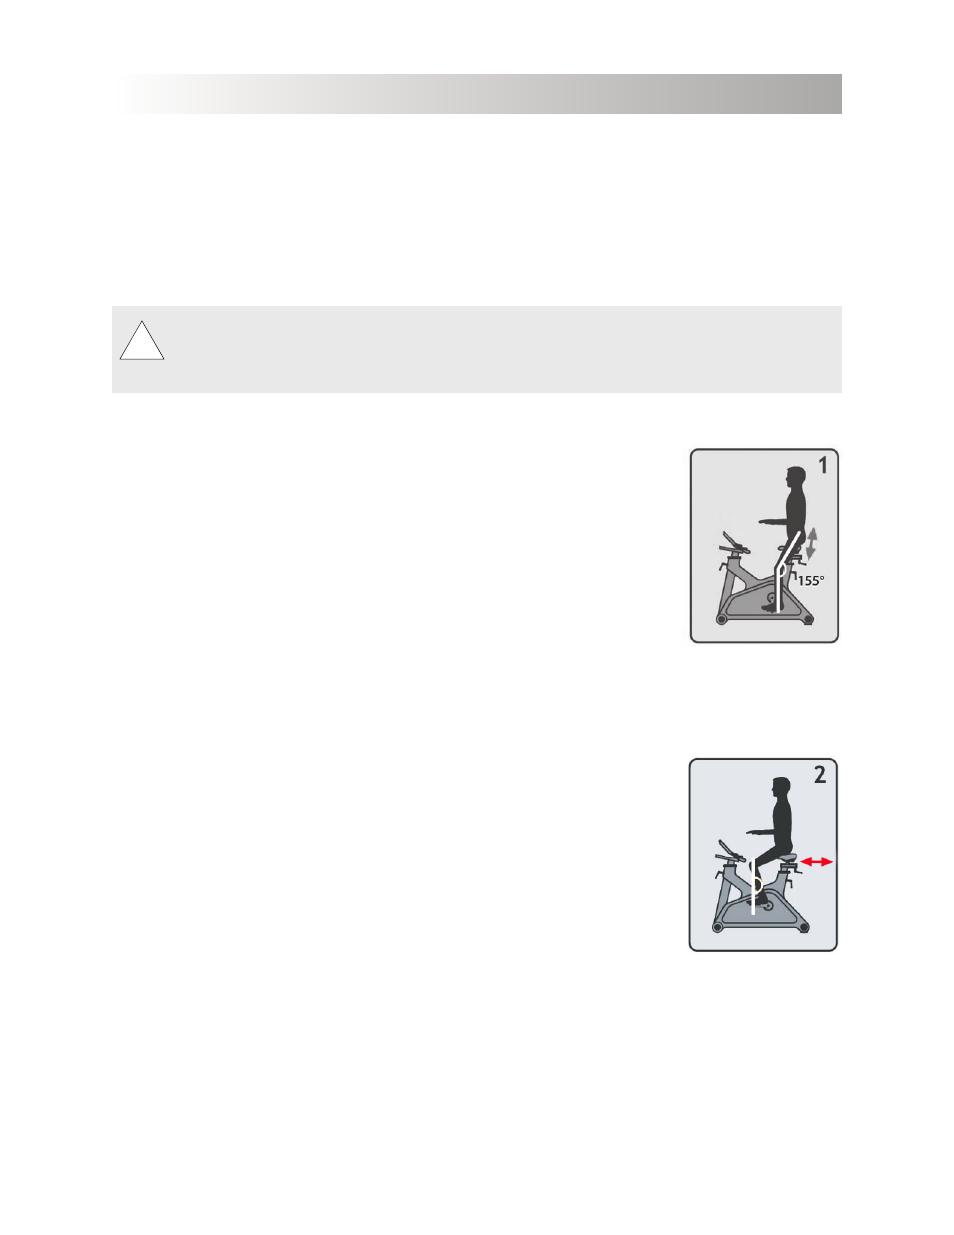
SeaT adjUSTmenT
Seat Height
Rotate the pedals so that one of the pedals is in the upward position.
1.
Place your foot in the toe clip of the pedal closest to the floor and mount the
2.
bike. Ensure that the ball of your foot is over the center of the pedal. Your
leg should be slightly bent at the knee.
If your leg is too straight or your foot cannot touch the pedal you will need to
3.
lower the seat. If you leg is bent too much you will need to raise the seat.
Dismount
4.
the bike and rotate the seat post adjustment handle counter
clockwise. Once loosened you may slide the eat post up or down as
necessary.
When the seat is in the desired position rotate the seat stem adjustment handle clockwise to secure
5.
the seat post. Note the final position mark on the seat stem for future reference.
Seat Fore/Aft Position
Adjusting the fore/aft allows for a better fit.
1.
Dismount the bike and rotate
the seat adjustment handle counter clockwise and slide the seat forward or
backward.
Sit on your bike with the cranks in the 3 & 9 o’clock position. Proper fore/
2.
aft position is achieved when the small bump at the top of the shin directly
below the knee cap (tibial tuberosity) is approximately over the pedal axle (at
the 3 o’clock position).
Dismount
3.
the bike and rotate the adjustment handle clockwise to secure the
seat.
Note the final position mark under the seat for future reference.
4.
SETTING UP AND OPERATING THE g•force UT