Operation – HEIDENHAIN ND 2100G Quick Start User Manual
Page 6
4
Operation
Preparing to measure
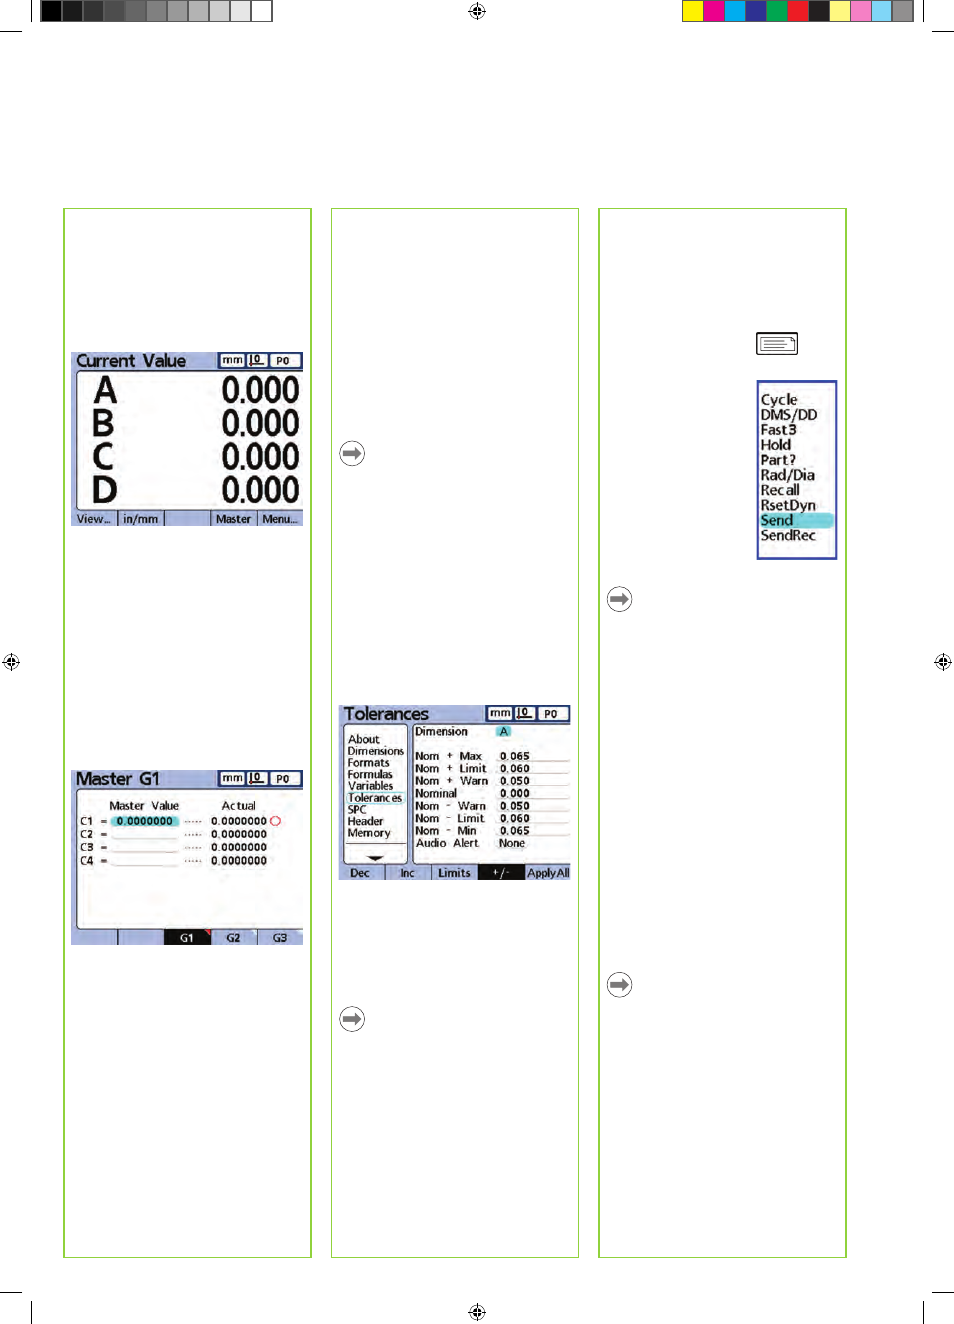
1. Power up the ND 2100 G
• Check connections to the ND 2100 G.
• Press the POWER SWITCH to power
the ND 2100 G. The CURRENT
VALUE screen will be displayed after
system initialization.
2. Establish a measurement reference
Establish references for encoder
channels prior to measuring.
To establish a measurement reference:
• Press the MASTER soft key to display
the Master screen.
• Navigate to the desired encoder
channel MASTER VALUE field.
• Position the encoder against the
reference surface.
• Enter the desired reference value
(zero or the desired offset) into the
MASTER VALUE field.
• Press the ENTER key and respond
to the confirmation request. A green
dot will appear next to the ACTUAL
value indicating that calibration of the
channel is complete.
Conducting measurements
1. Probe surfaces
Probe a single point with one
encoder channel, or multiple points
simultaneously with multiple encoder
channels.
2. Enter the measurement data
Press the ENTER key when
measurements are displayed on the
LCD. The measurement data will be
entered into the ND 2100 G database.
Note:
Advanced formula functions can be
used to perform sequential and semi-
automated measurements. Refer to the
User’s Guide for detailed information.
Applying Tolerances
1. Select a dimension
• Press the MENU soft key then press
the SETUP soft key to display the
setup menu.
• Navigate to the Tolerances screen and
select the desired DIMENSION using
the DEC and INC soft keys.
2. Specify tolerance values
• Enter the NOMINAL, WARNING,
LIMIT and MAx values.
• Navigate to the AUDIO ALERT field
and use the soft keys to select NONE,
WARNING or LIMITS.
Note:
Many types of tolerances can be applied
to dimensions. Refer to the User’s
Guide for detailed information.
Viewing measurement data
Measurement results can be viewed in
the graphs, histograms and data tables
as described earlier. Refer to the User’s
Guide for more details.
Reporting Results
Result data can be sent to a USB printer,
USB drive or a PC. The report format,
type and destination can be changed
in setup screens. The default setup is
shown below.
To print:
press the
PRINT key to send data
to the USB port.
To send data to a PC:
• Press the MENU soft
key to display menus
under the LCD.
• Press the ExTRA soft
key to display the Extra
menu.
• Highlight the SEND
function and press the
ENTER key to transmit
data over the RS-232
port.
Note:
Refer to the ND 2100 G user guide
for alternatives regarding printing and
transmitting data.
Saving and retrieving data
ND 2100 G settings and measurement
data can be backed up on a USB drive
and restored to the system or loaded on
another identical system later. To save or
retrieve data:
• Insert a USB drive into the NG 2100 G
• Press the MENU soft key and then
press the SETUP soft key to display
the setup menu.
• Navigate to the Supervisor screen and
highlight the PASSWORD field. Enter
the password if necessary.
• Press the SAVEx soft key to save
settings and measurement data.
• Press the LOADx soft key to retrieve
settings and data.
Note:
Frequently used functions can be
mapped to front panel keys using the
Hot key function explained in the User’s
Guide.