Install the front panel, Power-on and adjust display brightness, Calibrate the touch panel – Grass Valley M-Series iVDR Upgrade Kit Installation User Manual
Page 42
42
M-Series Upgrade Kit Manual
6 July 2004
Chapter 5 Installing the Front Panel
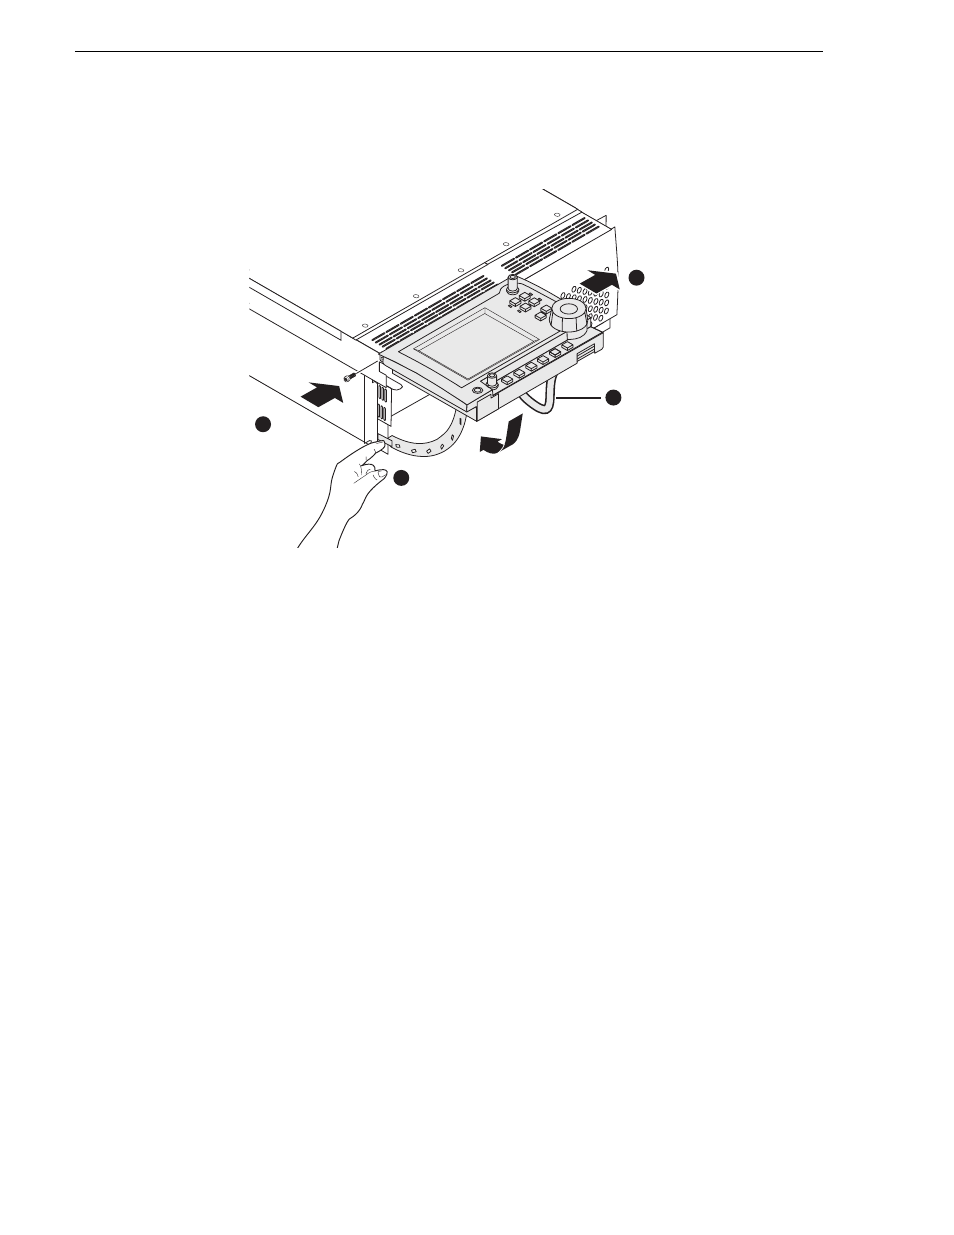
Install the front panel
NOTE: When lowering the front panel, you may have to adjust the bracket position
slightly to guide it into its chassis slot.
Power-on and adjust display brightness
1. Connect the power cord, and power-on the iVDR using the front standby switch.
Wait for Windows to initialize and AppCenter to start automatically.
2. Adjust the front panel display brightness for best display depending on ambient
light conditions using the brightness control located on the back of the front panel
assembly.
Calibrate the touch panel
Calibrate the front panel touch screen to optimize its performance. The front panel can
be tilted to a convenient operating angle. Calibration may enhance operation after the
angle of the touch panel is changed, or when the front panel has been removed and
extended to operate as a desktop device using the optional 15 foot extension cable and
front panel cradle.
To calibrate the touch screen:
1. In the AppCenter toolbar, touch
System
, then choose
Minimize
in the pop-up menu.
The Windows desktop appears.
2. On the Windows desktop, double-click the
Touch Screen Calibration
applet.
The Calibration Applet window opens.
Press the latch, then
lower the front panel
(Adjust the bracket
position and cable
dress as needed.)
4
Install
screw
(Use T15 tip)
2
Connect cable
to back of
front panel
3
Slide on
1