Unpacking, Installation in the densité frame, Unpacking installation in the densité frame – Grass Valley KMV-3901 Installation v.7.70 User Manual
Page 9
3
KMV-3901/KMV-3911
Guide to Installation and Operation
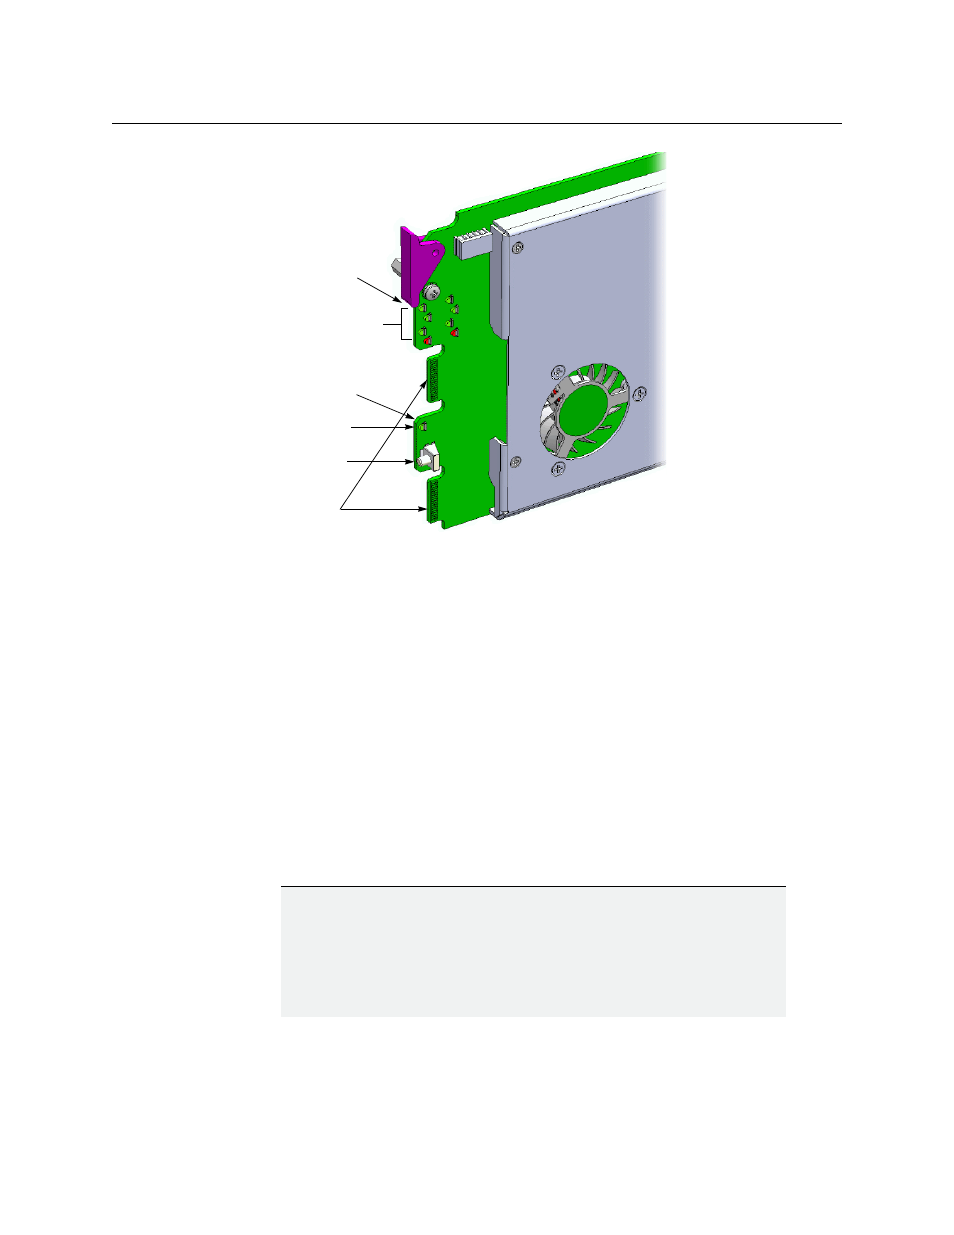
Front card-edge layout
Unpacking
Make sure the following items have been shipped with your KMV-3901/3911. If any of the
following items are missing, contact your distributor or Grass Valley.
• KMV-3911 or KMV-3901 3Gbps/HD/SD multiviewer card
• the appropriate rear connector panel for the card (see
Installation in the Densité Frame
The KMV-3901/3911 and its associated rear connector panel must be mounted in a Densité
3 frame or a Densité 3 mini frame. It is not necessary to switch off the frame’s power when
installing or removing the card. Refer to the Densité 3 frame manual or the Densité 3 mini
frame manual for detailed instructions on installing cards and their associated rear panels.
Bridge connectors
Select button
Status LED
Boot LED, Power LED
& CPU Status LED
(other side of board)
SDI LEDs
USB connector
(other side of board)
IMPORTANT
Keep the KMV-3901/3911 offline at initial setup to avoid conflicts.
Before powering up the Densité housing frame, make sure none of the KMV-
3901/3911multiviewer cards it contains are connected to the network, to
avoid IP-address conflicts during initial physical setup
—
i.e. make sure there
is no cable connected to your cards’ ETH port.