2 lan, 1 lan status – ATL Telecom IP250 User Manual
Page 35
6
35
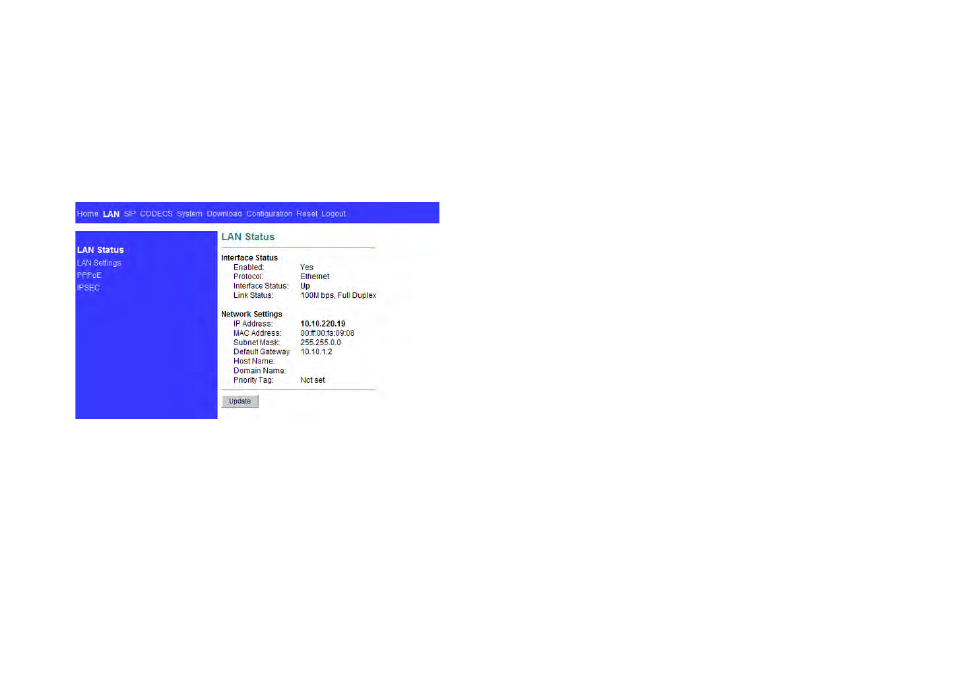
2 LAN
2.1 LAN Status
The following page allows configuration of the phone’s local network settings. Sub-pages
are available for the following on the left of page: the LAN interface status, configuration of
the LAN interface settings, and configuration of DHCP server settings, and Port Forwarding
(NAPT) Settings.
2.1 LAN Status
The page displays the current status of the LAN interface, including the IP address and other
network settings the interface is currently using.
Switch Talk Mode from Speakerphone or Headset to Handset
On speaker or headset, lift up handset and speak through handset
Pre-dial
On-hook, dial the phone number and then lift up the handset or press SPEAKER/HEADSET
to dial out automatically.
CALLER ID
Caller ID review
On-hook, press CLID and the LCD displays 1.RECEIVED 2.MISSED; select 1 or 2 by using
navigation keys and press ENTER to access 1.received call page or 2.missed call page.
a. Received: Use navigation keys to view 100 most recent received calls in
corresponding order, select a number and press ENTER to show the details of the call
including name of calling party, phone number, call in date and time.
b. Missed: Use navigation keys to view 100 most recent missed calls in corresponding
order, select a number and press ENTER to show the details of the call including
name of calling party, phone number, call in date and time.
Call back from caller ID
Select a number from received or missed calls, and then lift up the handset or press SPEAKER/
HEADSET to dial out automatically.
Delete caller ID
a. Delete one: Select a number from received or missed calls, press DELETE to
bring up sub-menu and select DELETE ONE by using navigation keys, press DELETE
again to confirm
b. Delete all: Press DELETE under received or missed call page to bring up sub-
menu, select DELETE ALL by using navigation keys and press DELETE again to
confirm
PHONE BOOK
On-hook, press PHONE BOOK and the LCD displays 1.ADD 2.SEARCH; select 1 or 2 by
using navigation keys and press ENTER to access 1.name input page or 2.view contact
page
View phone book
a. SEARCH: in view contact page, use navigation keys to browse between stored
contact information
b. SEARCH: in view contact page, enter the initial of the name to bring up a list of
names with the same initial and then browse contact information by using navigation
keys