Before! after – Airaid 201-719 User Manual
Page 2
10. Double check your work!
Make sure there is no foreign material in the intake path.
Make sure all clamps, hoses, bolts, and screws are tight.
11. Re-connect the negative battery cable!
Airaid Filter Co. 2688 E Rose Garden Ln. Phoenix AZ 85050 (800) 498-6951
www.airaid.com
Before!
After!
Instructions Revision
Date: 10/26/10
Thank you for purchasing the Airaid Intake System. Contact Airaid @ (800)
498-6951 8:00 AM - 5:00 PM MST weekdays for questions regarding fit or instructions
that are not clear to you. Your Airaid Intake System was carefully inspected and pack-
aged. Check that no parts are missing, or were damaged during shipping. If any parts
are missing, contact Airaid. The air filter element is protected from direct exposure to
water and debris; care should be taken not to drive through deep water. WATER INGES-
TION IS THE DRIVERS RESPONSIBILTY!
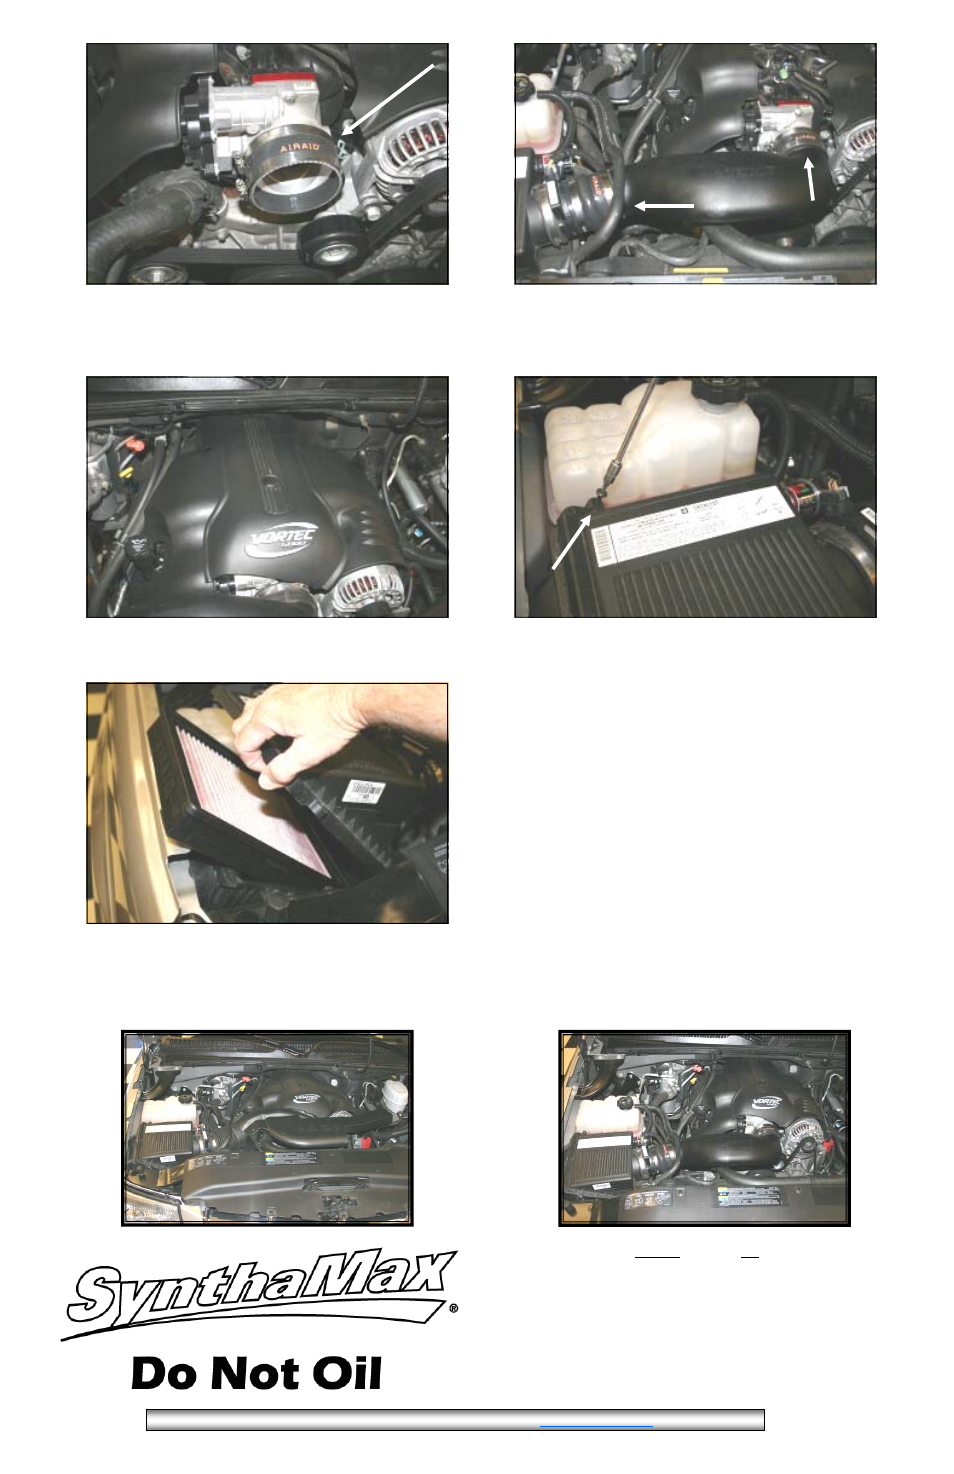
5. Install the coupler (#4) and two #64 hose clamps (#6) on
the throttle body as shown. Leave the hose clamps loose for
now.
6. Install the Modular Intake Tube (#2) into the hump hose
first, and then into the throttle body. Adjust for fit, and
tighten all four hose clamps. Re-insert the plastic piece from
step #3 into the hole on the bottom of the MIT.
7. Re-install the beauty cover and bolt. If you purchased the
200-919 MIT Kit, skip to step #10. If you purchased the 200-
719 Jr. Kit, proceed to step #8.
8. If you purchased the 201-719 Jr. Kit, remove 4 screws in
the factory airbox with a #25 Torx bit, and remove the fac-
tory air filter.
9. Install the Airaid Premium filter into the factory airbox,
and re-install the 4 screws.
Synthamax Air Filters do not require oil. Service air filter as
needed by cleaning with common non-petroleum all-purpose
household cleaner and water. Simple Green®, Formula
409® or equivalent works great. Apply cleaner to outside of
air filter and allow to soak. Then flush filter clean from the
inside out with a garden hose and repeat steps if necessary.
Do not apply high pressure water or air to clean filter. Allow
filter to air dry and reinstall.