Step 3: route the cables, Hardware manual – ACTi E924~E929 User Manual
Page 17
Hardware Manual
Step 3: Route the Cables
Determine whether the cable will pass through a hole on the surface or be routed along the
surface:
If the cable will pass through a hole on the surface
:
1.
Drill the hole for the cable on the surface.
2.
Route the cable from the network side through the hole and connect it to the Ethernet port of
the camera.
NOTE:
If the camera will be installed outdoors or in places wherein environmental factors
change drastically, make sure to waterproof the cable connection; see
on page 19 for instructions.
3.
Push the cable through the hole on the surface.
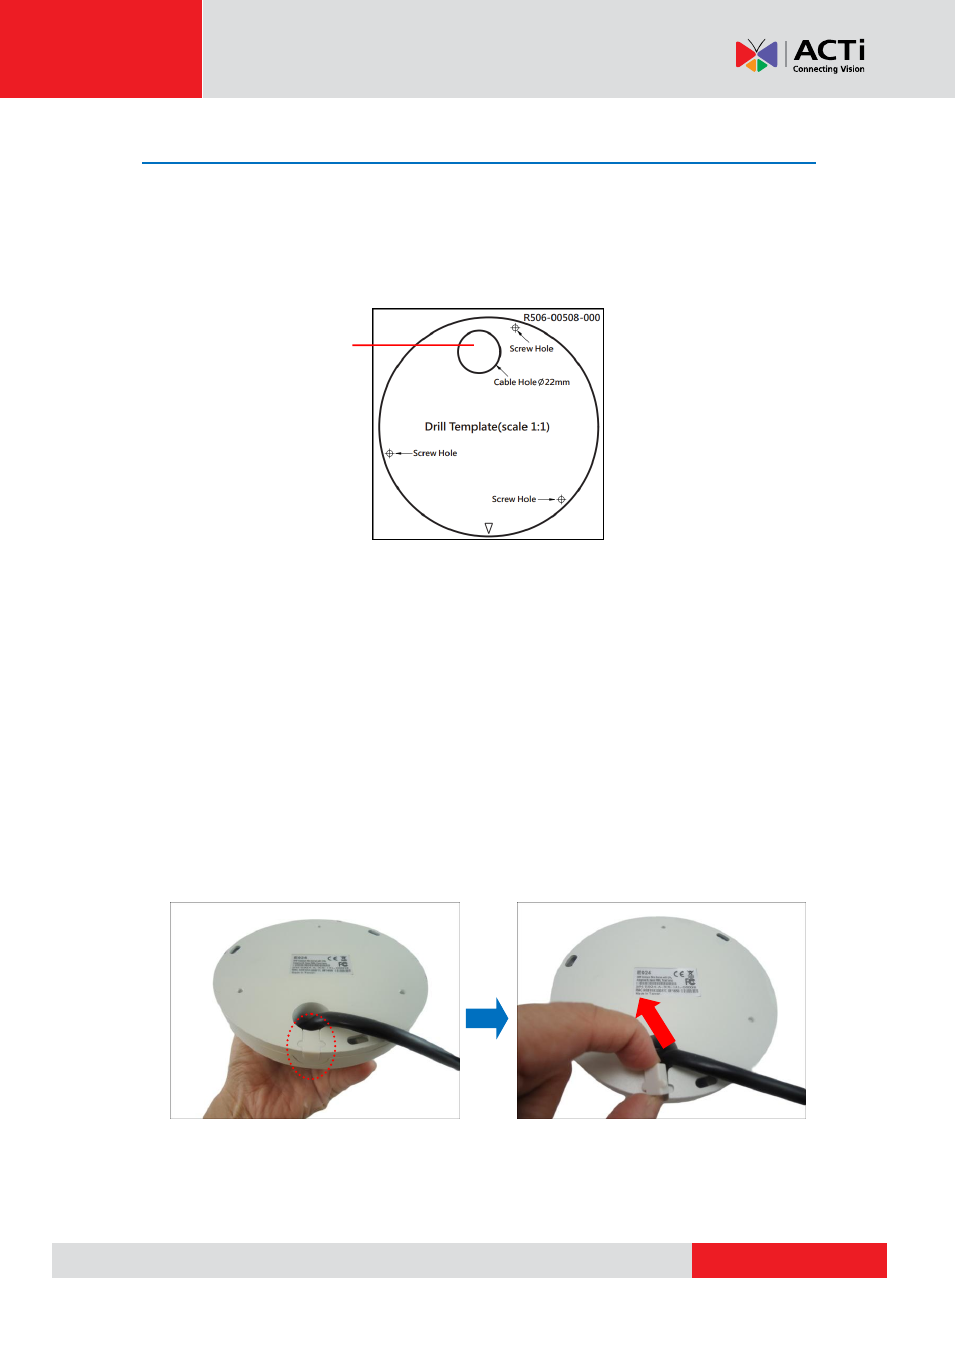
If the cable will be routed along the surface
1.
Pull the rubber tab off from the base of the camera.
2.
Route the camera cable through this gap.
Drill cable hole
within this block.
- E924M~E929M E918 E918M E919 E919M E920 E920M E921 E921M E922 E922M E923 E923M Outdoor Mini Dome and Mini Fisheye Dome on Hard Ceiling Outdoor Mini Dome and Outdoor Mini Fisheye Dome on Dropped Ceiling Outdoor Mini Dome and Mini Fisheye Dome on Straight Wall Outdoor Mini Dome and Mini Fisheye Dome on Tilted Wall 2MP Outdoor Mini Dome Camera with 2.55mm Fixed Lens and RJ-45 Connector