Installation procedures, Step 1: prepare for installation – ACTi E924~E929 User Manual
Page 15
Hardware Manual
Installation Procedures
This section describes procedures in mounting the camera on a flat surface.
NOTE:
The camera images on this documentation are for reference only and may be different
from the actual camera.
Step 1: Prepare for Installation
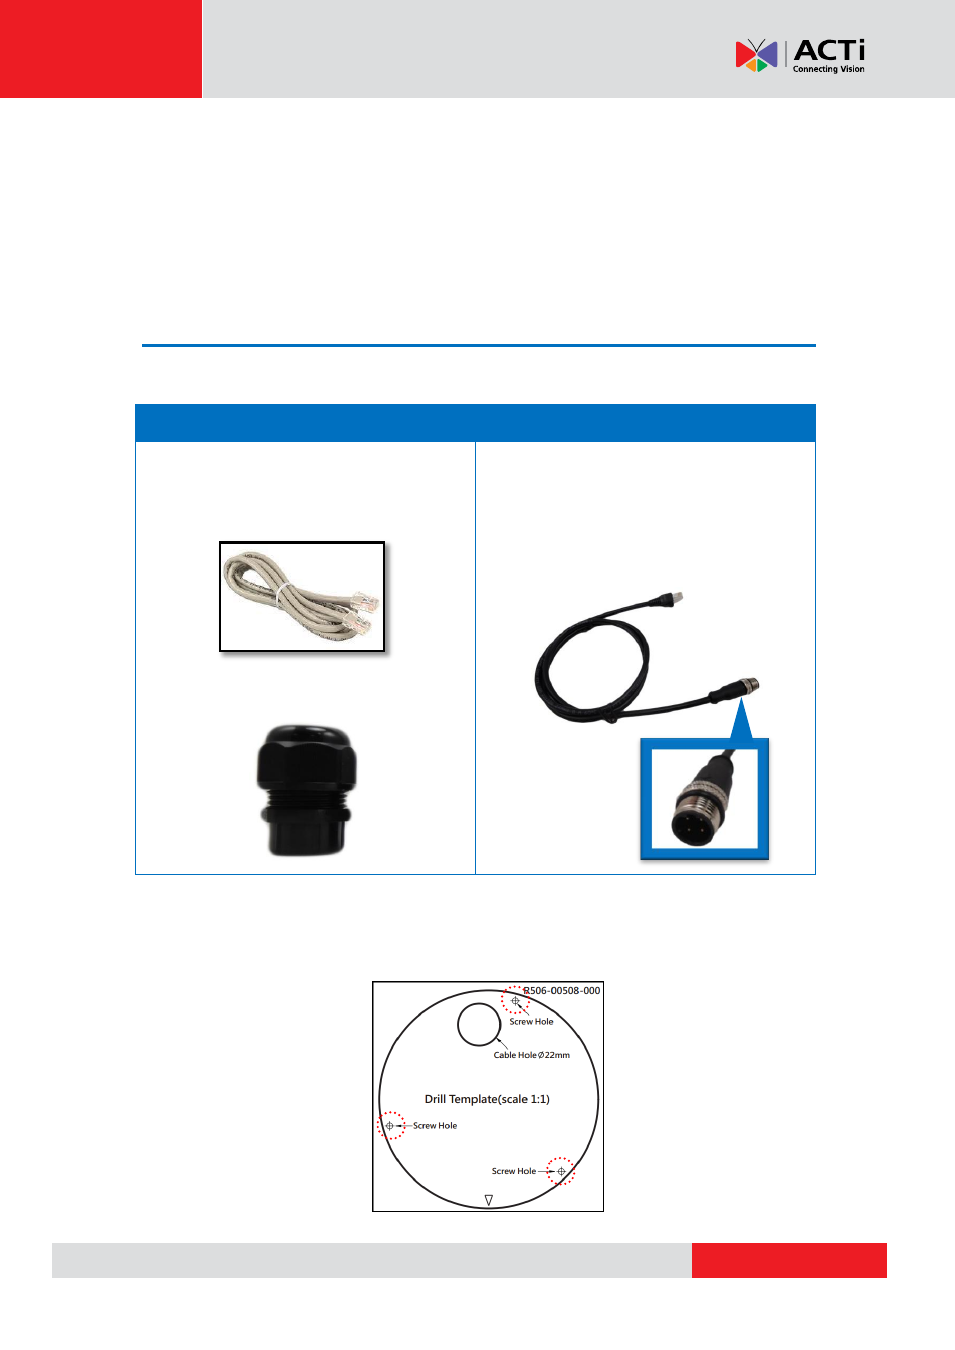
1.
Before installing the camera, prepare the additional accessories required for installation.
E9xx Models
E9xxM Models
Exterior-grade Ethernet Cable with
RJ-45 connector
(not included; can be
purchased from local stores)
Bundled Cable Gland
Exterior-grade Ethernet Cable with
Waterproof M12 Male Connector
,
D-coding and PoE type A (not included;
can be purchased from local stores)
2.
Depending on the material of the surface where the camera will be installed, it may be
necessary to drill the three (3) screw holes and use the supplied screw tox. In this case,
attach the bundled drill template on the surface and drill the screw holes.
- E924M~E929M E918 E918M E919 E919M E920 E920M E921 E921M E922 E922M E923 E923M Outdoor Mini Dome and Mini Fisheye Dome on Hard Ceiling Outdoor Mini Dome and Outdoor Mini Fisheye Dome on Dropped Ceiling Outdoor Mini Dome and Mini Fisheye Dome on Straight Wall Outdoor Mini Dome and Mini Fisheye Dome on Tilted Wall 2MP Outdoor Mini Dome Camera with 2.55mm Fixed Lens and RJ-45 Connector