Using the low-cut filter, Turning the low-cut filter on and off, Using marks – Teac DR-680 User Manual
Page 33: Moving to a mark, Manually adding marks when recording and during, Playback, 4 – recording
TASCAM DR-680
33
5 When you have finished making the settings,
press the
HOME/FUNC
key to return to the Home
Screen.
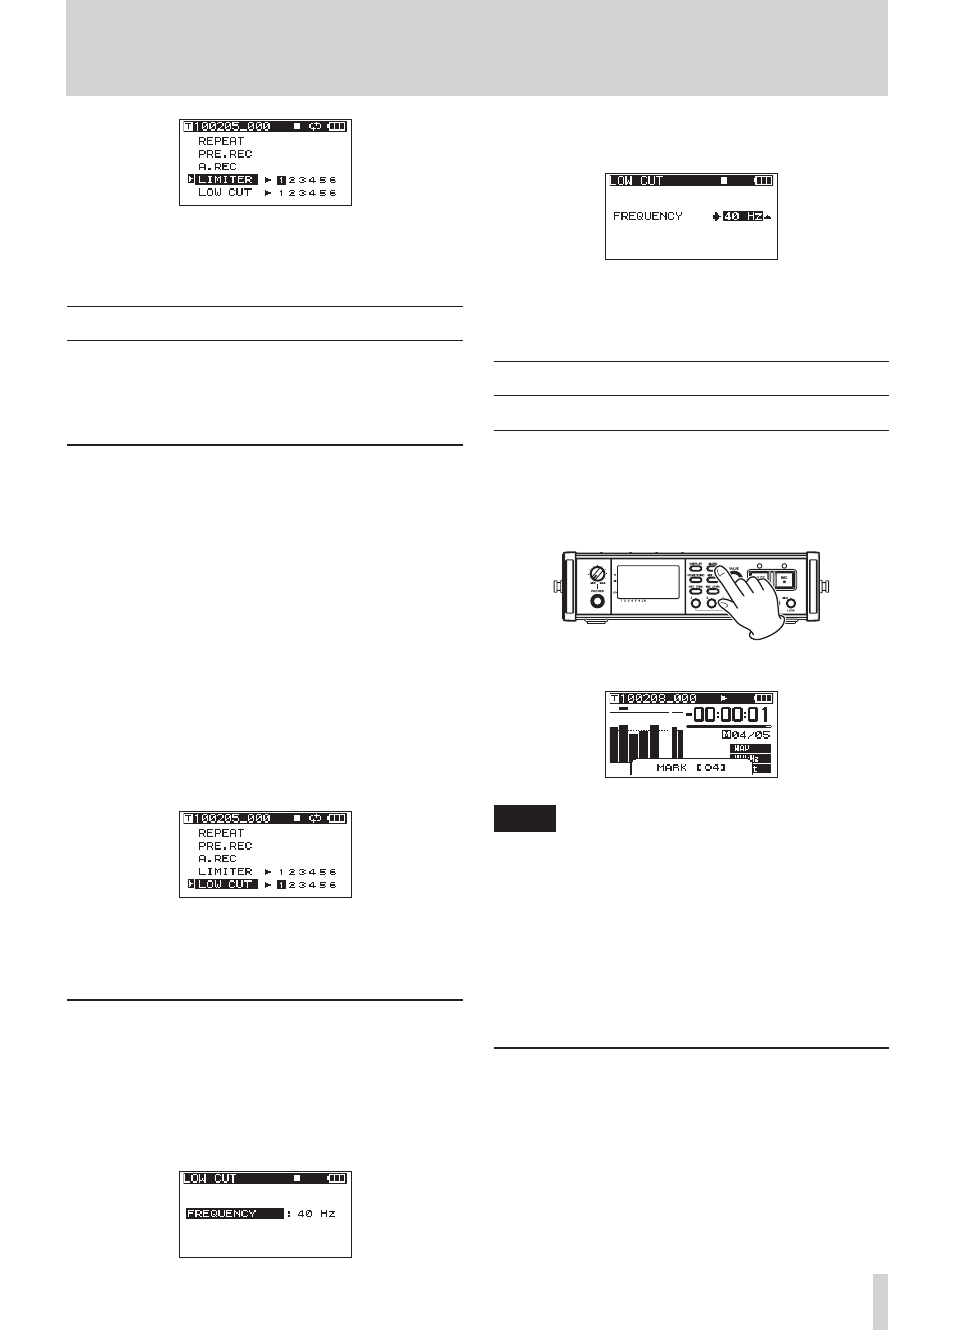
Using the low-cut filter
Use the low-cut filter to reduce low-frequency noise.
Set the cut-off frequency to 40 Hz, 80 Hz or 120 Hz
according to the recording conditions.
Turning the low-cut filter on and off
1 When the Home Screen is open, press the
HOME/
FUNC
key to open the Functions Screen.
2 Use the
VALUE
knob to move the cursor and
select the
LOW
CUT
menu item.
3 Press the
VALUE
knob.
4 Press the
VALUE
knob to turn the low-cut filter
ON or OFF for all inputs at the same time
(default: all channels off).
Press the
1
–
6
keys to turn the low-cut filter ON
or OFF for each input independently.
If the low-cut filter has been turned ON for one or
more inputs, the
LOW
CUT
indicator appears with a
dark background.
5 When you have finished making the settings,
press the
HOME/FUNC
key to return to the Home
Screen.
Setting the cut-off frequency of the
low-cut filter
1 Press the
MENU
key to open the
MENU
screen.
2 Use the
DATA
wheel to select the
LOW
CUT
menu
item, and press the
ENTER
key to open the
LOW
CUT
screen.
3 Use the
DATA
wheel to set the cut-off frequency
to
40
Hz
,
80
Hz
(default value) or
120
Hz
.
4 When you have finished making the settings,
press the
HOME/FUNC
key to return to the Home
Screen.
Using marks
Manually adding marks when recording
and during playback
Press the
MARK
key when recording and during
playback to add a mark at a desired position.
The mark number is shown when you do this.
NOTE
When a recording is paused and then restarted, a
•
mark is added at that point. Marks are numbered in
each take from 01–99, and the mark data is saved
with each take.
If you add a mark during playback, the mark is not
•
immediately saved in the file, but rather is saved when
playback stops. If you change the take using the Â
or ¯ key without stopping, the addition of mark is
not completed.
Moving to a mark
When stopped or during playback, press the
¯
key or
Â
key while pressing and holding the
MARK
key to move backward or forward to the
nearest mark in the selected take.
4 – Recording