Warning, Installing d1-4 camlock tooling – Smithy GN1300 User Manual
Page 54
Removing D1-4 Camlock Tooling From the
Lathe Spindle
Step 1: Protect the ways by placing a wooden board or protective material
such as styrofoam on the ways below the lathe spindle.
Step 2: Insert the chuck key provided into each of the three camlock sockets
on the spindle nose and turn counterclockwise to the unlocked position.
Step 3: Using a soft mallet, tap the tooling off the spindle.
If you prefer you can also mount a piece of stock in the chuck and then
“wiggle” the tooling loose.
Installing D1-4 Camlock Tooling
Tooling attaches quickly to the lathe spindle with three camlocks.
Step 1: Check the sockets on the spindle flange to make sure the index marks
are at the 12 o’clock/unlocked position.
Step 2: Align the three mounting studs to the spindle nose and slide the chuck
into place.
Step 3: With the chuck in position, insert the chuck key provided into each
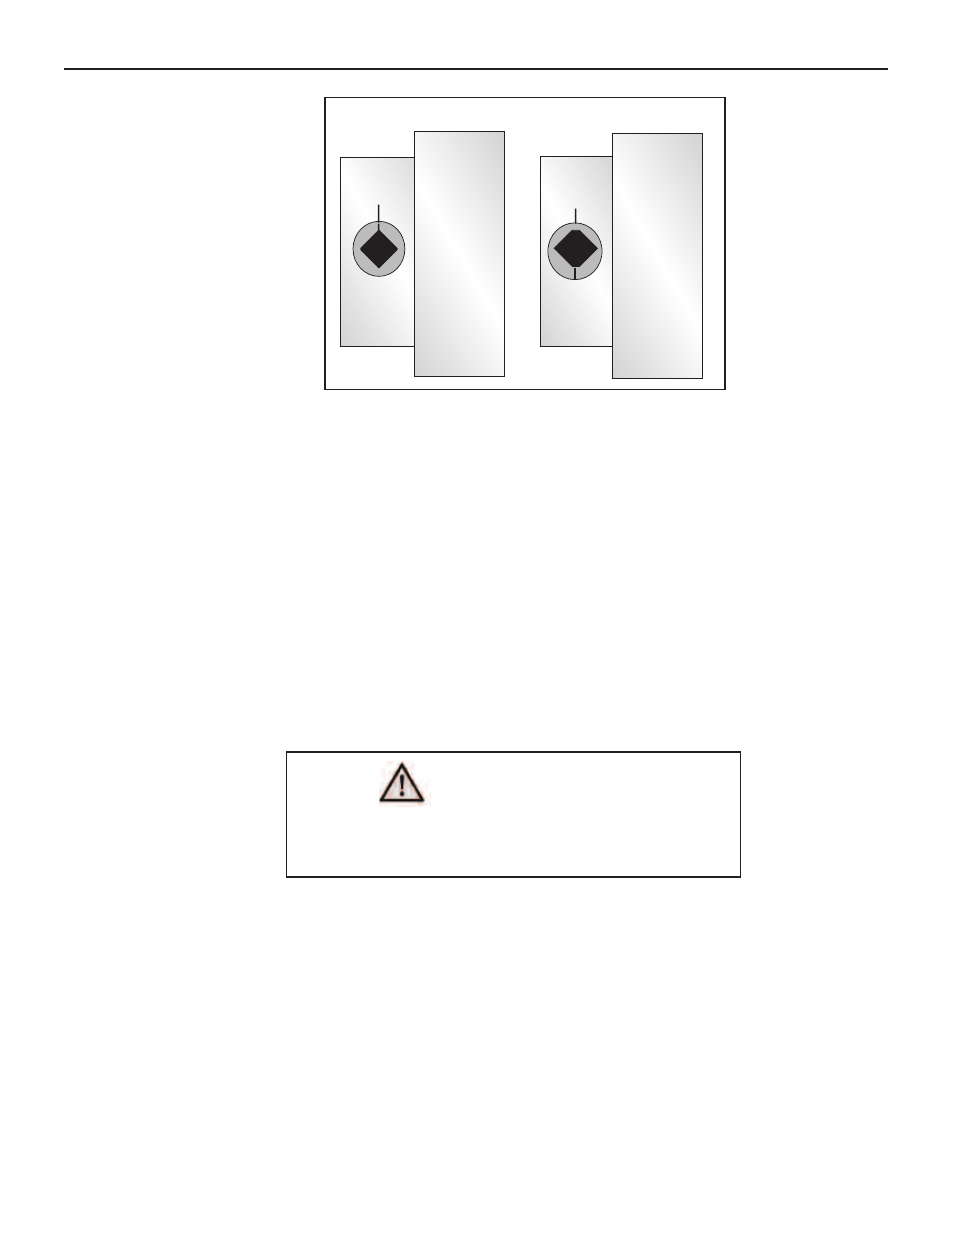
Figure 6.2 D1-4 Lathe Spindle in Locked & Unlocked Positon
Spindle
Flange
Unlocked
D1-4 Camlock
Tooling
Cam in Unlocked Position
Spindle
Flange
Locked
D1-4 Camlock
Tooling
Cam in Locked Position
When the tooling comes loose, be prepared to
support it immediately.
WARNING
6: Tooling Installation
6-2
Or Visit www.smithy.com