Cutting right-hand threads – Smithy GN1300 User Manual
Page 118
Cutting Right-hand Threads
Now you are ready to cut right-hand threads. First, advance the tool so it just touches
the workpiece and turn the compound calibration to zero. Then, using the compound
feed, feed in the tool 0.002”. Turn on the motor, engage the power feed (lever located on
the lower right hand face of the headstock) at the speed as indicated on the threading
chart. (You'll choose, I, II or III depending on the chart). With the leadscrew turning,
engage the half-nut by pushing the lever down and note the number lined up wiht the
mark on the threading dial. This closes the half-nut on the leadscrew and the powers the
cross-slide table to the left or right on the lathe bed ways. When you have finished the
cut, disengage the half-nut by lifting up on the handle.
It is best to take a light, scratch cut first without using cutting fluid. After the tool runs
the desired length, disengage the half-nut and back the tool out of the work. Then return
the tool to the starting position. Do not engage the half-nut until the threading dial is at
the same point as when you began. (If you began cutting at zero, do not re-engage until
zero on the threading dial once again matches the hashmark. Using a screw-pitch gauge,
check the thread pitch. The benefit of taking the light cut is that you can correct any
mistakes you might have made.
It's time to take the real cut now, so apply the appropriate cutting fluid to the work. Feed
the compound feed in 0.005-0.020” for the first run, depending on the pitch of the thread
you have to cut. If you are cutting a coarse thread, start by taking a few heavy cuts.
Reduce the cut depth for each run until it is about 0.002” at the final run. Bring the
cross-feed calibration to zero, then make the second cut.
Continue this process until the tool is within 0.010” of the finished depth. Brush the
threads regularly to remove chips. After the second cut, check the thread fit using a ring
gauge, a standard nut or mating part, or a screw thread micrometer. It is required to
leave the piece in the chuck and not remove it for testing.
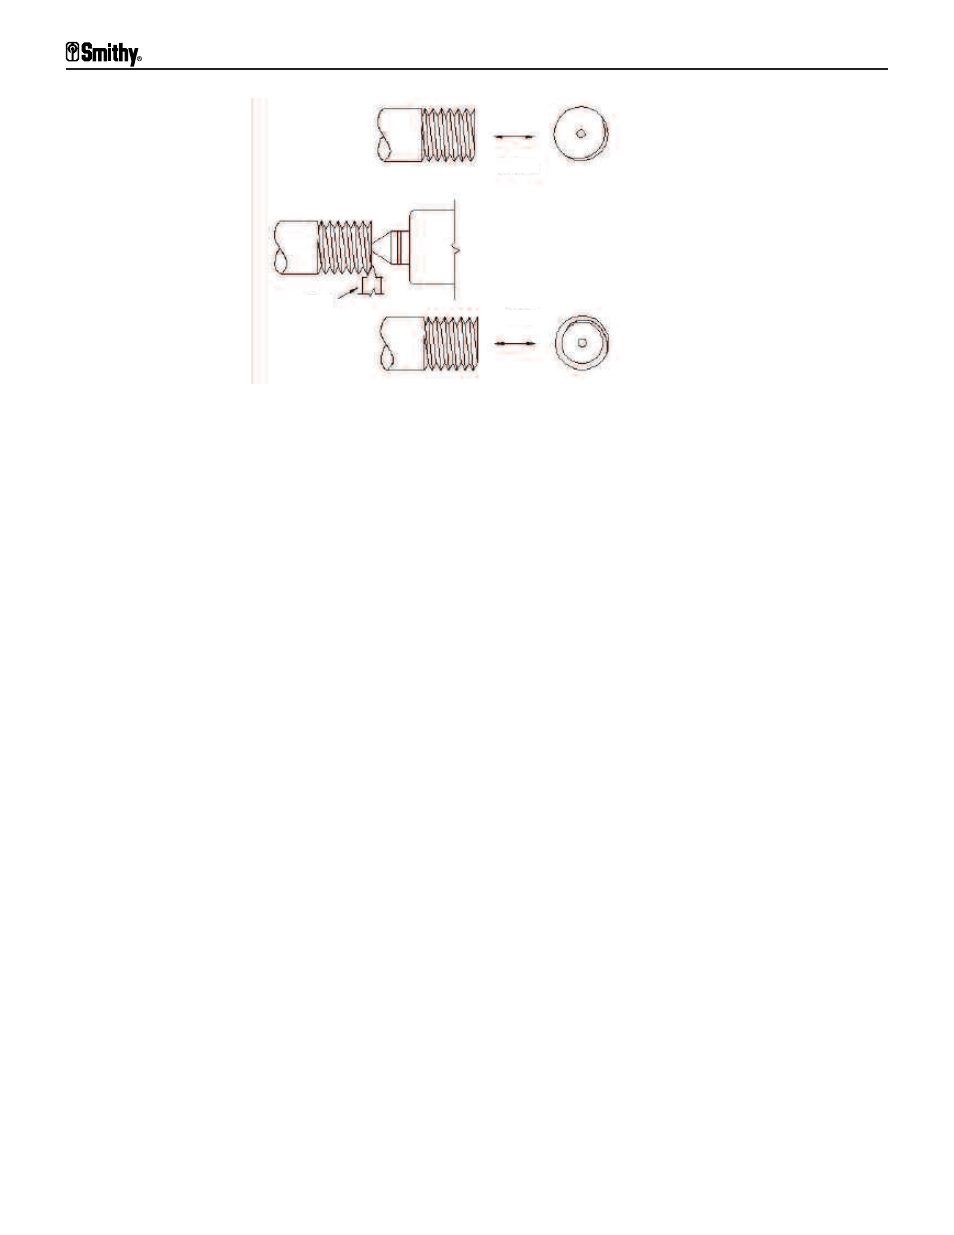
Continue taking 0.002” cuts. Then check the fit between each cut. when you thread the
nut, it should go on easily but without end play. When you have the desired fit, chamfer
the end of the thread to protect it from damage. To chamfer is to take a 45° cut off the
end of the bolt.
Figure A.10 Chamfer the end of the thread to protect it from damage
Granite 1300 Series Operator’s Manual
A-16
For Assistance: Call Toll Free 1-800-476-4849
Before
Tool
After