2 commissioning the refrigeration system, Commissioning the refrigeration system – REMKO WKF 120 Duo User Manual
Page 41
Connection to the unit
n
Remove the cover panel from the outdoor unit
if necessary. It may be necessary to remove
the pre-cut bushings.
n
Take off the factory-fitted protective caps. You
can use the union nuts for additional mounting.
Make sure to slide the union nuts onto the pipe
before it is flared.
n
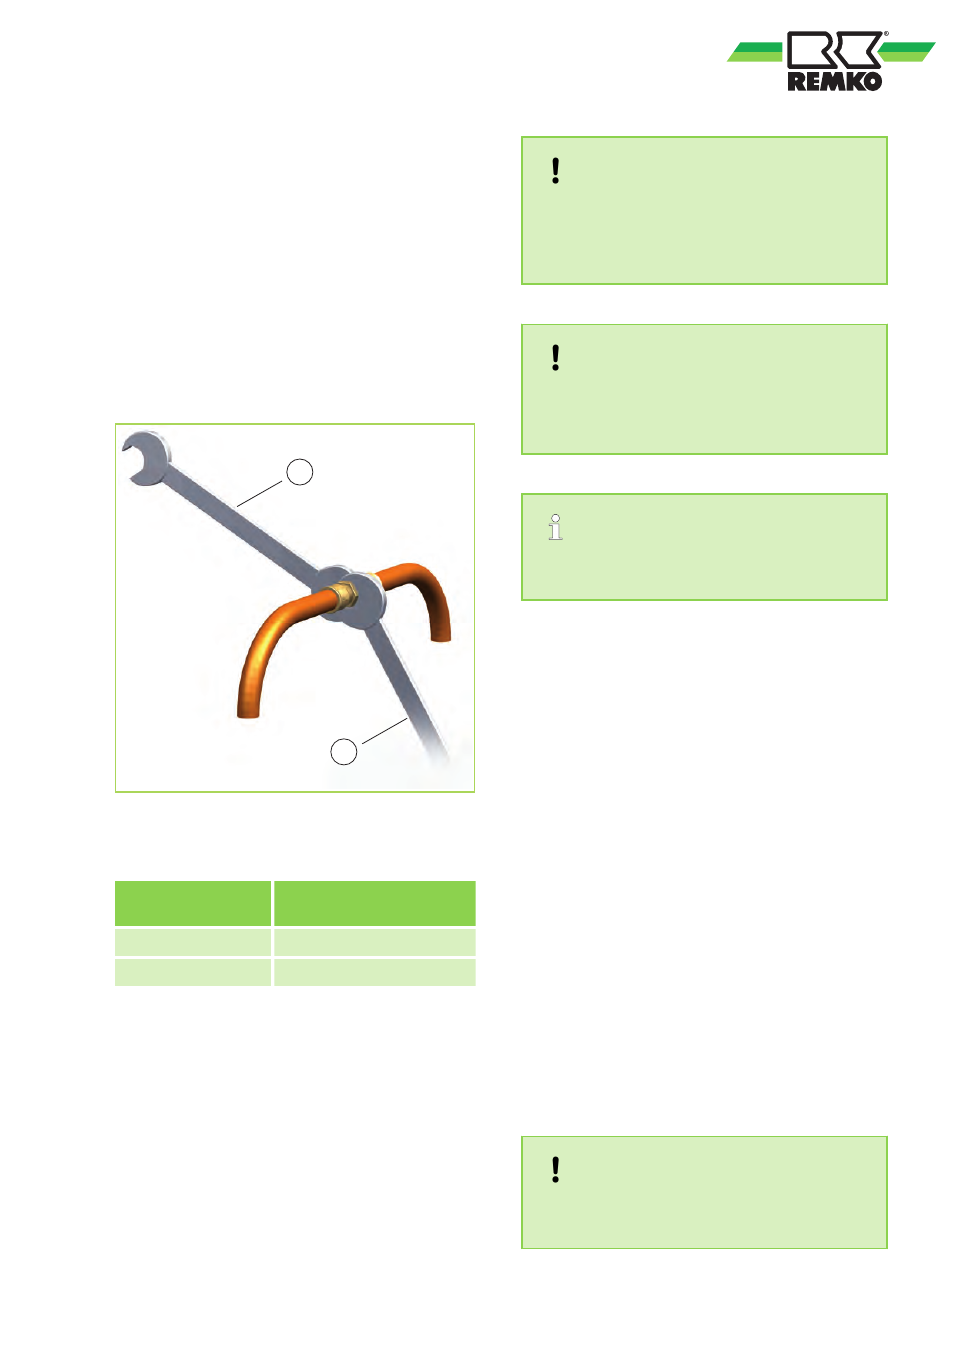
Make connections to the device by hand ini-
tially, in order to ensure a good fit. Later,
tighten the joints with two open-end wrenches
Use one wrench to resist the rotation of the
2
1
Fig. 43: Tighten fittings
1: Tighten 1st Spanner
2: Counter 2nd Spanner
Copper piping Out-
side diameter
Tightening torque
3/8" = 9,52 mm
32 - 40 Nm
5/8" = 15,88 mm
65 - 75 Nm
n
The installed refrigerant pipes, including the
flare connections, must be provided with suit-
able insulation.
n
Special measures need not be taken for the
return of the compressor oil.
NOTICE!
Use only tools which are approved for use in
an HVAC environment. (z. B.: bending pliers,
pipe/tubing cutters, de-burrers and flaring
tools). Do not cut refrigerant pipes with a saw.
NOTICE!
All work must be carried out in a way that pre-
vents dirt, particles, water etc. from entering,
refrigerant lines!
Outdoor units may be delivered with nuts suit-
able for joining flanges.
8.2
Commissioning the
refrigeration system
Leak testing
Once all the connections have been made, the
pressure gauge station is attached to the Schrader
valve as follows (if fitted):
blue = large valve = suction pressure
Once the connection has been made successfully,
the leak test is carried out with dry nitrogen. Leak
testing involves spraying a leak detection spray
onto the connections. If bubbles are visible, the
connections have not been made properly. In that
case, tighten the connection or, if necessary,
create a new flange.
Pumping down to vacuum
After completing a successful leak test, the excess
pressure in the refrigerant piping is removed and a
vacuum pump with an absolute final partial pres-
sure of min. 10 mbar is used to remove all of the
air and empty the pipes. Any moisture present in
the pipes will also be removed.
NOTICE!
A vacuum of at least 10 mbar must be pro-
duced!
41