3 setup, installation of the indoor unit, Remko wkf duo – REMKO WKF 120 Duo User Manual
Page 30
Wall breakthroughs
n
A wall opening of at least 100 mm diameter
and 10 mm slope from the inside to the outside
must be created.
n
To prevent damage, the interior of the wall
opening should be padded or, for example,
lined with PVC pipe (see figure).
n
After installation has been completed, use a
suitable sealing compound to close off the wall
breakthrough under observation of fire protec-
tion regulations (responsibility of customer).
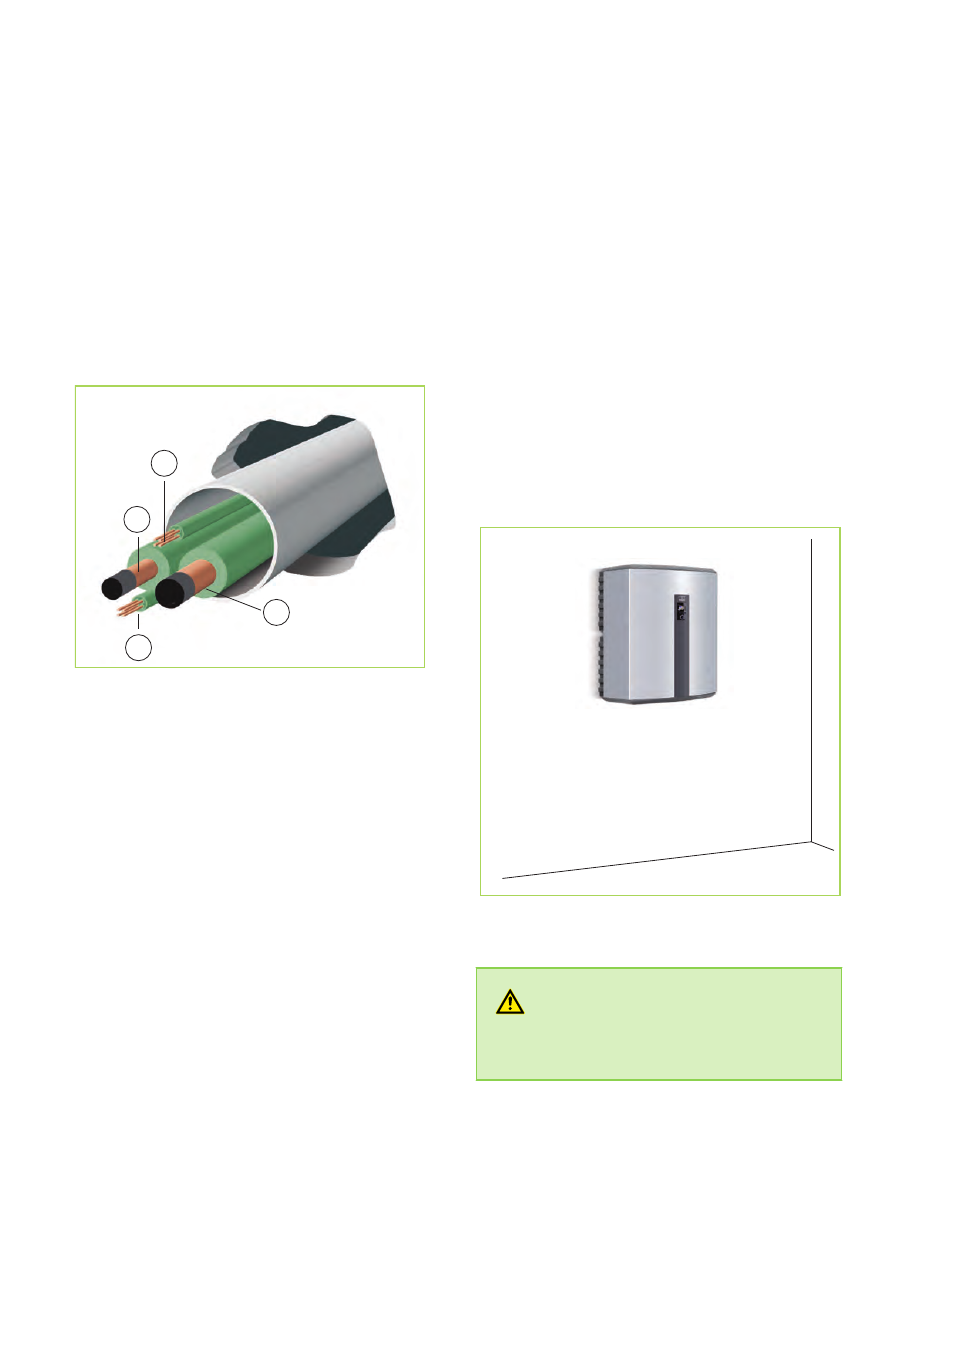
2
1
4
3
Fig. 28: Wall breakthroughs
1: Liquid line
2: Control cable
3: Supply
4: Hot gas line
4.3
Setup, installation of the
indoor unit
Installation or setting up the indoor unit
n
The wall bracket is secured to the wall using
the enclosed fasteners and the indoor unit
hooked into it.
n
The wall must have sufficient loading capacity
for the weight of the indoor unit.
n
Make sure that the wall bracket is mounted
vertically.
n
The adjusting screws on the back of the
housing can be used to precisely align the
indoor unit.
n
The indoor unit must be mounted in such a
way that there is sufficient space on all sides
for installation and maintenance purposes. It is
equally important that there is sufficient space
above the device for installing the safety
assembly.
Fig. 29: Wall mounting the indoor unit
WARNING!
Only fasteners suitable for the given applica-
tion may be used.
REMKO WKF Duo
30