Installing the designer river rocks, Installing the designer river rocks: 28, Installation – Montigo H38DF User Manual
Page 28
Page 28
XG0147 - 150204.1
H*38DF Gas Fireplace
Installation
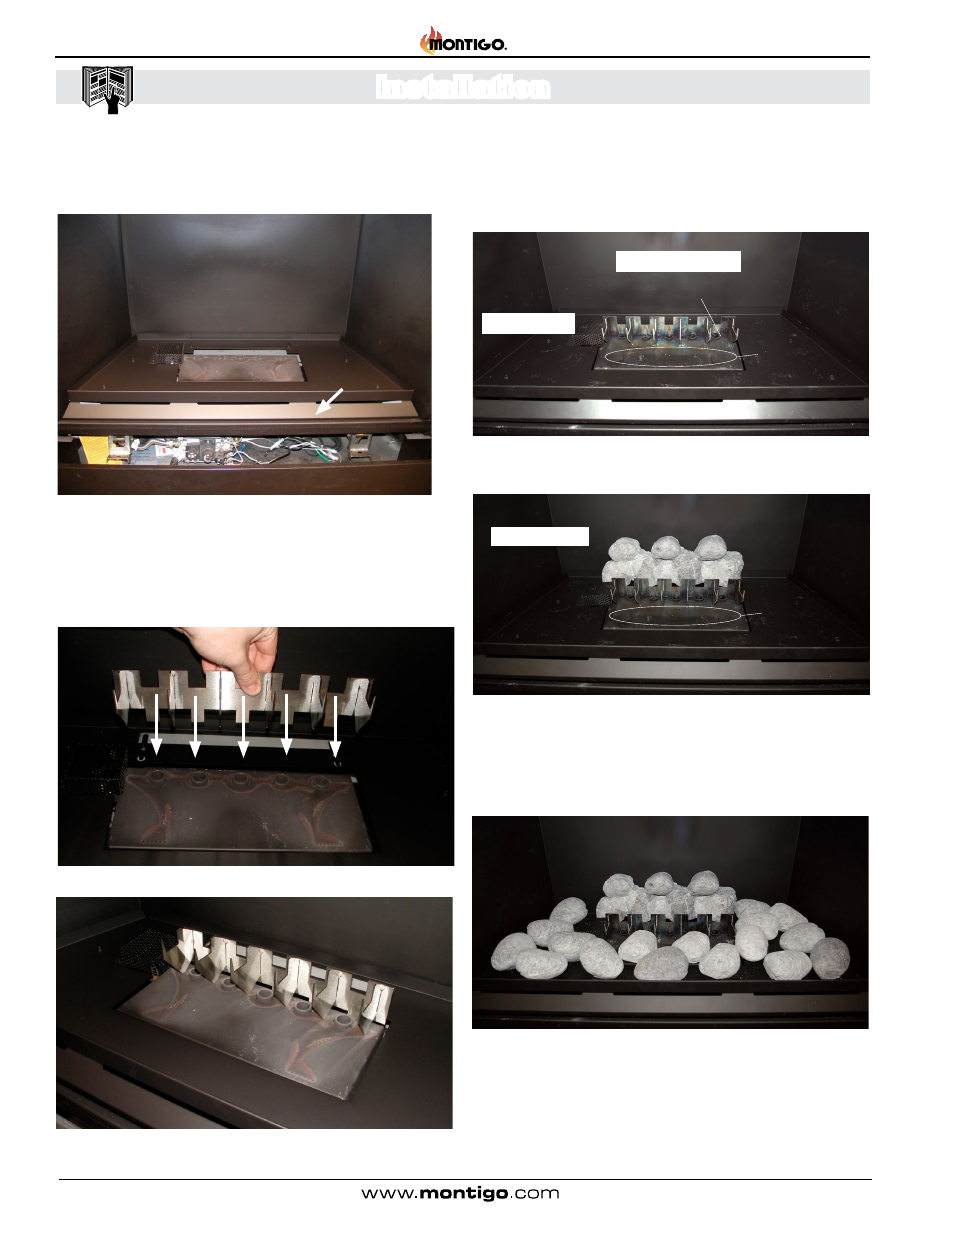
3. Install the new Rock Tray and front cover. Make sure the tray is not
sitting on top of the pilot.
2. Remove the Rock Guard and River Rocks from packaging.
Figure 30. Burner Tray Front Cover
4. For Air Baffle adjustment, see "Section 3-1-2: Air Baffle for
H38DF* & HR38DF* Only" on page 9
Figure 30b. Completed Placement of Rock Guard.
5. Slide the rock guard locator tabs behind the Burner. The rocks on
the Rock Guard should line up between the air inlets of the burner.
Figure 30a. Pushing the Rock Guard down into place.
Burner Tray Front Cover
Installing the Designer River Rocks:
The HR38DF* is supplied with (29) twenty-nine faux ceramic fibre river
rock. Unpack the rocks and handle them very carefully. Shown Below:
1. Remove the glass door as described in the previous Instructions.
Back of Fireplace
Air Inlets
Figure 30c.
Firebox prior to faux ceramic fibre rock installation.
3. Install Lower (17) seventeen Faux Rock "B" as shown in Figure
30e. Note: place cut surfaces of Rocks face down on firebox Pan.
2. Install Rear faux "A" ceramic 3 in1 Rock as shown in Figure 30b.
Pilot and cover
Rear 3 in 1 faux Rock "A"
Figure 30d. Placement of Rear faux ceramic rock "A" (flat surfaces of
rock on bottom pan of the fireplace). Note size and location of rock.
Rock placement
Burner holes
Burner holes
Lower Faux Rock "B" placement
Figure 30e. Placement of (17) seventeen Lower "B" faux ceramic
rocks. Note approximate location and placement. (Do not cover the
burner holes if possible). (Place one of the rocks on top of the Pilot
cover *).
*
Rock Tray
Front Cover