Kleenmaid KED2000 User Manual
Page 6
6
Installation location
d
Installation
-
The power supply plug must
remain accessible at all times!
-
The installation surface for the
dryer must be clean, level and firm.
-
Keep the area around the dryer
clean.
-
Align the dryer with the
heightadjustable feet.
Use a spirit level.
-
Never remove the heightĆadjustable
feet!
-
Do not install the dryer behind
a lockable door, a sliding door
or a door with a hinge facing the
dryer.
-
Install the exhaust air duct.
Follow the exhaust air duct
installation instructions.
d
Do not operate the dryer if there
is a risk of frost!
The installation room must be well
ventilated, otherwise the dryer will
operate below optimum performance.
Do not operate the dryer at temperaĆ
tures above 40 °C and below 5 °C.
Low temperatures affect the automatic
program sequence and may prolong
the drying times.
Do not install the appliance on carpets!
Compensate for uneven floors with the
heightĆadjustable feet.
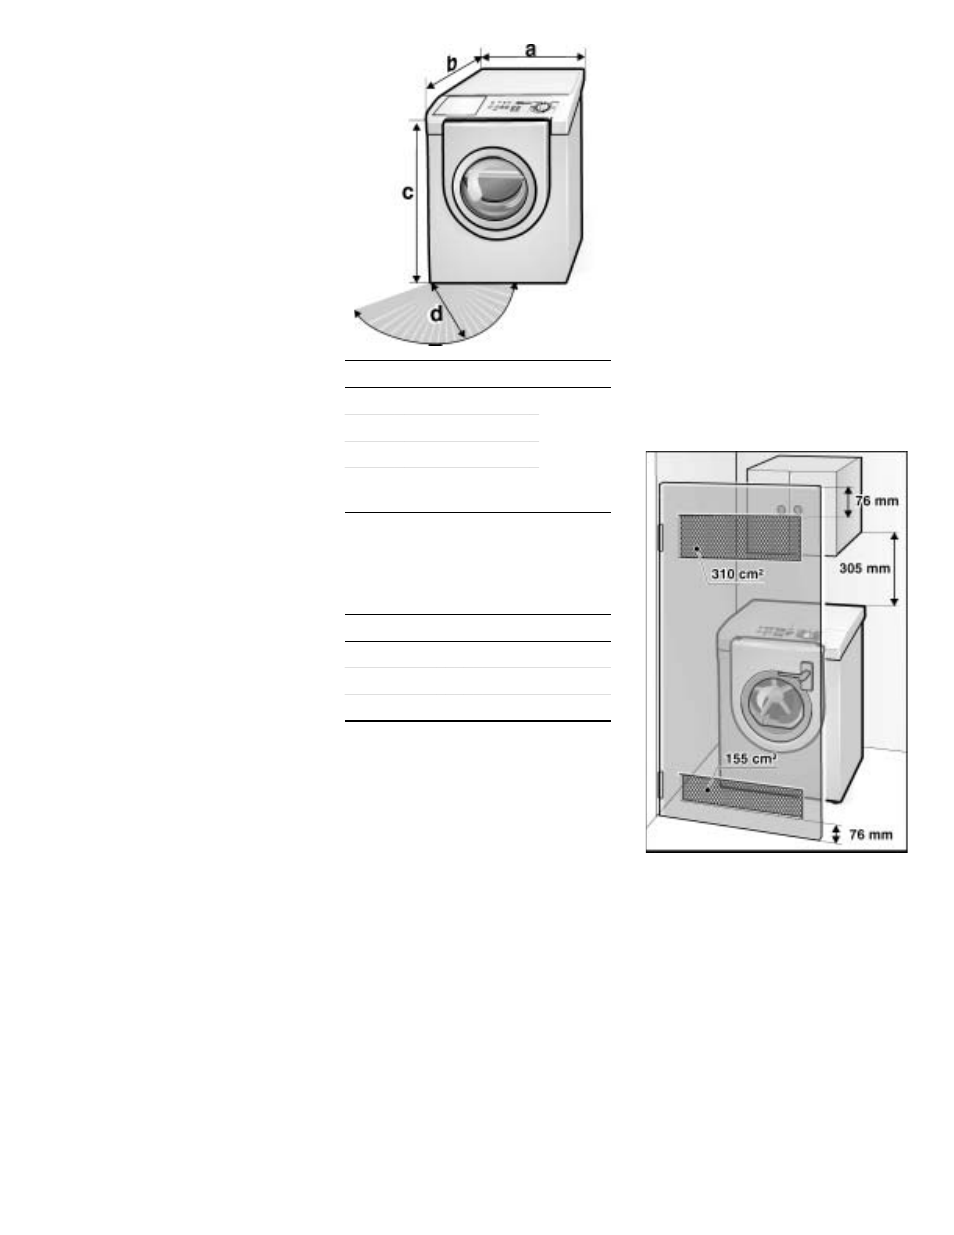
The size of the installation area
depends on the dimensions of the
dryer. Ensure that there is adequate
room for the swivel range of the door!
Dimension
Weight
a
686 mm
56 kg
b
808 mm
g
with
k i
c
945 mm
packaging
64 kg
d
angle
500 mm
170 - 180°
64 kg
If installing the dryer in a closet, observe
the minimum distances according to
the following table:
Minimum Installation Clearances
Closet
Sides
O mm
Top
305 mm
Rear*
O mm
* as close to wall as venting will allow.
Important information concerning
minimum distances:
-
Depending on the location of
the exhaust air connection, an
additional minimum distance of
14 cm must be provided on this side
for pipes/brackets (see Page 7).
-
Distances above the indicated
minimum dimensions reduce the
risk of mold formation behind the
appliance.
-
Additional distances reduce noise
transmission.
-
Additional distances facilitate
installation and service.
-
If the dryer is installed in a small
room, the doors of the room must
be fitted with vents of a specified
minimum size.
The dryer door is delivered with hinges
on the right. If required, the door hinges
can be switched to the left side.
If the door hinges are to be changed
over, please contact your dealer or our
customer serviceĆteam
(see Page NO TAG).