Installing a virtual ta client, Configuring a virtual ta client/server – D-Link DI-304M User Manual
Page 75
DI-304/DI-304M ISDN Remote Router
Installing a Virtual TA Client
1. Insert the CD-ROM supplied with your DI-304/DI-304M, or
directly double-click the installer file. Vsetup95.exe is for
Windows 95 OSR2.1 or higher. Vsetup98.exe is for Windows 98,
98SE, and Me. Vsetup2k.exe is for Windows 2000.
2. Follow the on screen instruction of the installer. The last step
requires you to restart your computer. Click OK to restart.
3. After the computer restarted, you will see a VT icon on the
taskbar (usually in the bottom-right of the screen, near the clock).
When the icon text is green, the Virtual TA client is connected to
the Virtual TA server and you can launch your CAPI-based
software to use the client to access the router. Read your
software user guide for detailed configuration. If the icon text is
red, it means the client lost the connection with the server.
Check the physical Ethernet connection.
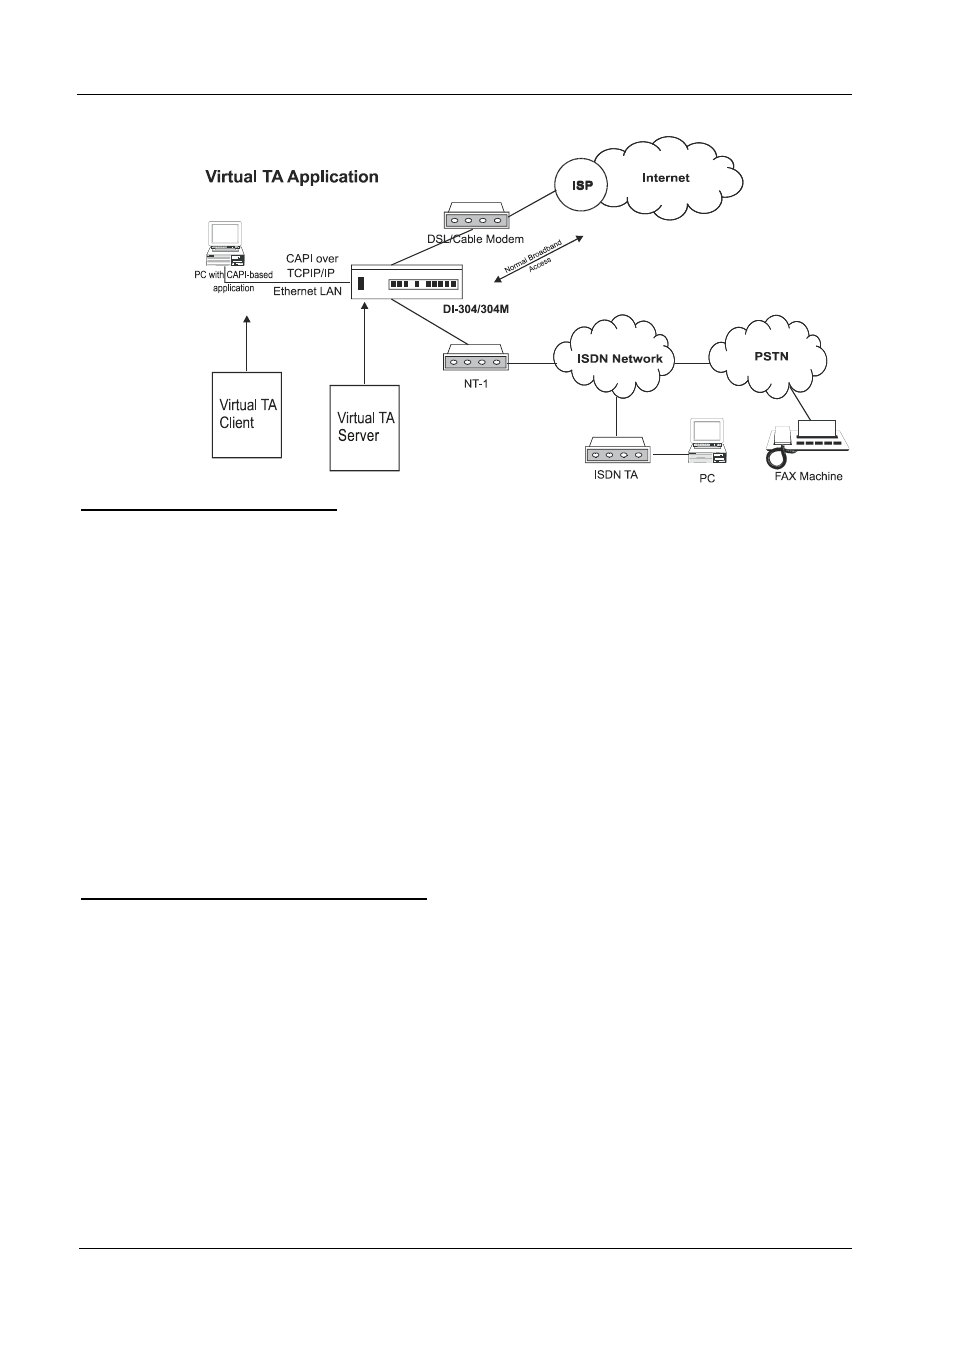
Configuring a Virtual TA Client/Server
The Virtual TA application is a client/server model. You must set it up on both ends
to operate your Virtual TA application.
By default, the Virtual TA server is enabled and the username and password fields
are blank. Any Virtual TA client may login to the server. Once a single Username
and Password field has been filled, the Virtual TA server will only allow clients with
a valid username and password to login.
67