Operation - basic cut – Formax Cut-True 27A User Manual
Page 7
OPERATION - Basic Cut
4
13. Infrared Light Beam Safety Curtain
The infrared light beam safety curtain will be activated automatically once
the cutter is powered on. Green LED indicators show when it is activated.
Red LED indicators show when the beam has been broken.
14. Touchscreen Control Panel
Use the LCD touchscreen to program up to 99 jobs, up to 30 cuts each.
15. Cover
Attached to the cutter with eight screws. Disassemble only in case of blade
change or maintenance.
16. Clamp Enable Switches
Press and hold the two clamp enable switches to clamp the paper securely
in place. The clamp switches are indicated by this icon The right switch is
used for both clamp and blade activation.
17. Cutting Blade Enable Switch
Press and hold the two blade enable switches to activate the blade and cut
paper. The blade switches are indicated by this icon The right switch is
used for both clamp and blade activation, in conjunction with this green
button.
18. Key-Activated Mode Select Switch
Turn to right for cutting. Turn to left for blade replacement. Turn to middle to
stop all operations.
19. Power Light
Shows when machine is powered on.
20. Electronic Hand Wheel
Used to adjust back gauge to appropriate paper size and cut length.
To move the back gauge toward the operator, turn clockwise.
To move the back gauge away from the operator, turn counterclockwise.
21. Power Switch
Used to turn on and off power to the cutter.
22. Paper Alignment Bar
Steel side bar helps to align the paper prior to cutting.
LED Laser Cutting Line (not shown) Shows operator exactly where the blade will cut the paper stack.
Wooden Push Block (not shown)
Used to help align paper stacks for precise cutting.
Blade Change Safety Tool
(not shown)
This device is used to safely remove the blade when it needs to be
sharpened or replaced.
Tool Kit (not shown)
Includes T-wrench and interchangeable bits for use in adjustments and
blade replacement.
1.
Plug in the cutter to an appropriate power outlet
(110V 20 Amp dedicated). Turn on red power switch.
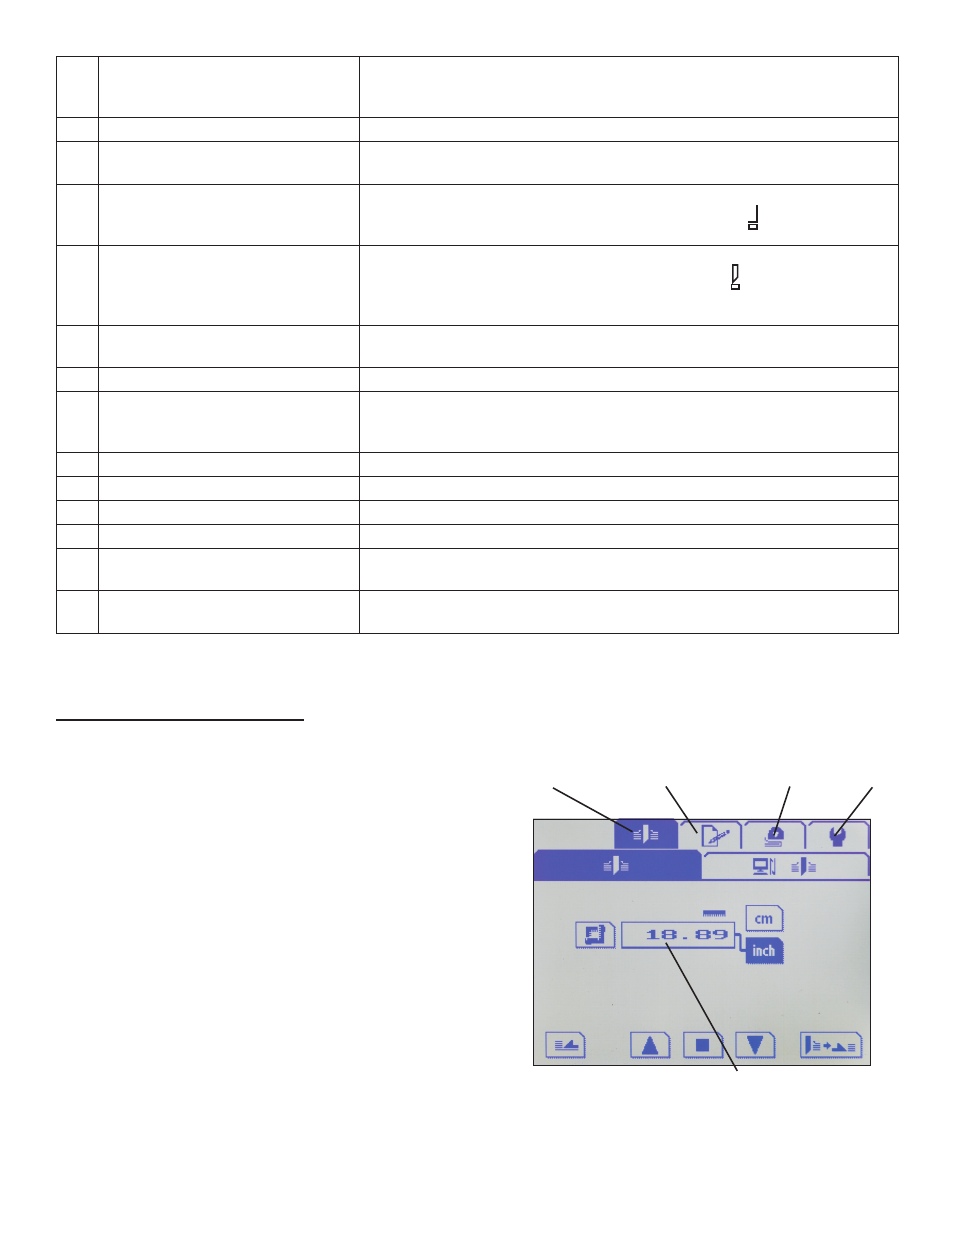
2.
Choose metric or inch measurements by pressing
either the “cm” or “inch” box on the touchscreen
(Fig. 1). Then touch the back gage block, and a key-
pad will appear (Fig. 2)
3.
Be sure the key-activated mode select switch (page 4,
part #18) is turned to the right on Cut mode “I” .
Fig. 1
Cutting Mode
Edit Mode
Clamping Bar Display
Tools
Back gauge block