Display of the clamping system, Rotating / replacing the cutting stick – Formax Cut-True 27A User Manual
Page 15
12
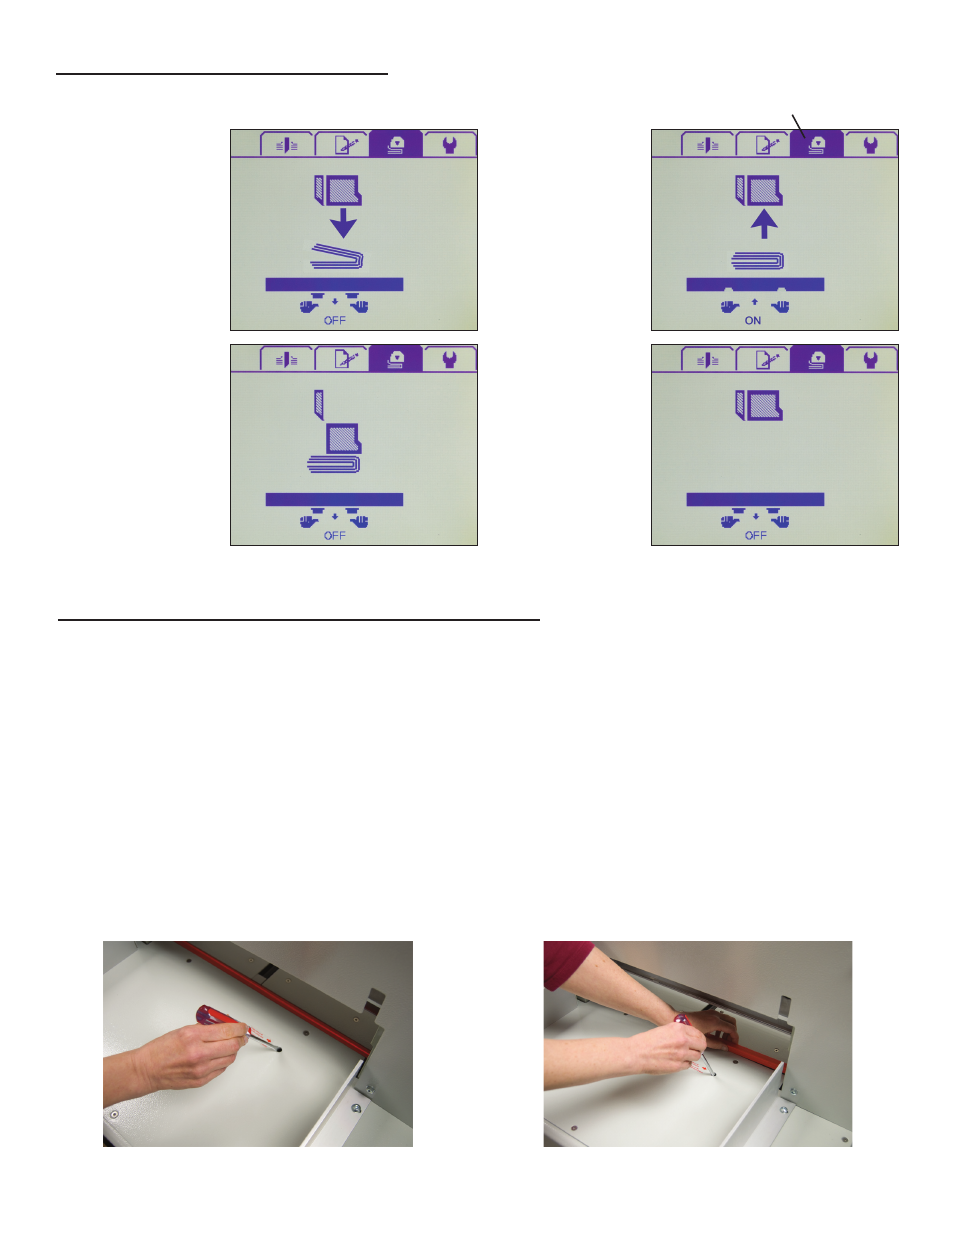
Display of the Clamping System
This function allows you to see the movements of the paper clamping system. Press the Clamp Status icon.
Stage 1:
The clamping bar
lowers when you
press both of the
green clamp enable
buttons.
Stage 2:
The clamping bar is
holding the stack of
paper securely.
Stage 3:
The clamping bar
is going up when
you push either of
the clamp enable
buttons.
Stage 4:
The clamping bar
is in its original
position.
ROTATING / REPLACING THE CUTTING STICK
The cutting stick is the surface the blade contacts during the cutting process. It can be rotated and used on each side,
4 times altogether.
If the last piece of paper in the stack is not cut through cleanly, and the blade depth has been adjusted properly, the cut-
ting stick should be rotated or replaced.
The cutting stick sits in a channel in the base of the cutter, just below the blade carrier. To remove it, first turn off the
power. Then insert the 5mm screwdriver into the cutting stick access slot (see photo below left) and lift up. Grasp the
cutting stick and remove (see photo below right). Rotate the cutting stick to a new side and re-install.
NOTE: When the cutting stick is rotated or replaced, the blade height must be readjusted. See the next page for blade
height adjustment instructions.