Cutting blade maintenance, Troubleshooting, Adjusting blade height / cutting depth – Formax Cut-True 27A User Manual
Page 16
CUTTING BLADE MAINTENANCE
The cutting blade is made of heat-treated high-carbon steel and is designed for repeated use. However, over time the
blade will become dull, and not perform to the highest standards. Cutting heavy paper or cardboard will dull the blade
more quickly than thinner paper stock. A dull blade will not cut accurately. Blade lifetime with normal paper is approximate-
ly 1,600 cuts (tested in maximum capacity).
NOTE: If the blade jams in the paper stack or leaves a groove in the paper, it should be changed immediately.
If the blade is not making clean, accurate cuts, check the following:
* Have you rotated or replaced the cutting stick?
* Have you correctly adjusted the height of the blade?
If so, the blade will need to be replaced. The blade can either be re-sharpened by a professional, or it can be replaced
with a new blade. To avoid injury, follow the Blade Changing Procedure and use the Blade Change Safety Tool, included
with the cutter.
TROUBLESHOOTING
Blade doesn’t move
Check if the main motor magnetic contact is activated.
No power
Check power source and all control circuit fuses.
Overload
Wait until the breaker automatically resets, which takes around 30-60 seconds.
The indicator light will be off. Reduce size of paper stack or change blade.
Cutter won’t operate
Press the two “enable switches” again, and be sure nothing is blocking the infrared
safety light beam curtain.
Other issues
Please contact your Formax dealer for service.
13
When the cutting stick is rotated or replaced, or the blade is replaced, the blade height must be readjusted. A blade which
cuts too deeply damages not only the cutting stick but the blade itself. The optimal blade height is when the last sheet in a
stack is cut accurately. The blade height can be adjusted up to 2mm.
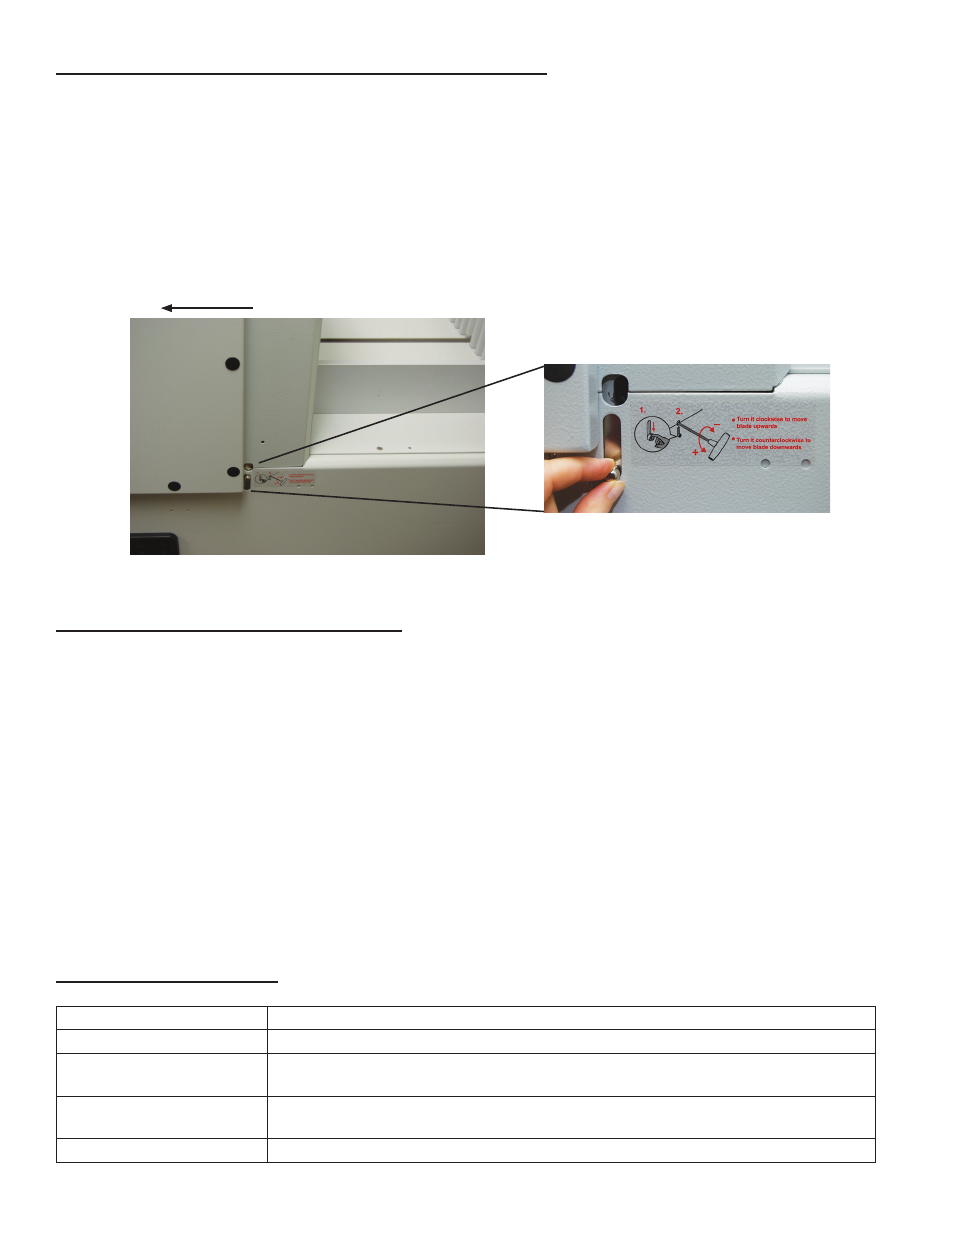
ADJUSTING BLADE HEIGHT / CUTTING DEPTH
1. The blade adjustment access is on the right side of the cutter, just behind the fuse panel (see picture, below left).
2. Slide the finger knob down and hold in place to open the access door.
3. Insert the the T-wrench from the tool kit into the adjustment slot. To lower the blade (+), turn to the left. To raise the
blade (-), turn to the right.
4. NOTE: You must remove the T-wrench before restoring power to avoid injury or damage to the cutter.
Fig. 14a
Fig. 14b
Front of Cutter