Formax Cut-True 27A User Manual
Page 20
17
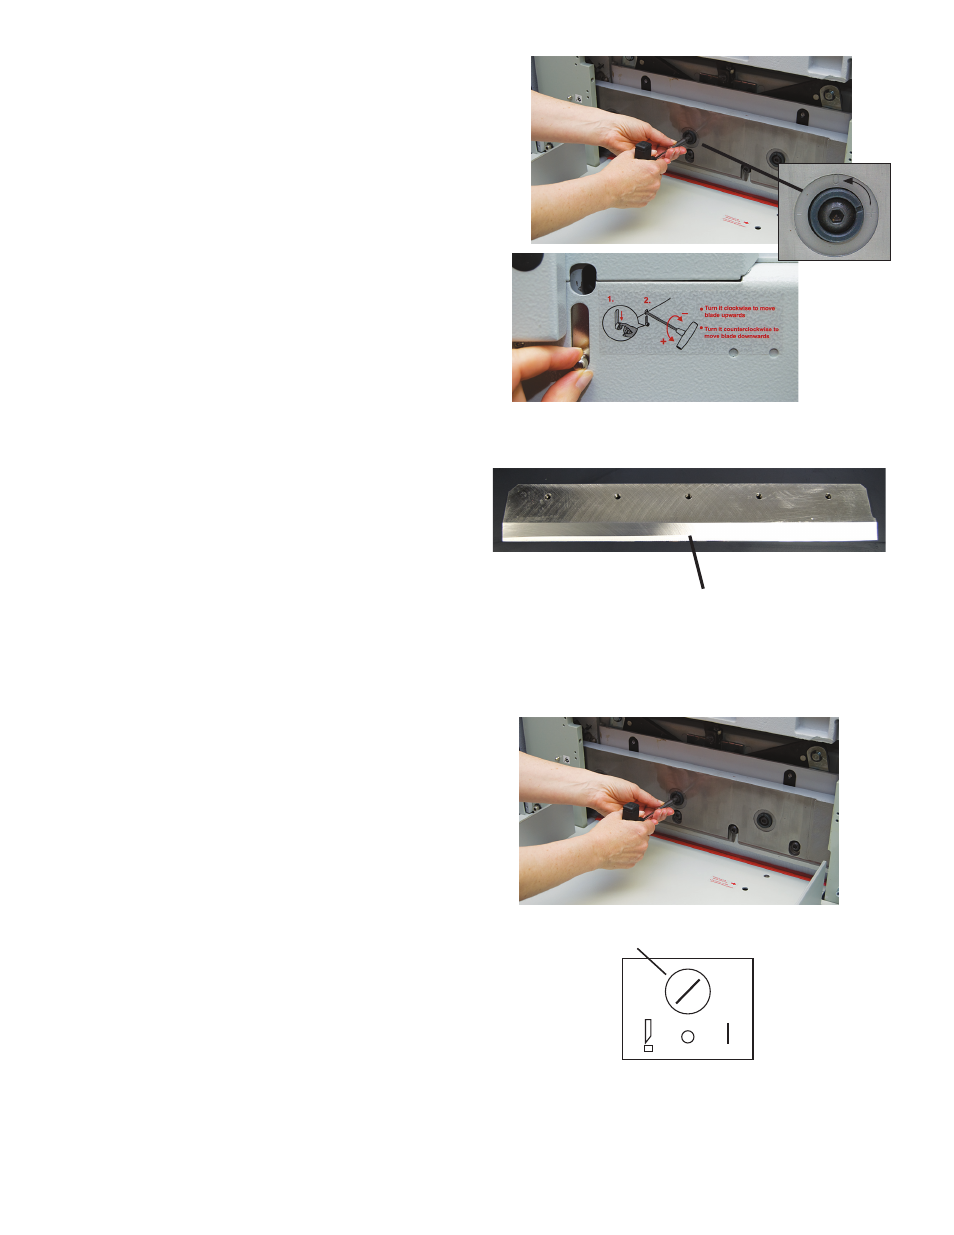
10. Use the T-wrench to turn the three socket head-
less adjustable screws, and set to “0” point. Turn
the blade fine adjustment device clockwise, at the
right side of the machine.
This ensures the new blade does not cut too
deeply into the cutting stick.
To access the Blade Adjustment Device, located
on the right side of the cutter (Fig. 14a), press
down on the silver finger knob, and insert the
T-wrench into the adjustment slot.
To move the blade up, turn clockwise.
To move the blade down, turn counterclockwise.
NOTE: Be sure to remove the T-wrench before
turning on the power.
11.
Place the new blade with the beveled cutting
edge facing up, and the screw holes at the top,
as shown here. Remove the protective pad
from the new blade.
To attach the blade change tool, place it over
the blade and screw the handles into the lower
set of screw holes.
Reverse the procedure to install the new blade.
Beveled cutting edge
12.
Once the blade screws are all securely in
place, check to see if the blade touches the
cutting stick evenly. If it is tilted or uneven, ad-
just the three socket headless screws until the
blade and cutting stick match.
Check the cutting depth by turning the Select
Switch to the right and cutting a single sheet
of paper. If the blade does not cut accurately,
adjust the three socket headless screws and
the Blade Adjustment Device.
13.
Once the blade is properly adjusted, reposition
the cover and tighten all screws into place.
Select switch in cutting position
0
+
-