910ub owner’s manual – Diamondback Fitness 910Ub User Manual
Page 9
910Ub Owner’s Manual
9
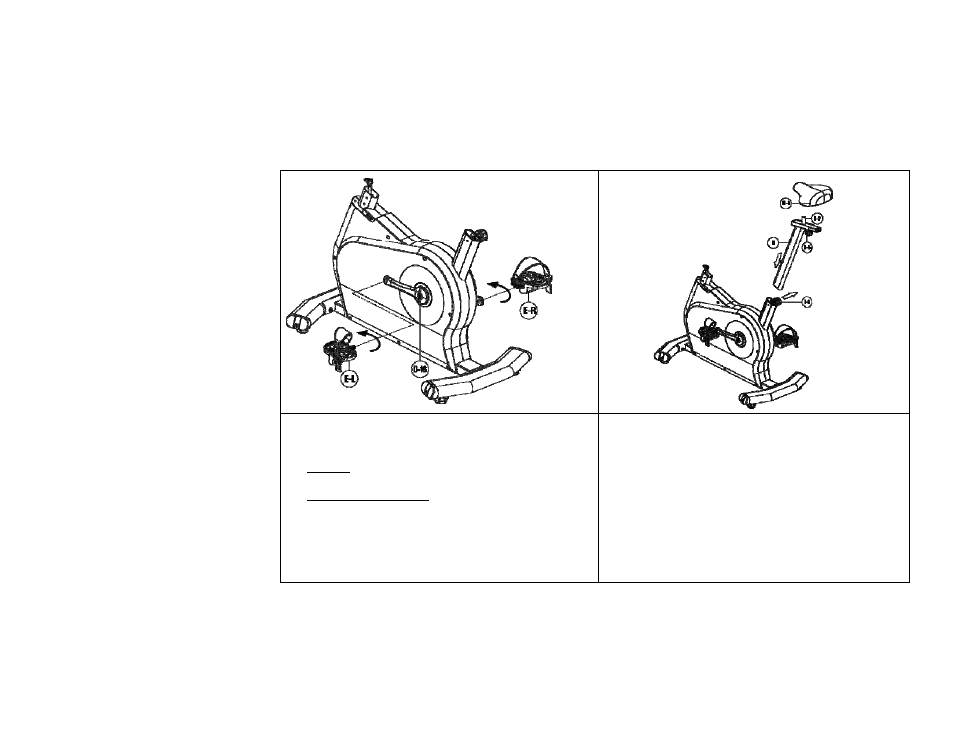
10. Identify the left and right pedals. The ends of the pedal axles are
marked with an “L” for left and “R” for right. Install the right
pedal (E‐R) into the right crank by hand, rotating the axle in a
clockwise direction.
11. Thread the left pedal (E‐L) into the left crank by hand in a
counter‐clockwise direction.
12. Use the enclosed 15mm pedal wrench to firmly affix the pedals
to the cranks.
13. Retighten pedals after approximately ten (10) hours of use.
14. Tighten the left and right crank hex bolts (D‐16) with the
enclosed hex wrench. Re‐tighten after using for ten (10) hours.
15. Slide the clamp on the underside of saddle (H‐1) onto knurled
post (H‐2) at the top of the seat post (H) and tighten the nuts
on either side firmly and evenly using the enclosed wrench.
16. Slide the entire seat post assembly into the main frame seat
tube by un‐threading the adjuster knob (D‐6) [located on the
right side of the seat tube] a few turns. Pull outward, away
from frame and slide the assembly into the frame. Adjust the
seat to preferred height and release the knob.
17. Do not extend the post beyond the minimum insertion mark
(MAX) stamped into the post. Ensure the post is fixed in place,
and tighten knob.