910ub owner’s manual – Diamondback Fitness 910Ub User Manual
Page 13
910Ub Owner’s Manual
13
FINAL ASSEMBLY AND INSTALLATION
42. Roll the cycle to its final position by lifting
the rear stabilizer until the wheels on the
front stabilizer touch the ground. This may
require more than one person. Move
slowly as the unit is heavy. Carefully lower
the rear stabilizer until to the floor.
43. Ensure the unit is stable and does not rock
from side to side. Level the four (4)
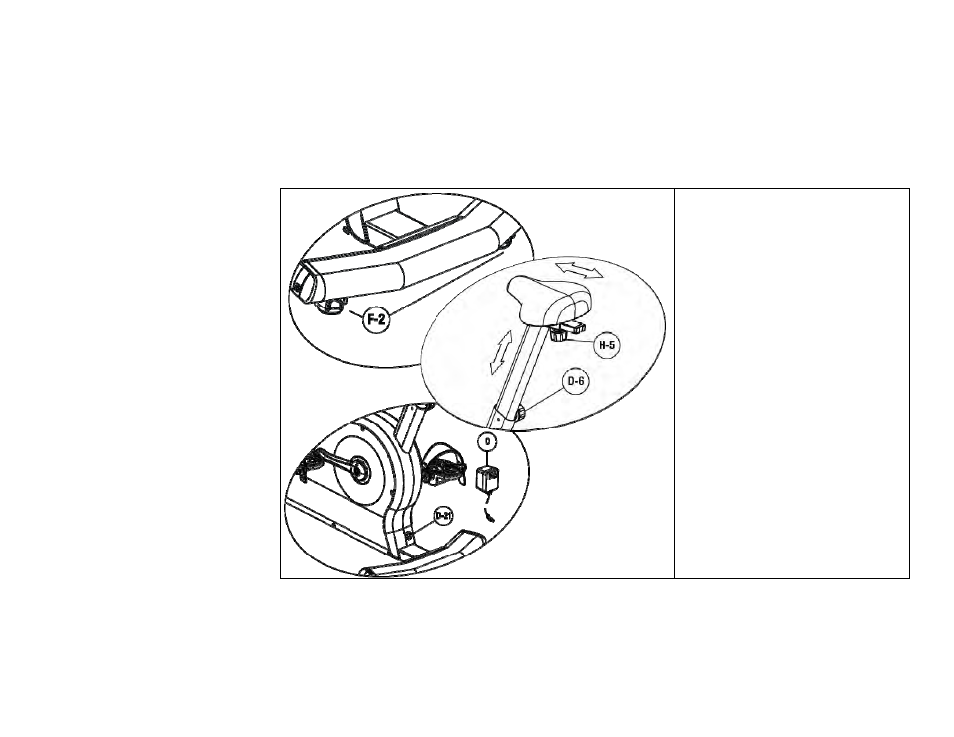
stabilizer feet (F‐2) as needed (see Fig. 3).
To extend a stabilizer foot toward the
ground, rotate it clockwise when viewing
from above.
44. Make final adjustments to the seat height
by loosening knob D‐6 two (2) turns.
While supporting the seatpost / seat
assembly, pull the knob outward to
disengage the set pin. Adjust the seat to
the desired height and release the knob.
Ensure the pin is fully engaged, and re‐
tighten the knob.
45. Adjust the fore‐aft position of the seat via
the seat slide adjuster knob (H‐5). Loosen
the knob, slide the seat assembly into the
desired position and re‐tighten the knob.
46. Plug one end of the power supply (O) into
a 120V power source. Plug the opposite
end into the input jack (D‐21) located at
the rear of the unit. (See Fig. 5.)
Fig. 3.
Fig. 4.
Fig. 5.