Diamondback Fitness 910Ub User Manual
Page 12
12
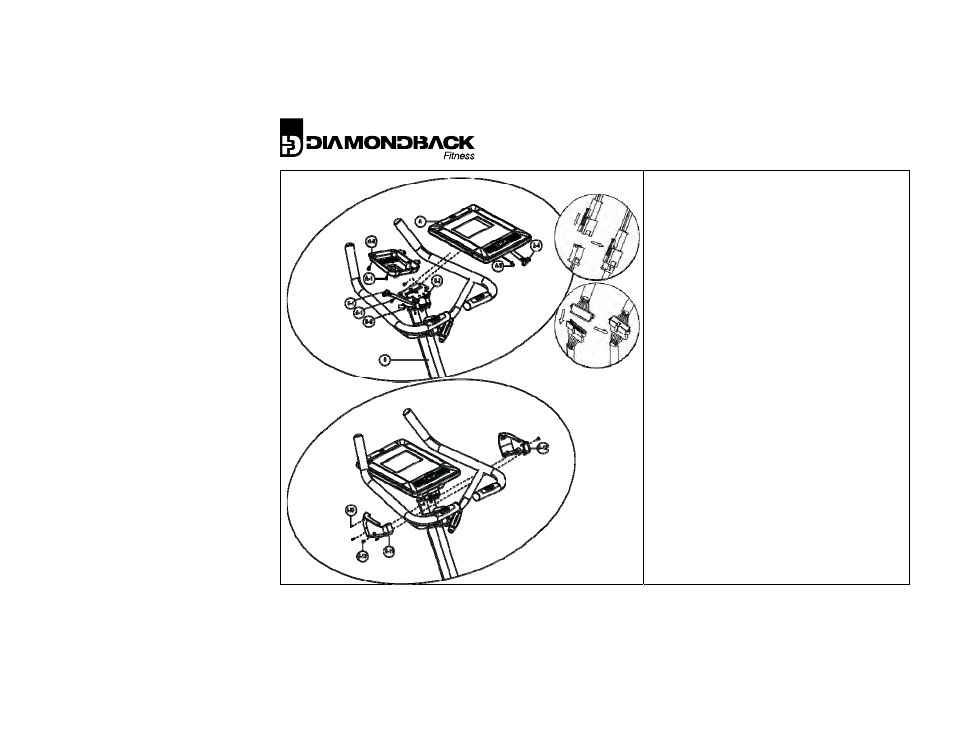
33. Remove the six (6) Phillips screws (A‐1) from the
backside of the console (A) and set aside.
34. Feed wire connectors C‐1 & B‐2 through the
backside of the console hinge cover (A‐2).
35. While supporting the console (A), join connectors
A‐3 & B‐2. Join connectors A‐4 with C‐1. Ensure
that all connections are firm.
36. Tilt the console mounting plate (C‐2) toward the
rear of the unit.
37. Install two (2) Phillips screws (A‐1) through the
underside of the console mounting plate and into
the backside of the console. The screws should be
installed through the uppermost pair of holes as
displayed in Fig. 1 to the left.
38. Align the console hinge cover (A‐2) with the
mounting holes on the backside of the console by
sliding the cover’s slots over the base of the hinge
mount. It may be necessary to tuck any extra
cables into the console mast.
39. Re‐install the four (4) Phillips screws (A‐1) through
the backside of the console hinge cover (A‐2) and
into the back of the console (A). Tighten all screws
firmly.
40. Bring the upper console mast covers (C‐11 & C‐12)
together over the top of the console mast (as
shown in Fig. 2. to the left) and install the three
(3) Phillips screws (I‐10) through the left cover (C‐
11) and into the left cover (C‐12). Do not over‐
tighten.
41.
Install the two (2) Phillips screws (C‐13) through
the covers (C‐11 & C‐12) and into the console
mast.
Fig. 1.
Fig. 2.