910ub owner’s manual – Diamondback Fitness 910Ub User Manual
Page 11
910Ub Owner’s Manual
11
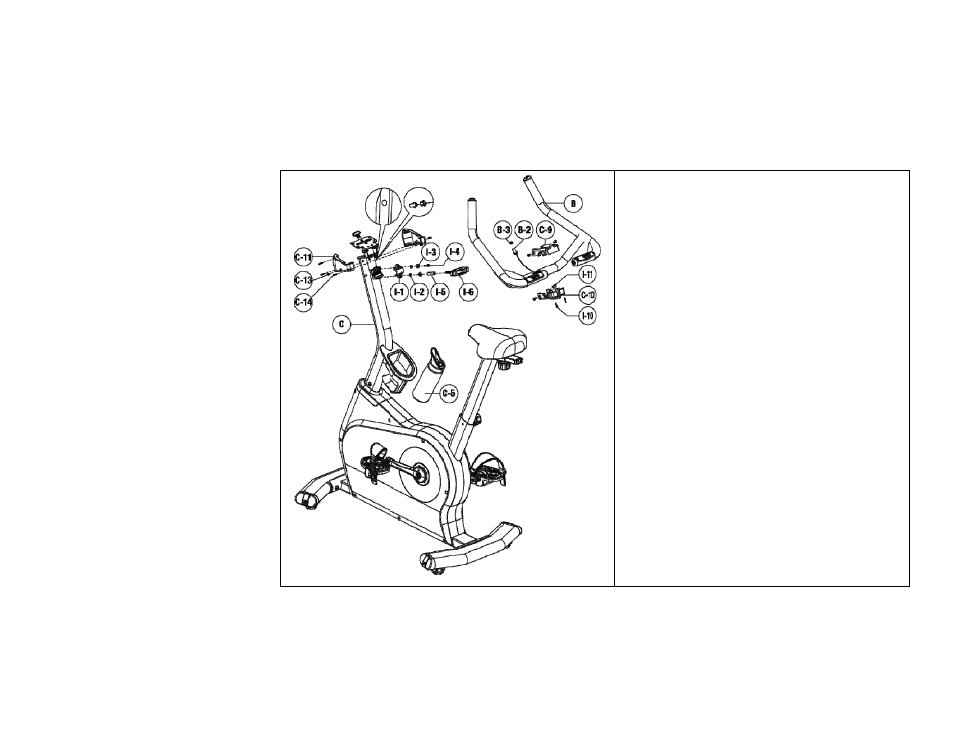
26. Position the handlebar assembly (B) in front of the
clamp near the top of the console mast (C), taking care
to keep the pulse wire (B‐2) clear of the clamp.
27. Install the upper handlebar clamp fixing assembly by
loosely treading the Allen bolt (I‐4) through the lock
washer (I‐3), flat washer (I‐2) and clamp face (I‐1) and
into the upper hole of the console mast (C).
28. Thread the T‐handle adjuster (I‐6) through the spacer
(I‐5), lock washer (I‐3) and flat (I‐2) washer and into the
console mast (C). Tighten the Allen bolt (I‐4) and T‐
handle adjuster (I‐6) evenly and firmly, positioning the
handlebar to the desired position. The upper and lower
gaps between the console mast clamp and the clamp
should be equal.
29. Snap the pulse wire grommet (B‐3) onto the pulse wire
(B‐2) as shown smaller in the bubble to the left. Thread
the heart rate wire connector (B‐2) through the hole
on the right‐hand side of the console mast (C) and
upward, out through the opening at the top. Fit the
pulse wire grommet into the hole in the right side of
the console mast.
30. Bring the upper and lower handlebar pivot covers (C‐9
& C‐10) together over the handlebar pivot and install
the two (2) Phillips screws (I‐10) through the bottom
cover and into the upper cover.
31. Install the four (4) Phillips screws (I‐11) through covers
C‐9 & C‐10 and into the console mast.
32.
Place the water bottle (C‐5) in the cage located on the
console mast.