Replacing the bitmap -9, Deleting a bitmap -9, Graphic frame entry effect -9 – Daktronics Venus 1500 Ver 1.x User Manual
Page 36: Delete command -9
Message
5-9
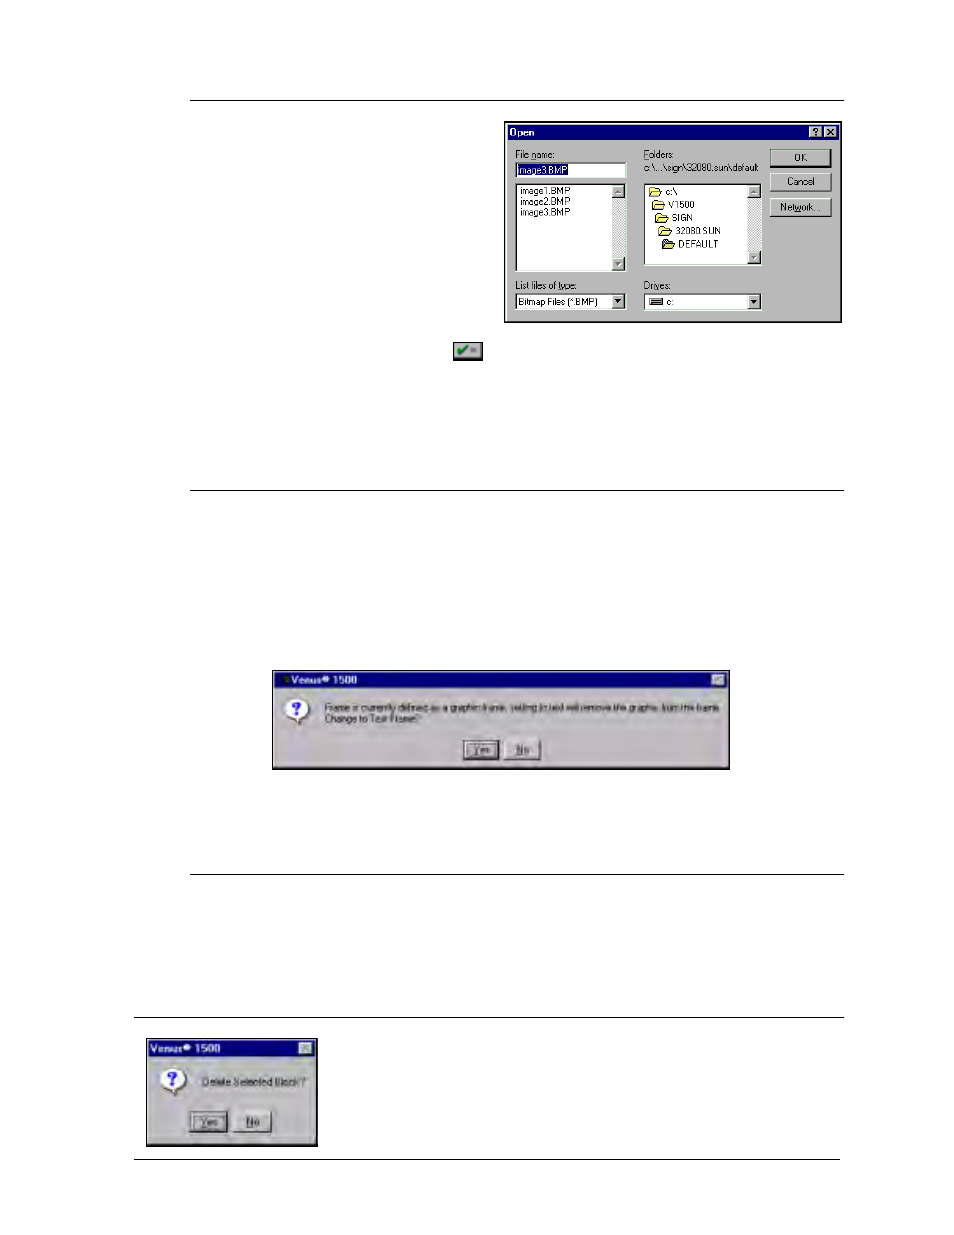
5.8.2 Replacing the Bitmap
To select a different bitmap than
the one shown, click once on
[
BROWSE
]. The Open dialog box
will appear.
By default, bitmaps are saved in a
directory identified by sign type (a
SunSpot bitmap is shown) under
C:\V1500\sign. Bitmaps located
within other folder may be used.
Open the appropriate folder, select
the desired bitmap, then click
or press <
ENTER
>. The new bitmap will appear in
the frame.
i
Remember: The pixel dimensions of the bitmap must always match the matrix size
of the sign.
5.8.3 Deleting a Bitmap
To remove a bitmap from a message, there are two options:
õ Click on the Delete Frame button at the bottom of the message editor to remove
the entire frame or
ö Click on the down arrow next to Frame Type then select Text. The following
dialog box appears. Select [
YES
] to remove the bitmap and change the screen to a
text frame.
m
m
m
m
Note: If a bitmap is deleted from sign directory (C:\V1500\Sign…), it will still
appear within the message, however the bitmap can no longer be edited.
5.8.4 Graphic Frame Entry Effect
Three entry effects are available for graphic frames: Instant (IN), Scroll Left (SL) and
Scroll Right (SR). Click on the abbreviated button to the right of the bitmap image in
the message editor then select the desired effect. The default is instant (IN).
5.9
Delete Command
Large portions of text can be deleted using the delete command. Highlight
the desired text, then press <
DELETE
>. A verification window will appear.
Choose <
YES
> to delete the selection or <
NO
> to abort the delete
command.