Display interior, Led module replacement, Display interior -3 – Daktronics CE-1010 User Manual
Page 21: Led module replacement -3, Figure 12: led module ribbon cable removal -3, 2 display interior
To completely remove the LED module panel from the cabinet of the display:
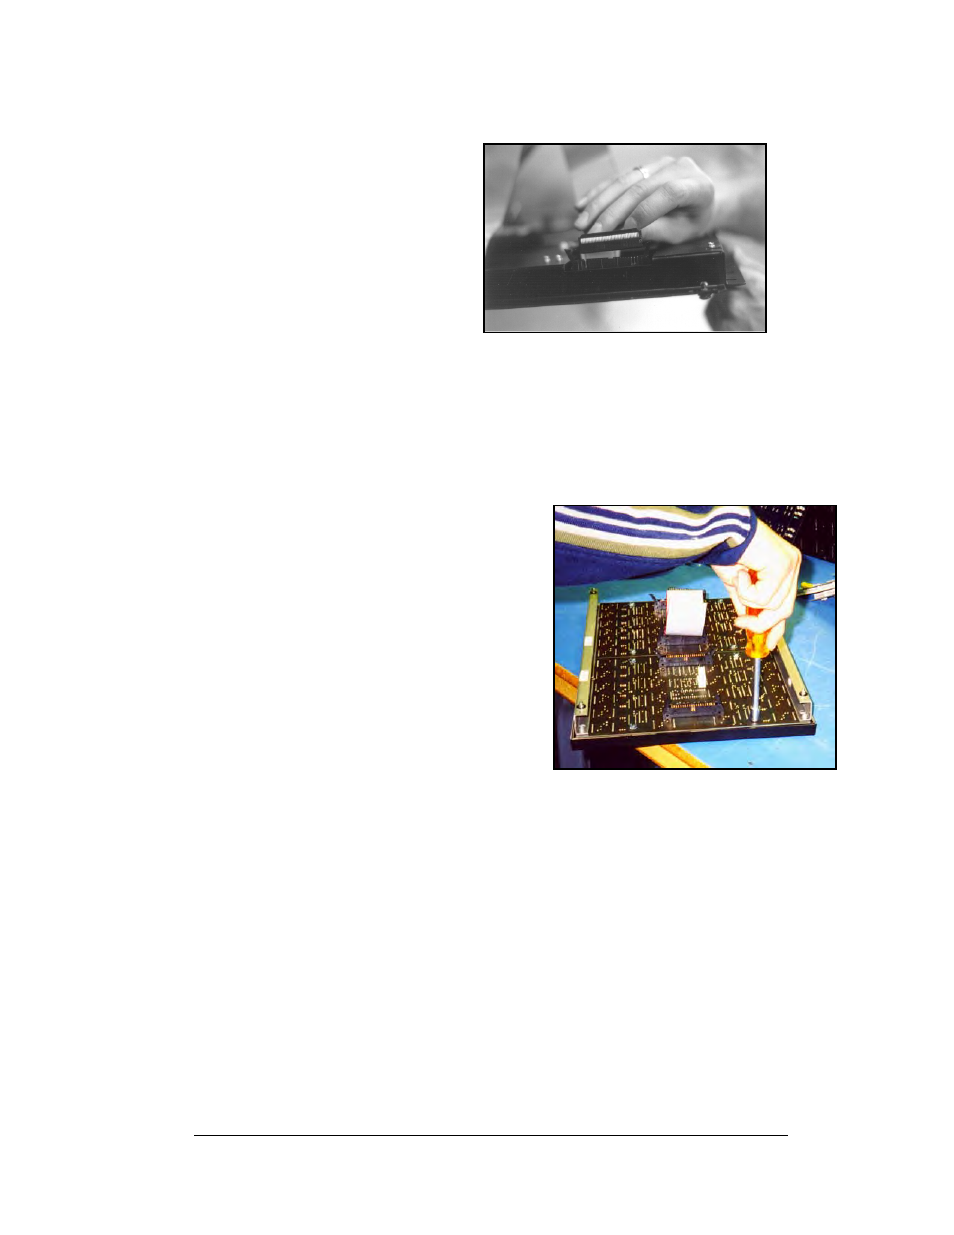
Figure 12: LED Module Ribbon Cable Removal
1. Spread the clasps of the 40-
pin connectors on the rear
side of the panel.
2. Gently pull the cable to
disconnect the pin connector
(refer to Figure 12).
3. Disconnect the four-pin
power connectors. The power
cable is released by squeezing
the tabs on each side of the
connector.
4.2 Display
Interior
Once the LED module panel is removed, the display interior is visible. Various
internal components, including the display controller and the power supplies, are
now accessible for repair or replacement.
LED Module Replacement
Figure 13: Removing the wire cloth
retainer frame nuts
If any LED modules fail, the recommended
procedure is to replace the failed module,
send it to Daktronics, or send it to a certified
dealer for repair. Refer to Section 4.6 for
information on packaging components for
shipment.
To remove an LED module:
1. Remove the appropriate LED
module panel as described in
Section 4.1.
2. Disconnect the remaining 40-
pin ribbon cable from the failed
module.
3. Removing the wire cloth retainer frame requires the following: For 1.2"
displays, remove the four nuts located along the rear edge of the LED
circuit board. For the 2.1" displays, remove the four perimeter nuts and
one in the center of the circuit board. For the 3.2" and 4.2" displays,
remove the six perimeter nuts and two in the center. Refer to Figure
13.
4. Flip the module panel over and remove the wire cloth filter from the
front of the failed module.
Maintenance and Troubleshooting
4-3