Printing the printer setup forms, Remark: do not fill this empty marker – Compuprint SP40 plus User Manual
Page 22
User Manual
MAN10239-01 17
Printing the Printer Setup Forms
If you already have the preprinted forms for the printer setup, go to “
Filling in the Printer Setup Forms
” later in
this manual.
1. With the printer in Setup Mode, insert a blank sheet in A4 or Letter format.
2. The printer loads the sheet and stops.
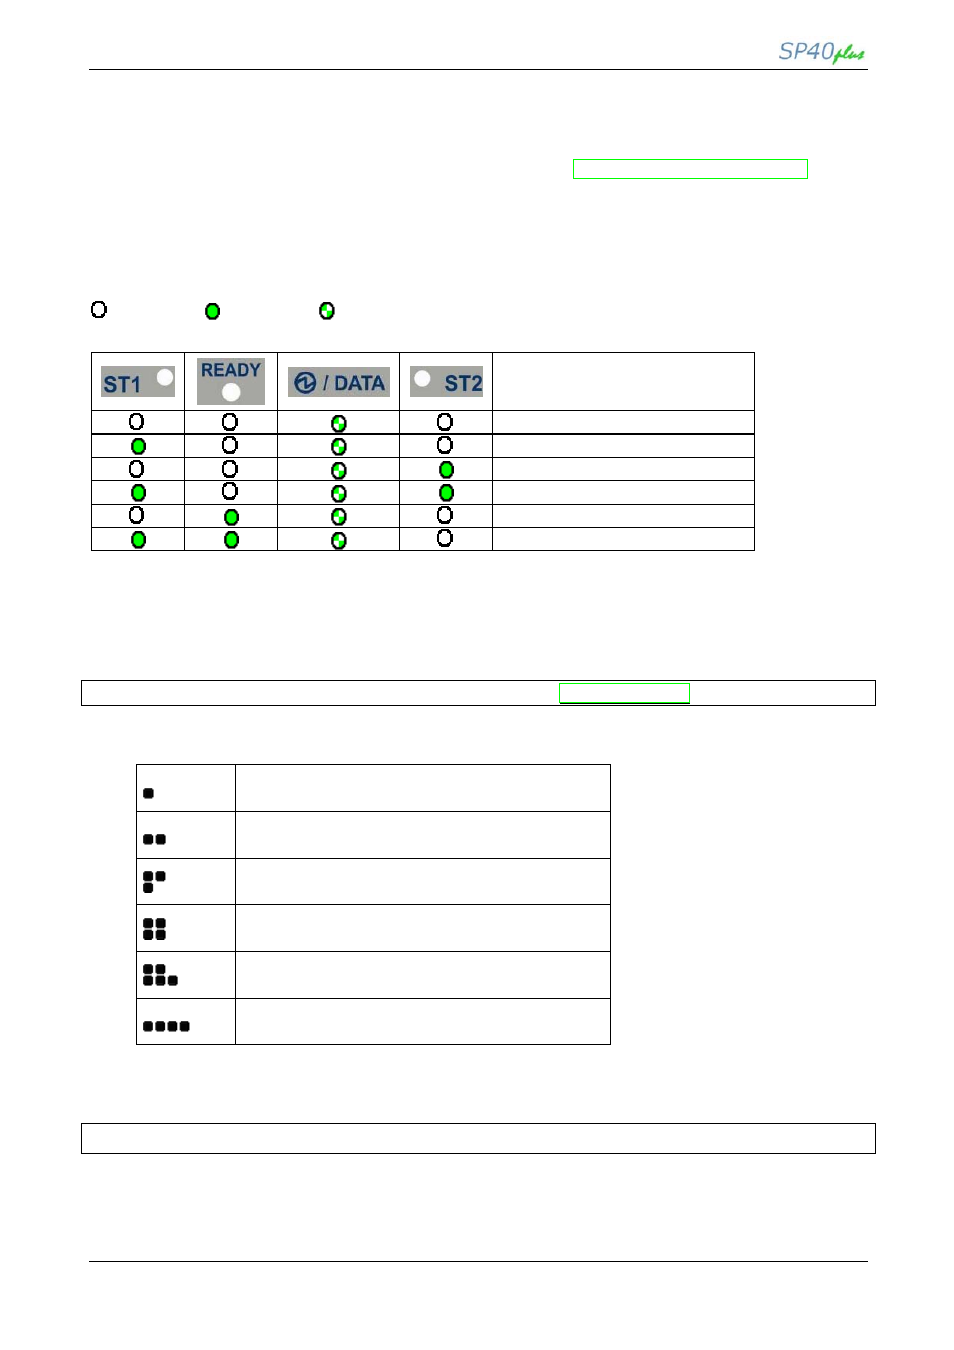
3. If you press the ST1 key, the three leds change and you can select the Setup Page you want to print
as follows:
= unlit
= lit
= flashing
SETUP STATUS
Configuration Page
Program 1 – Setup Page
Program 2 – Setup Page
Program 3 – Setup Page
Program 4 – Setup Page
Offset Tuning Set Up Page
Pressing the ST2 key, the printer prints the selected Setup Page, showed in next pages.
Only the Program 1 Setup Page printout is reported because the other are exactly the same except for the
marker.
The printer setup forms contain all printer parameters and the values that can be set. The current value is
indicated by an asterisk (*).
For a detailed description of the parameters and the settings see “
Setup Parameters
” later in this manual.
Each Setup form is identified by a marker in the upper left corner of the page as follows:
Configuration Setup
( ) SP40plus
Program 1
( ) SP40plus
Program 2
( ) SP40plus
Program 3
( ) SP40plus
Program 4
( ) SP40plus
Offset Tuning Setup
( ) SP40plus
In this line an empty marker ( ) is printed within the printer model and the Code Version to be used for the
white calibration check.
Remark: do not fill this empty marker
For the printer with operator panel with LCD, the SETUP operation are directly displayed on the LCD jointly
with the above described leds combination.