5 operation, 1 power- and warm-up, 2 user interface – Bronkhorst Vapor Delivery Module User Manual
Page 17: 1 buttons, 2 display, Operation, Power- and warm-up, User interface, Buttons, Display
Bronkhorst®
Vapor Delivery Module
17
9.17.079
5
Operation
5.1
Power- and warm-up
Before switching on the power, be sure that:
System is checked for leakage of gases and liquids
All connections have been made
Flow-set points are zero
No liquid has been spilled into the equipment
Switch on and then:
Allow 30 minutes (from switching on) to warm up (common for thermal flow controllers)
Wait until pre-set temperatures are reached. When the LED indicators turn blue,
temperatures are reached.
Make sure that the carrier gas is always flowing before the liquid flow setpoint is applied.
5.2
User interface
5.2.1
Buttons
The buttons have the following functions:
- Enter selected menu
- Enter edit mode
- Confirm selection/changes
- Menu selection up
- Select information field
- Next character in edit mode
- Up in table
- Menu selection down
- Select information field
- Previous character in edit mode
- Down in table
- Return to previous screen
- Undo, cancel and exit edit mode
- Switch content in the 'Custom readout 2' field
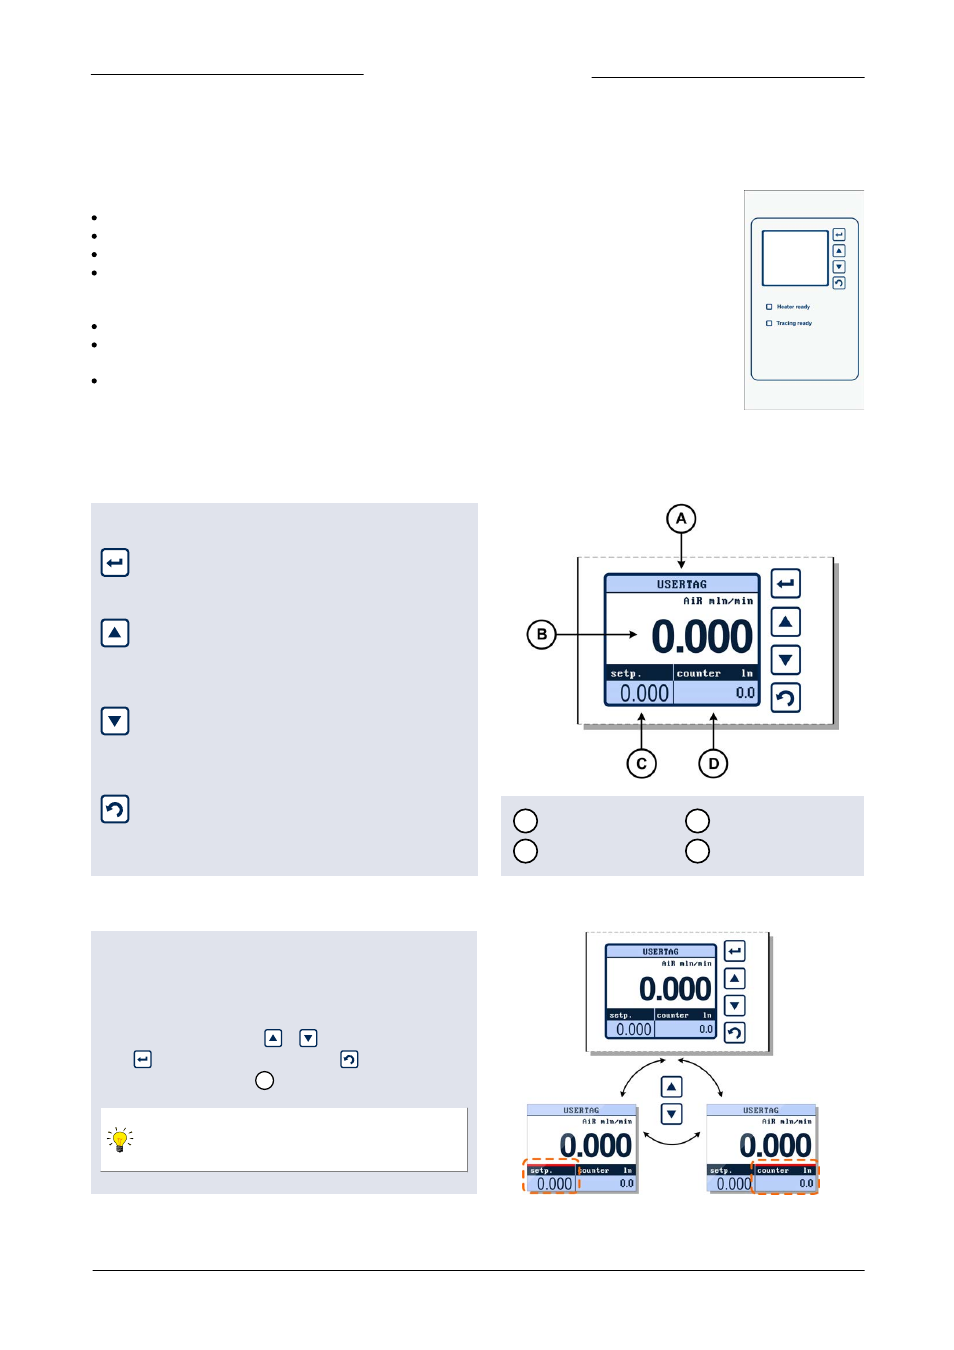
A
Top line
C
Custom readout 1
B
Measure readout
D
Custom readout 2
5.2.2
Display
The display is divided into 4 areas, ‘Measure readout’,
‘Custom readout 1’, ‘Custom readout 2’ and the 'Top line'.
The information in these areas can be configured by the user.
If an area contains a parameter which can be set or reset by
the operator, you can press
or
to select this parameter.
Press
to enter the edit mode or press
to return to the
‘Measure readout’ screen
B
.
If ‘Custom readout 1’ is disabled, you can only
switch between ‘Measure readout’ and ‘Custom
readout 2’.