Panel set, avalon – Avalon Firestyles Panel Set User Manual
Page 2
Panel Set, Avalon
Travis Industries
Page 2 of 2
Printed 11/4/05
2.
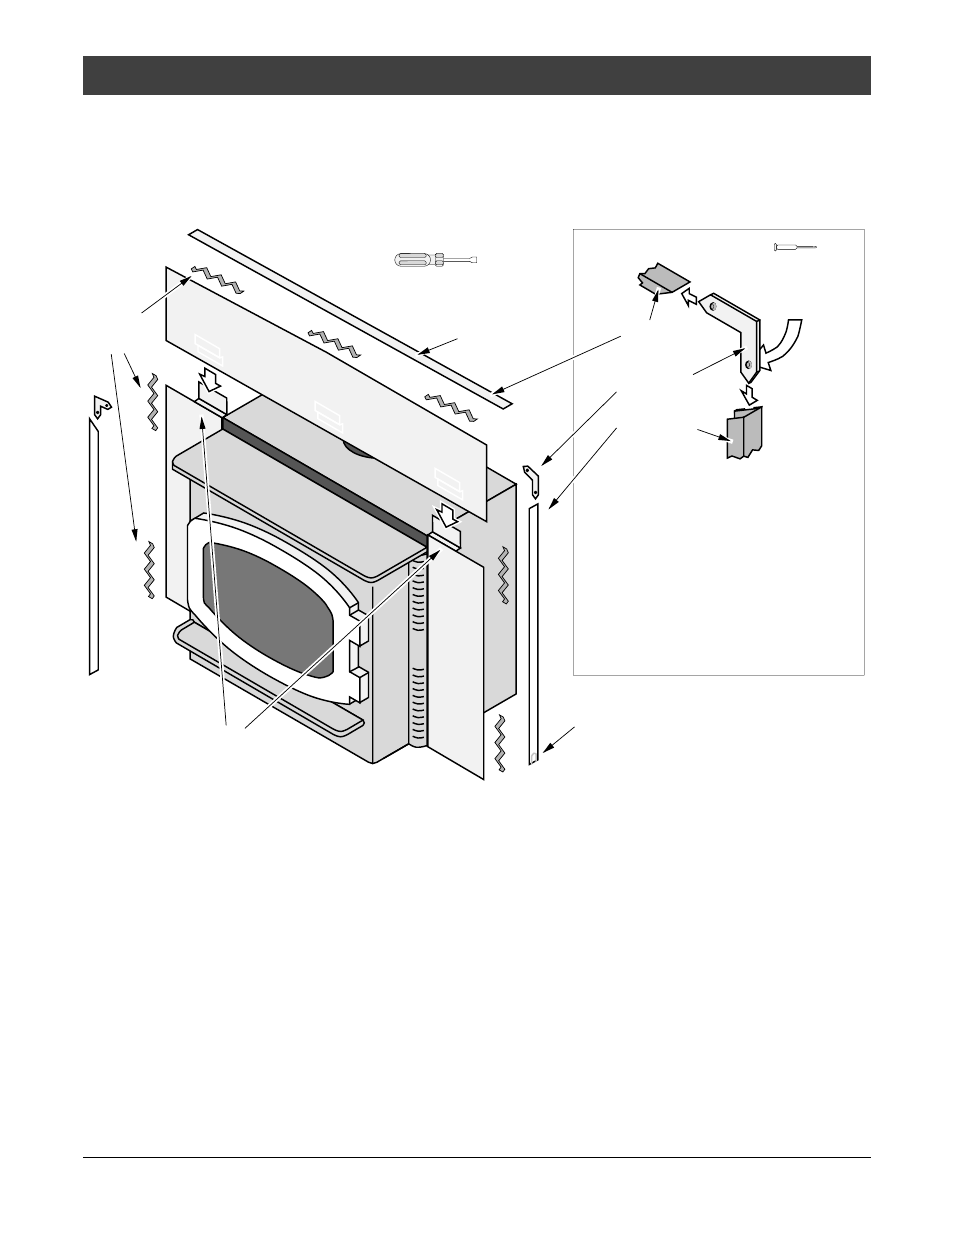
Adjust the position of the side panels so they are: 1) flush with the bottom of the insert; 2) both
the same distance back from the front of the insert; 3) perpendicular to the floor (use the top
panel, if necessary, to judge alignment). Tighten the screws that hold the side panels in place.
3.
Place the insert into the fireplace and connect the flue (if using a positive or direct connection).
Install the top panel and trim following the directions below.
"L" Bracket
Right Side
Trim
Top Trim
Optional Trim Installation:
Insert one leg of each "L" bracket into the top
and side trim piece. Align the trim to form a
precise corner, then tighten the two set
screws with a small standard screwdriver.
Slide the trim over the panels. Place the
spring clips behind the panels at the locations
shown. This keeps the trim tight against the
panel.
Micro (1/16”)
Standard
Screwdriver
Install the top panel so the tabs insert
into the joggle clips on the top panel
Top
Panel
Spring
Clips
Top Trim
Optional Knock-Out
An optional knock-out is provided on both
sides if the power cord is routed behind the
surround panel.
5/16" Nutdriver
Insulation Installation (required only for face seal installations)
1.
With the insert drawn 6" from the fireplace, glue the insulation strip included with the insert to the
back of the panels using RTV silicon or stove gasket cement. The insulation should be installed
so it overlaps the fireplace opening to form a seal between the panels and the fireplace face. Let
the silicon or cement dry.
2.
Push the insert into the fireplace, allowing the insulation to form a seal between the panels and
the fireplace. Use a screwdriver to tuck any exposed insulation behind the panels.