Lopi front blower installation instructions, High – Avalon Firestyles Lopi Front Blower User Manual
Page 2
Lopi Front Blower
Installation Instructions
Page 2 of 2
17601771.docx — 11/15/12
© Travis Industries, Inc.
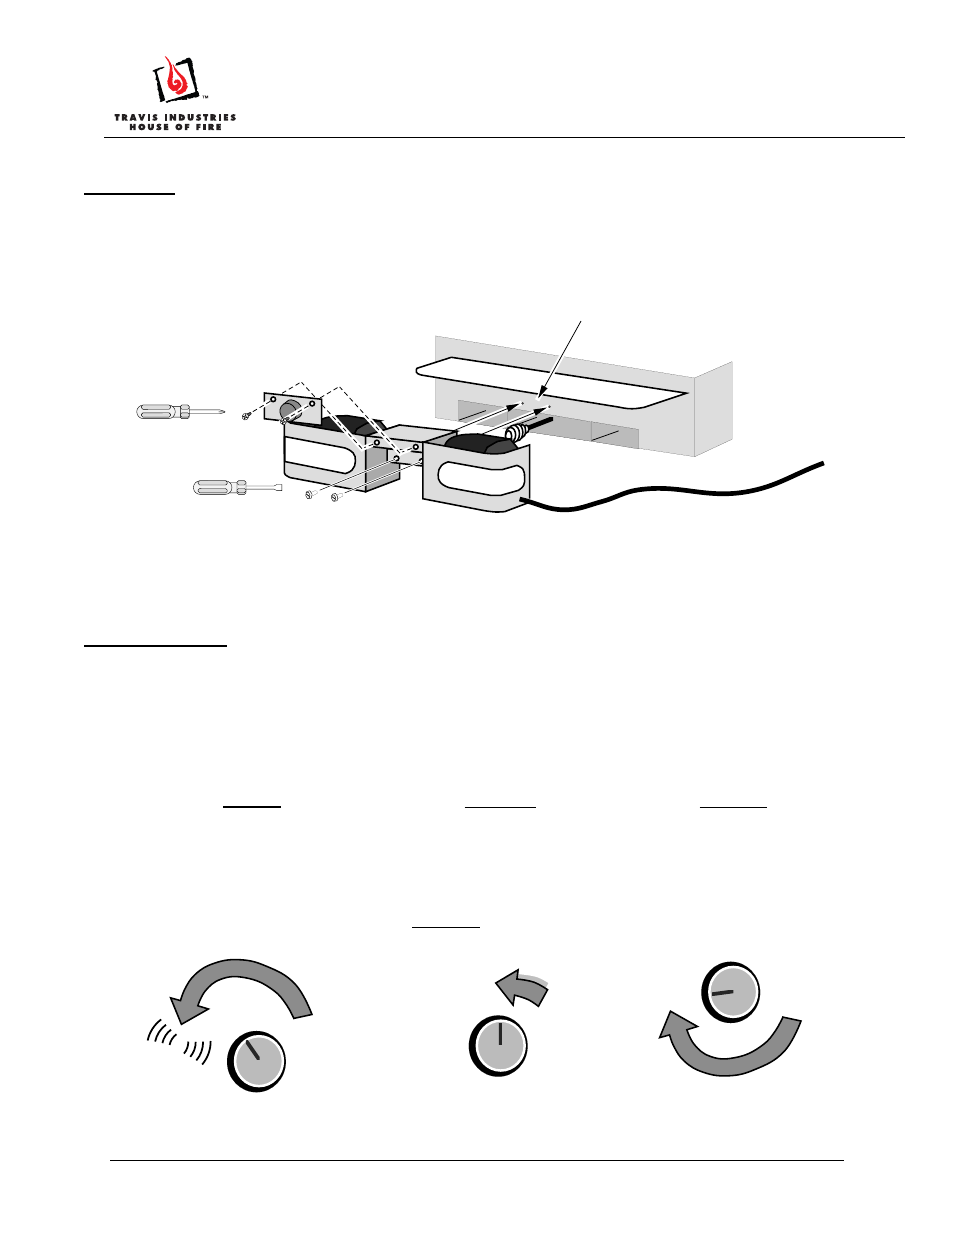
Installation
1. Attach the blower following the instructions below.
NOTE: Before tightening the screws with a 3/8” nutdriver, lift the blower up so it tucks
underneath the ashlip.
2. Plug the power cord running from the control box into a grounded 110‐volt electrical outlet.
Blower Operation
The blower will not start until the appliance is up to temperature, activating a thermodisk which then
allows power to the motors. Once up to temperature, the blower will operate at the speed determined
by the position of the blower knob (see the illustration below). The blower will shut off automatically
once the appliance cools.
Use a 3/8" nutdriver to secure the
front blower to the appliance.
Plug the
blower into a
110 volt
grounded
outlet.
3/8" Nutdriver
Remove the two screws.
Phillips
Screwdriver
Remove the rheostat plate to access the
blower mounting holes (leave the wiring
intact). Re-attach the rheostat plate after the
blower is attached.
OFF
Turn the dial all the
way counter-clockwise
until it clicks off.
HIGH
The high position is all the
way counter-clockwise,
without clicking off.
LOW
Turn the dial all
the way
clockwise.