Pre-setup – CRU Drive eRazer Ultra User Manual
Page 2
PMS 711
2 cyan
85 magenta
76 yellow
10.25.12
CRU Mark
Page 2
Table of Contents
1. Pre-Setup
2
1.1 Drive eRazer Ultra Accessories
2
1.2 Identifying Parts
2
2. Setup
3
3. Menu Structure and Usage
3
3.1 Home/Start Erasing
3
3.2 Review Settings
3
3.2.1 Erase Type
3
3.2.2 HPA/DCO Handling
4
3.2.3 Validation
4
3.2.4 Label Printer Output
5
3.2.5 Reset to factory
5
3.3 View Drive Info
5
3.4 View Dock Info
5
3.5 Other Screens During the Erasure Process
6
3.5.1 Operational Status
6
3.5.2 Error Indication
6
4. Frequently Asked Questions
7
5. Technical Specifications
9
1. Pre-Setup
1.1 Accessories
Check the accessories packaged with your Drive eRazer
Ultra. Please contact CRU if any items are missing or
damaged. The box should include:
Contains Number
Drive eRazer unit
1
AC adapter
1
Metal drive plate
1
Packet of screws and bumpers
1
SATA power/data cable
1
IDE/PATA power cable
1
IDE/PATA data cable
1
Quick Start Guide and warranty info
1
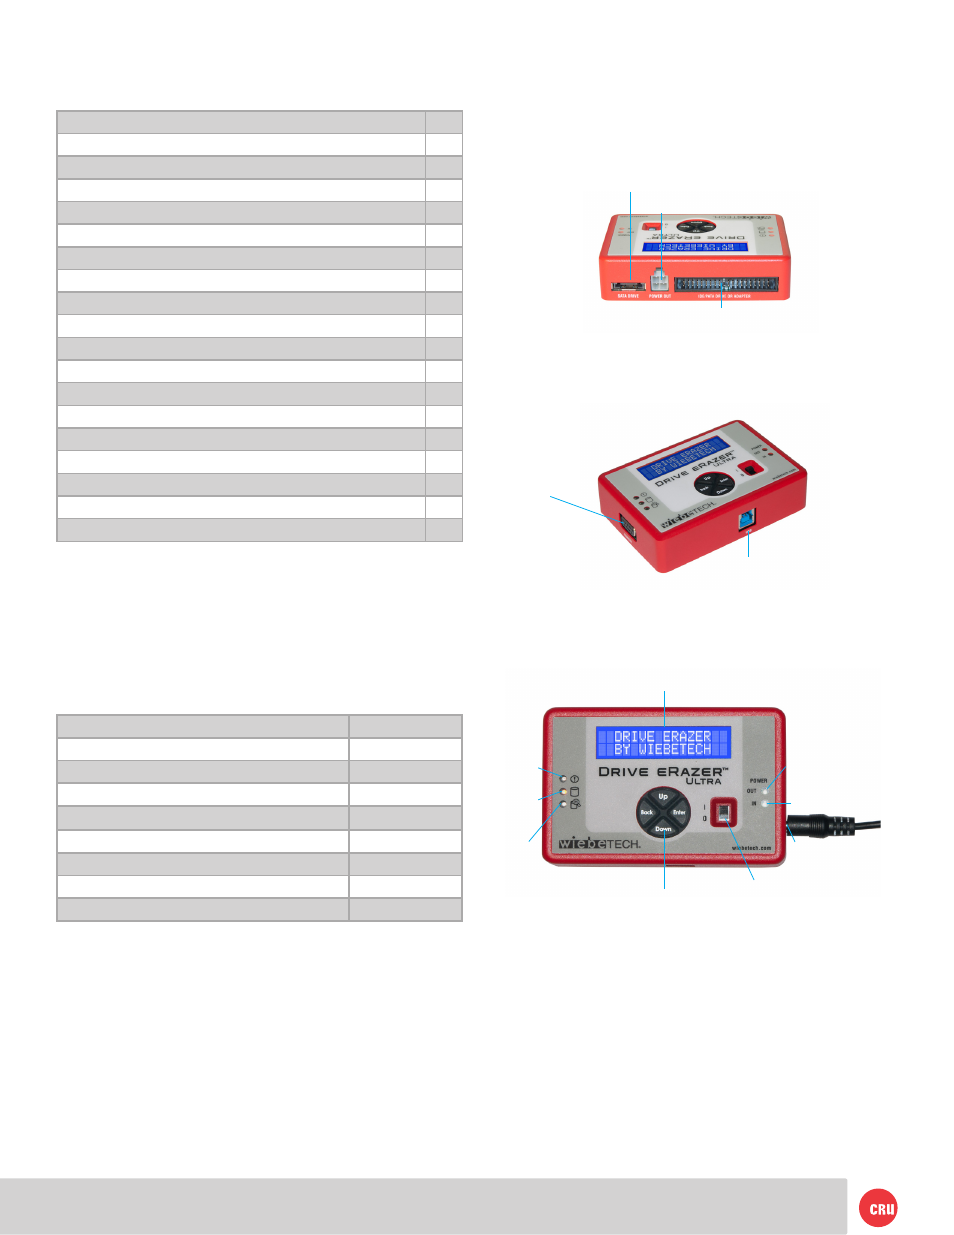
eSATA connection for connecting SATA drives
40-pin IDE header for external IDE cable attachment
4-pin square connection for drive power cable
DB9 connector for
Serial connection for
printer output
USB B type connector
Error
LED
(red)
Disk access
LED (amber)
HPA/DCO
Indication
LED (green)
Navigation buttons
Power switch
DC +12V input from
AC adapter
Power output
status LED (green)
Power output
status LED (green)
LCD
1.2 Identifying Parts
Take a moment to familiarize yourself with the parts of your
new Drive eRazer. This will aid you in the remaining steps.