Optional hydrosport ™ rowing system, Installing the rowing system – Dimension One Spas Aquatic Fitness System User Manual
Page 21
Dimension One Spas - Aquatic Fitness System - Owner’s Manual
19
Optional HydroSport
™
Rowing System
Installing the Rowing System
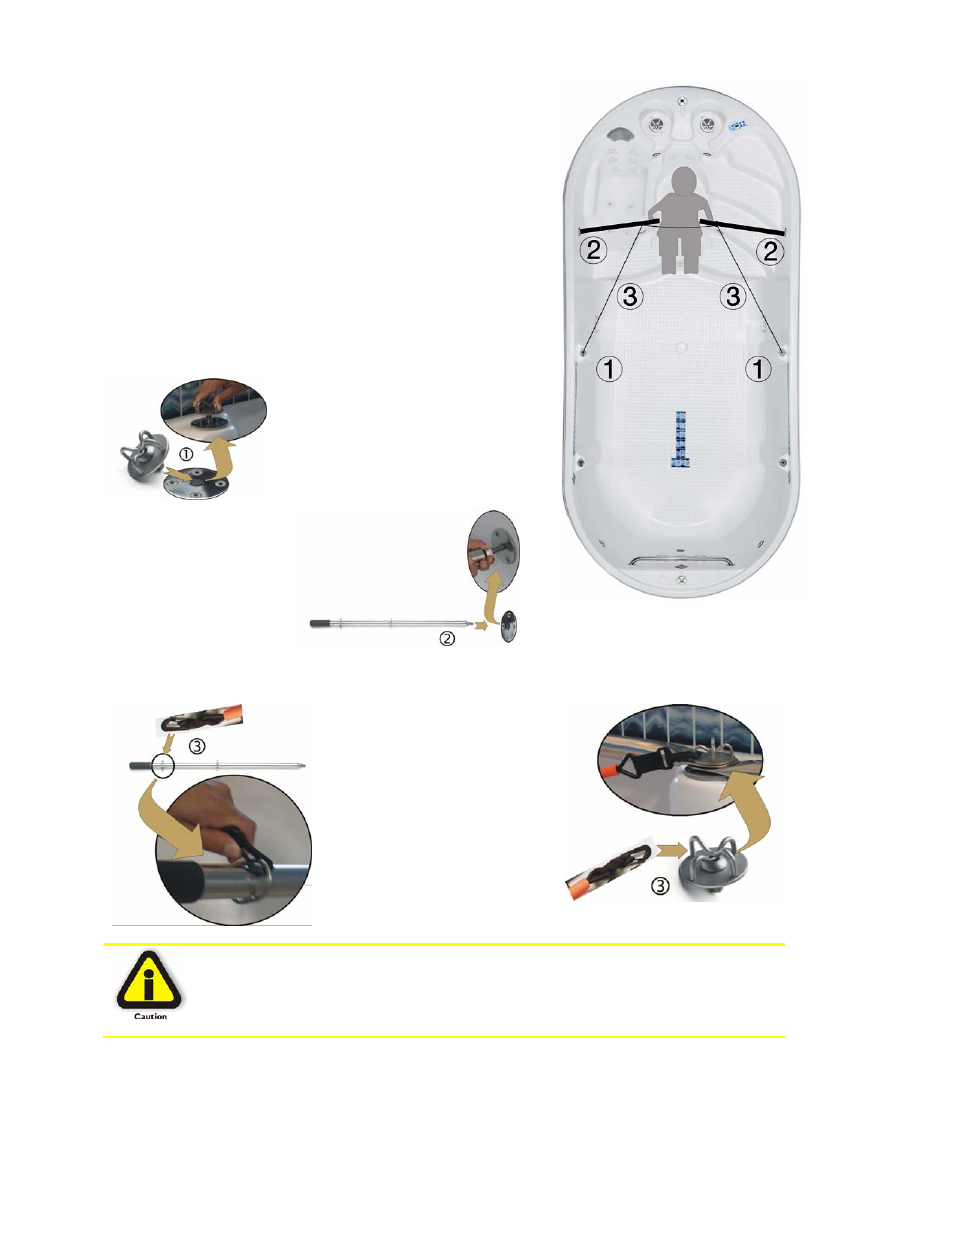
Easy as 1-2-3
The HydroSport
™ Rowing System installs in three steps:
1) Install Butterfly Tops
2) Install
Rowers
3) Install Tensor Cords
1) Screw a Butterfly Top into the
OptiMount
™ located on top of the
pedestal closest to the rowing seat or
area. Be sure to remove the plastic
insert from the OptiMount
™ center.
Use the OptiMounts identified by “1”
in the 1-2-3 picture.
2) Screw each rower into an OptiMount
™
on the wall on each side of the rowing seat. Be
sure to remove the plastic insert from the
center of the OptiMount
™. Use the
OptiMounts identified by “2” in the
1-2-3 picture.
3) Choose a tensor cord for your rowing exercise. Snap a clip from one end of the rower to a Butterfly
Top. Snap the other end of the cord to the rower.
As a starting point use the red
cords. Change colors to adjust
resistance as you determine
your needs.
You must make sure the cord snap-hooks are properly connected and the rower
ring and the Butterfly Top ring are completely “inside” the snap-hook. If not
properly installed, the tension on the cords during exercise could cause them to
release and become a safety hazard.