Connecting the ac line – Applied Motion Si5580 User Manual
Page 5
-5-
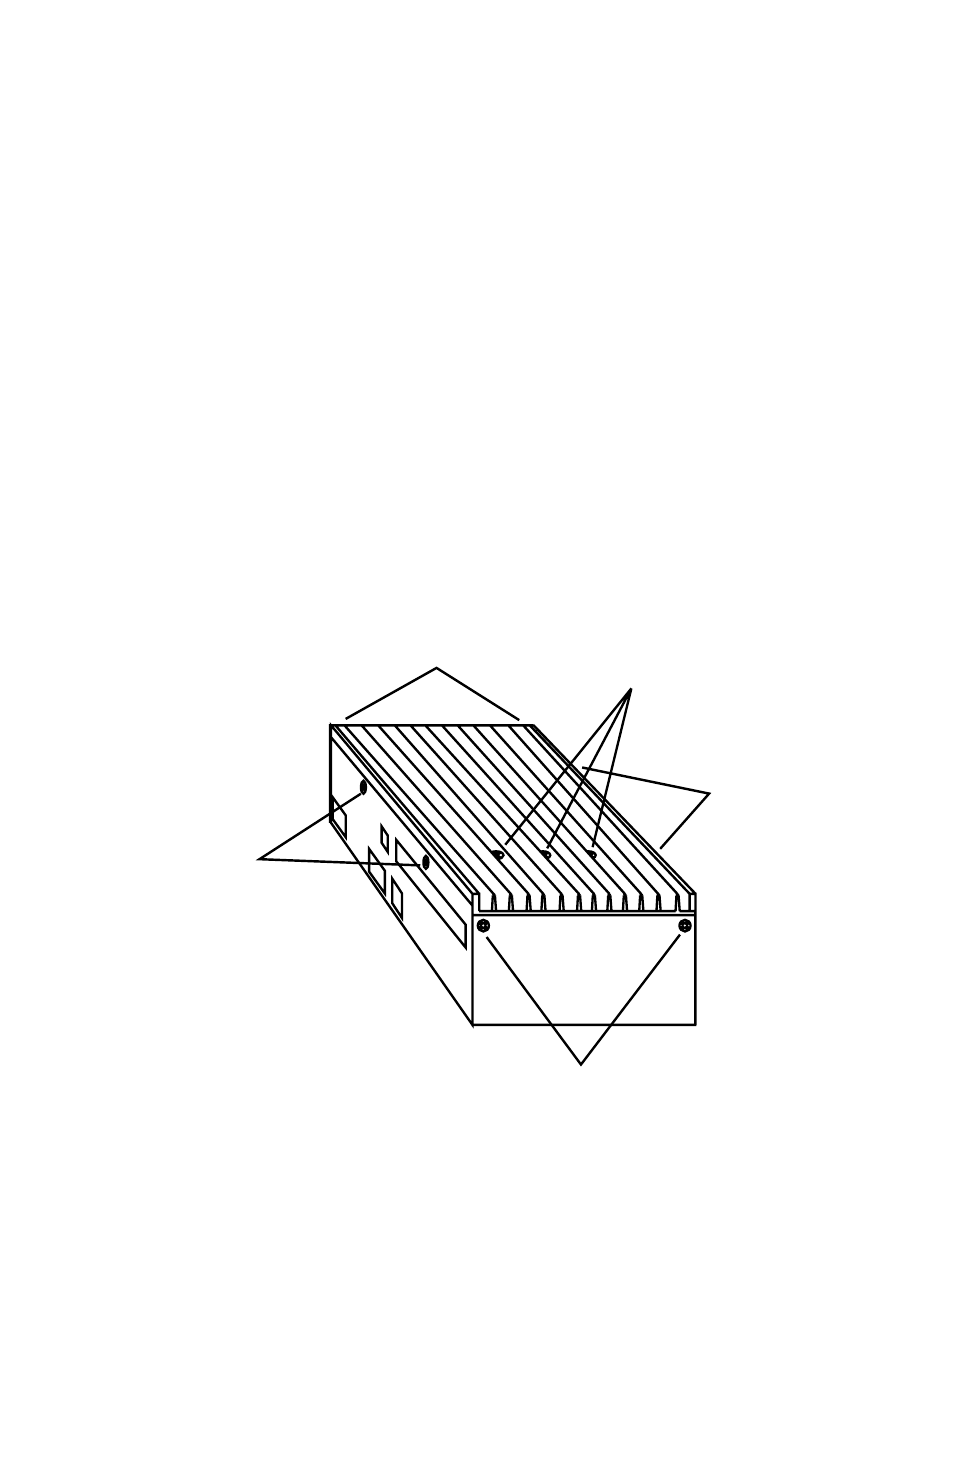
2 screws (medium length)
2 screws
2 screws
(shortest
length)
2 screws
3 screws on
top (longest
length)
Connecting the AC Line
The Si5580 is set for 110 VAC operation at the factory. If you use 110 VAC power, all you need to do
is install a power cord and plug it in (skip to Installing an AC Line Cord). If you plan to use 220
VAC power, follow the instructions below.
Note: If you plan to hard wire the Si5580 to AC power, consult a qualified electrician and observe all
building and electrical codes. AC power can be dangerous.
220 VAC Instructions
In order to use 220 volts, you’ll need to set the 110/220 VAC switch to the correct position and install
the correct fuse.
1) Remove all mating connectors from the drive.
2) Set the drive on its side, with the aluminum heat sink fins up.
3) With a medium-sized phillips screwdriver, remove the eight screws at the perimeter of the case and
the three screws that connect the heat sink to the internal heat bar, keeping track of which screws
go where. See the diagram below.
Note: Do not remove the 1/4-20 Allen head screw that connects the heat sink to the internal trans-
former.
4) Separate the heat sink assembly from the cover and note how the wires are routed to the PC board.
There are labels on the PC board to assist you.
5) Disconnect the two sets of wires connecting the heat sink/transformer assembly to the chassis/PC
board. The 110/220 VAC SWITCH is located on the PC board, near the AC power connector. See
diagram on page 6.