Mounting the drive, Mounting the optional mmi – Applied Motion Si5580 User Manual
Page 18
-18-
Never use your drive in a space where there is no air flow
or where the ambient temperature exceeds 50°C (120°F).
Never block the fins of the heat sink or the vent holes.
Never put the drive where it can get wet.
Never allow metal particles near the drive.
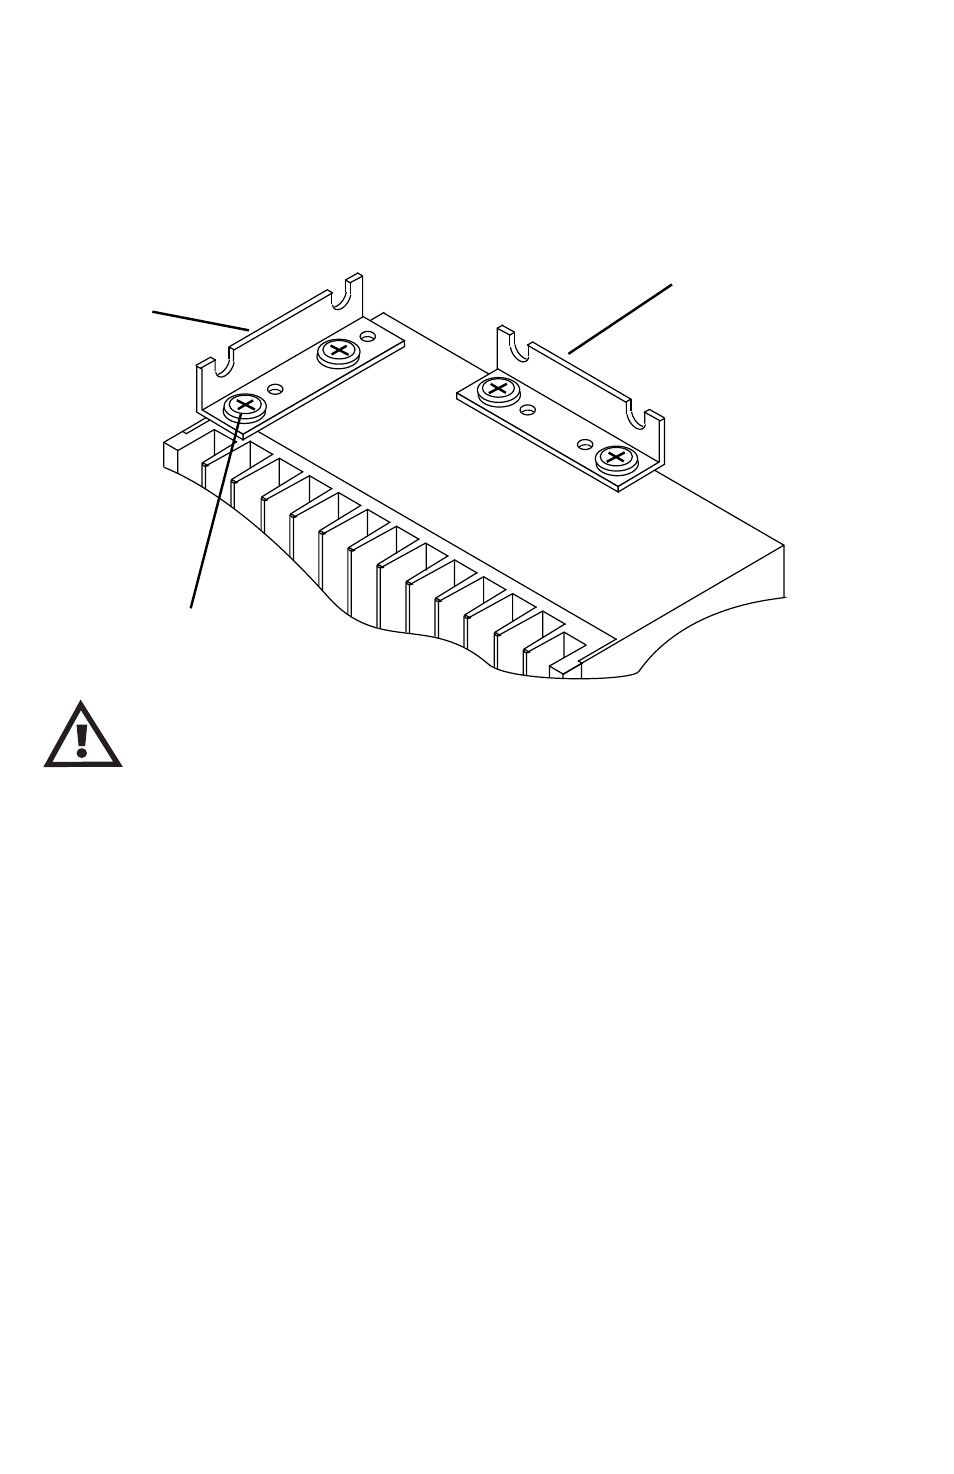
Bracket position for
wide side mounting.
Place brackets on
top and bottom of
drive.
Bracket
position
for narrow
side
mounting.
Place
brackets
on top
and
bottom of
drive.
This screw is already in
the drive.
Mounting the Drive
You can mount your drive on the wide or the narrow side of the case. Either way you’ll need to get the
brackets and screws out of the accessory bag and bolt them onto the Si5580. If you’re mounting on
the narrow side, you’ll first have to remove one of the screws from the heat sink, then put it back with
the bracket in place, as shown in the figure.
Mounting the Optional MMI
There are two ways to mount the MMI in your application. No matter which method you choose,
you’ll need to connect the MMI to your Si5580 with the programming cable. You will not, however,
need the adapter plug. The MMI has the same telephone style connector as the Si5580.
Depending on how you mount the MMI and cable in your application, you may find that it is difficult
to remove the cable from the back of the MMI. If this is the case, and you need to reprogram the
Si5580, you can use any telephone line cord as a programming cable. They are available at most
supermarkets and discount stores. Pleae be careful not to lose the adapter plug that connects the
telephone cord to the COM port of your PC. The adapter is a custom made part and is only available
from Applied Motion.