Woodhaven 4963: Taper Master User Manual
Page 3
2
3
4
INSTALL
HANDLE
Insert a 1" bolt (HB030) in the desired T-slot in the
Fence, then a 5/8" spacer (BUSH004) and a handle (5590)
on the end of the bolt. Position the handle where desired on
the Fence and tighten.
INSTALL WORK STOP
Insert two 1/4" spacers (BUSH002) on a thumb screw
(5505) and start an oval nut (5760B - raised side first) on
the end of the thumb screw. Slide it on to the T-slot on
the edge of the fence, position it near the end of the fence
for now and tighten. This will serve as a work Stop.
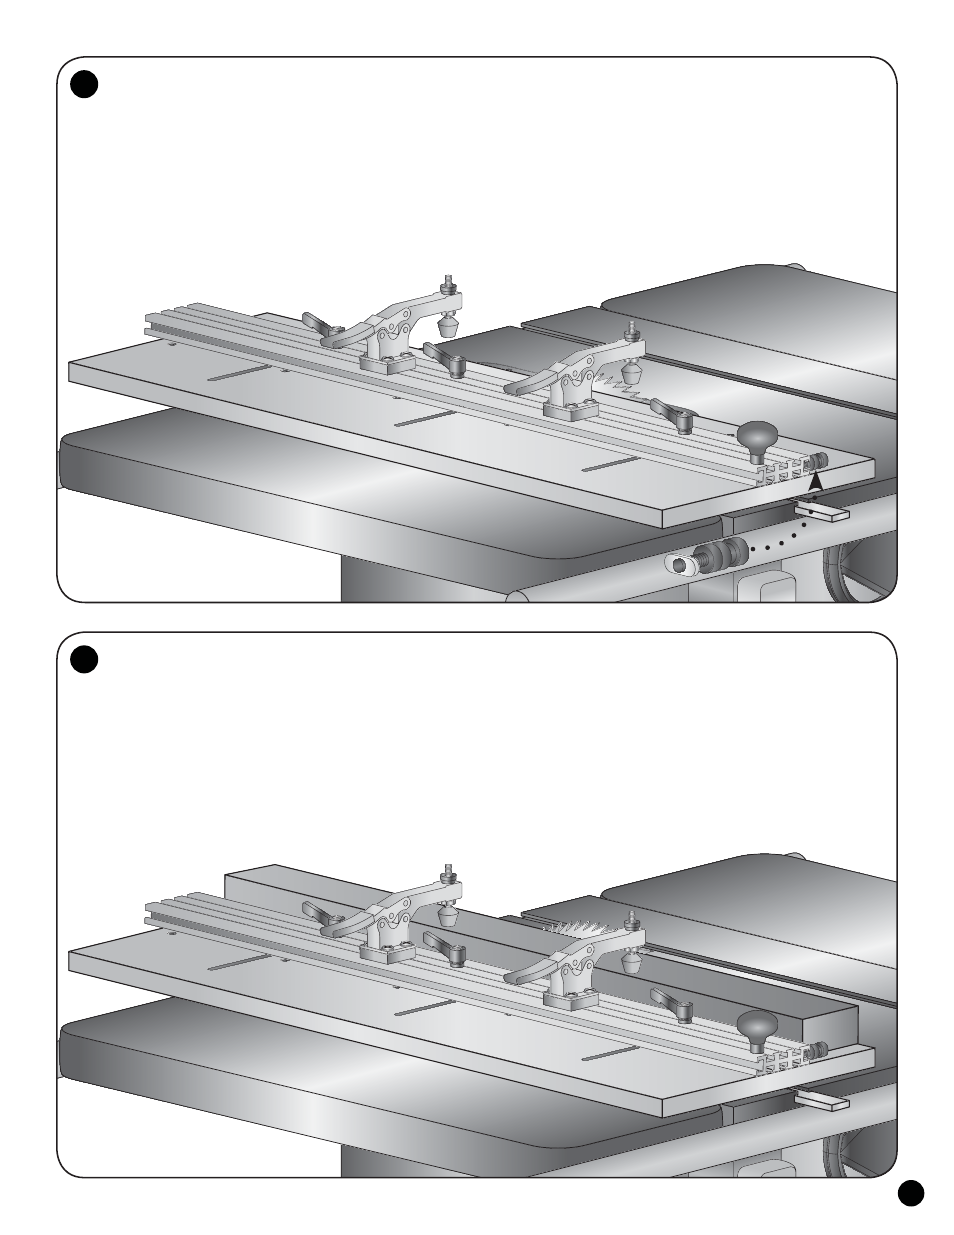
INSTALL CLAMPS
Assemble the two Inboard Clamps (6305IC)
according to the directions that come with them and
attach them to the center T-Slot of the Fence.
USING THE TAPER MASTER
Be sure to observe all safety precautions when using
the table saw or band saw. The cut-off from your work
can be thrown by the table saw blade as it falls to the table.
To help prevent this, clamp a 3/4" thick board on the opposite
side of the blade.
Set the fence on the Taper Master to the
desired taper or angle. This is done by lining up
the cut lines on your work with the cut edge of the
Base, which is also the cut line of your saw.
Position the handle on the Fence where desired. Place
the work on the Base and butt it against the Fence and the
Stop. Adjust and tighten the toggle clamps on the work using
medium pressure. Do not over tighten!
Pull the work/jig back from the saw blade, start
the saw, then slide it forward past the saw blade.
Handle:
5590
BUSH004
HB030
Clamp
Assembly
Work Stop:
5505
BUSH002 x2
5760B