Woodhaven 526: Medium Coping Sled User Manual
Page 4
3
10
9
11
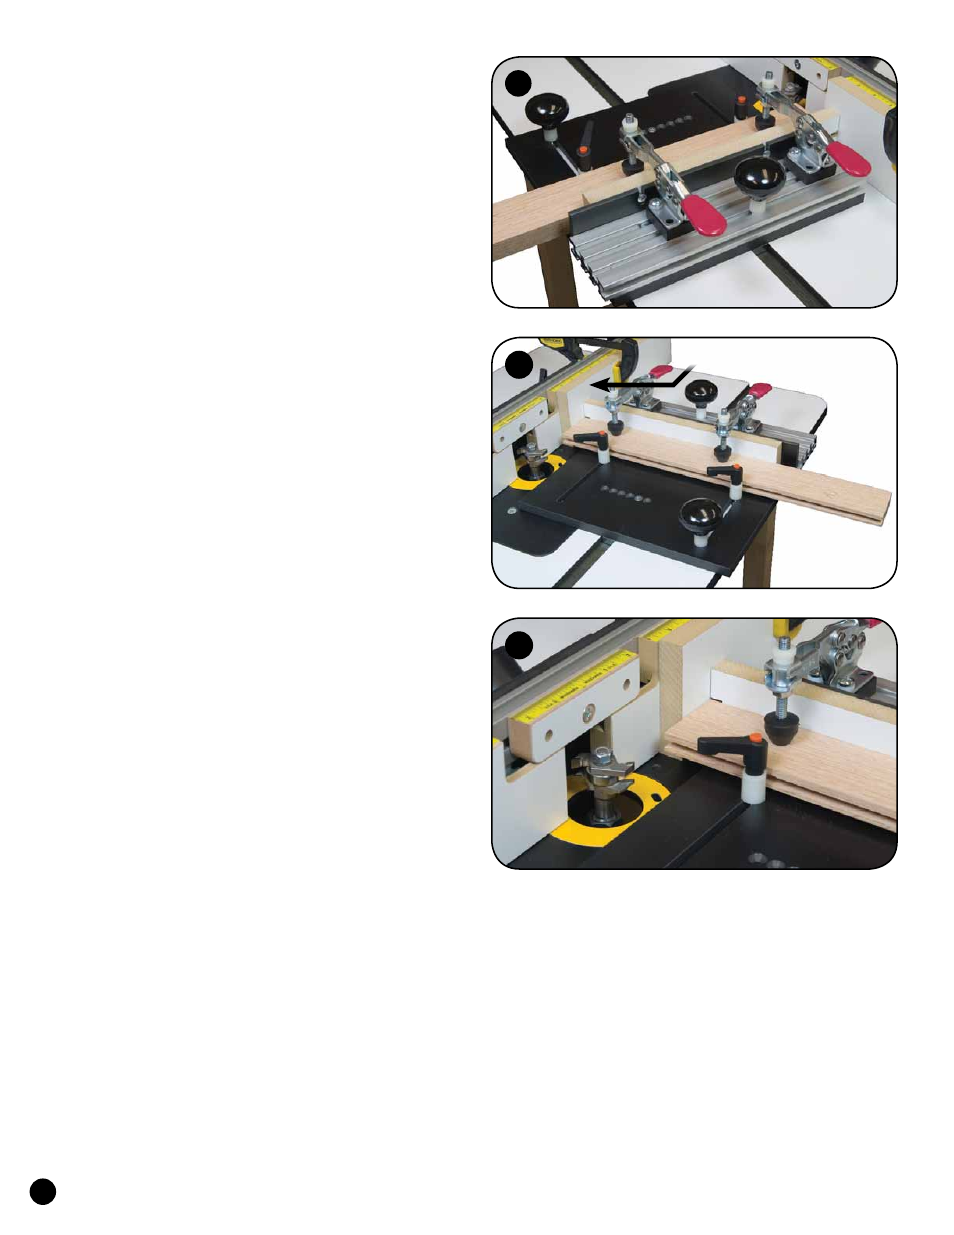
USING THE COPING SLED
Make and install a 3/4" thick wood fence. It should be 1-
3/4" to 2" tall by whatever length (12 to 24" depending on fence
and part length) you desire. Attach the wood fence to the slotted
openings in the sub-fence using the 3/4" screws (STP001)
provided. Wood fences can be quickly changed, so make extras
to cover all the zero-clearance bit profiles you need. See fig. 11.
Install a cope bit/cutter in your router or shaper. Adjust the
bit height, taking into account the 1/2" thickness of the base.
We use an extra thick base to insure that there's no distortion
to the base when you use the toggle clamp. Most cope bits and
routers will work with this sled, but make sure you have at least
3/4" of the bit shank in the router before making any cuts. If
extra bit height is needed, you may need to use a router lift or
collet extension. Make sure the cutter will not strike the base
(unless using it without a jig bar), or the Ultra Track Fence.
We recommend using the infeed side of your fence
and a spacer to help position the work on the sled. The
fence must be parallel to the miter slot for this to work.
Adjust the fence so the spacer is in line with the bearing
on the cope bit. Slide the hold-ins against the work and
tighten the ratchet handles. Turn the router on and, holding
both knobs, slide the Coping Sled forward past the bit. In
the unlikely event the work moves during cutting, glue a
strip of 120 grit sandpaper on the base. See fig. 11 - 13.
Get the optional 6305R 1" Riser Kit (one per
clamp) to increase the clamp capacity by 1".
©Copyright WOODHAVEN INC. 1/16/06
(800) 344-6657 or WWW.WOODHAVEN.COM
Spacer Block
Spacer Block
Spacer
Block