Woodhaven 526: Medium Coping Sled User Manual
Page 3
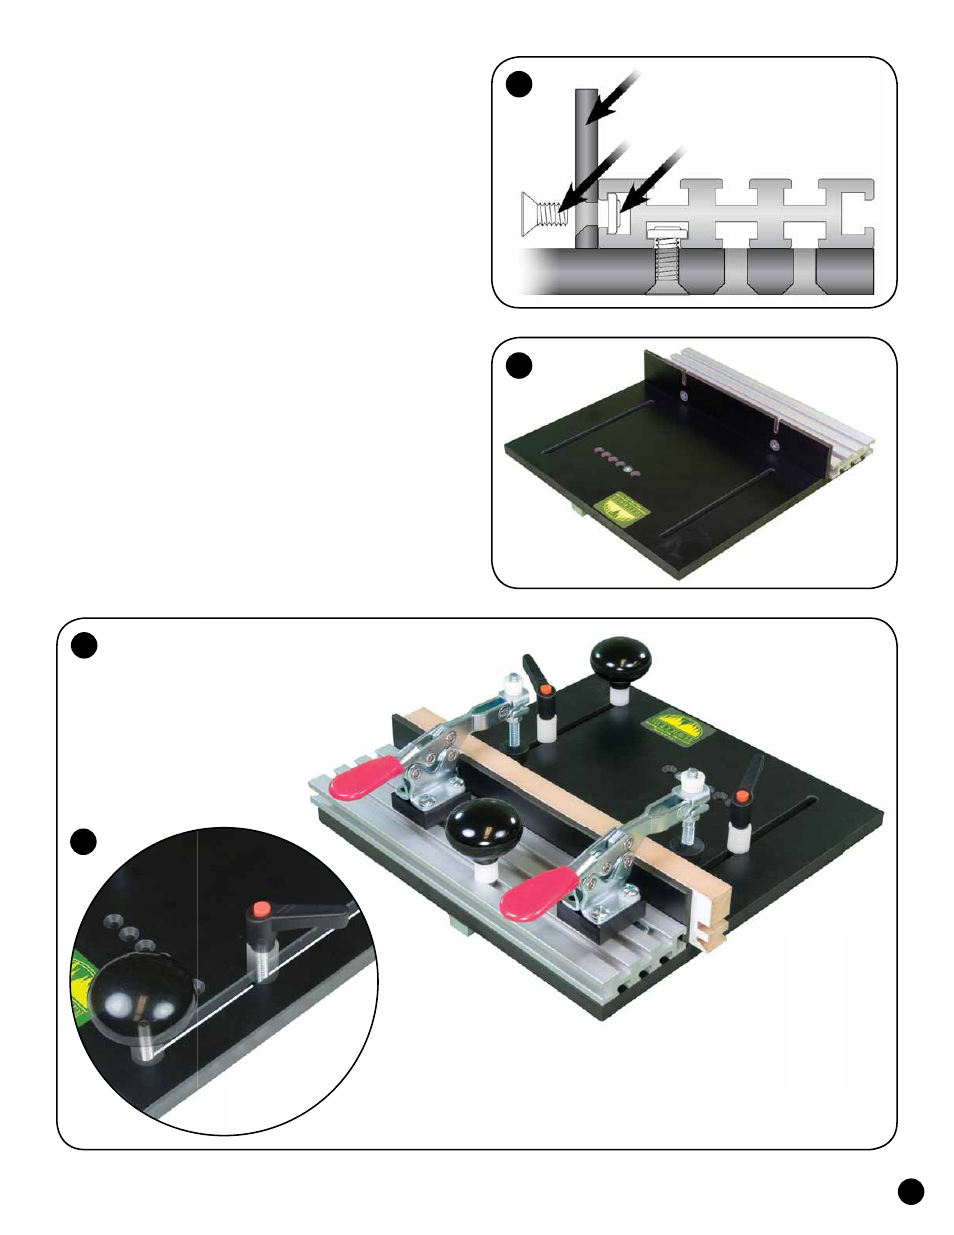
2
5
6
7
526A
5760B
MF005
Attach the 1/4" Phenolic Sub-Fence (526A) to the Ultra
Track Fence using four 1/2" screws (MF005) and oval nuts
(5760B). Insert the screws thru the countersunk holes in the
sub-fence and start the oval nuts, smooth side first, on the ends
of the screws. Slide the sub-fence on to the front T-slot of the
fence, centering it, and tighten the screws. See fig. 5 & 6.
Attach a knob on the base where shown. Insert
a 1-1/4" bolt (HB040) thru the slot in the base, then
a 5/8" spacer (BUSH004) and a knob (5590) on the
end of the bolt. For now, position the knob at the
far corner of the base and tighten. See fig. 7.
Attach the two hold-ins on the base. Insert a 1-1/4"
bolt (HB040) thru each slot in the base, then a 5/8" spacer
(BUSH004), a 1/8" spacer (BUSH001) and a ratchet
handle (5860) on the end of each bolt. The hold-ins are
positioned against the work to help hold it against the fence
when cutting, but can be removed if desired. See fig. 7.
Attach a knob to the Ultra Track Fence. Insert a
1" bolt (HB030) in the T-slot shown in the fence, then
a 5/8" spacer (BUSH004) and a knob (5590) on the
end of the bolt. For now, position the knob 5" from the
bit end of the fence and tighten. See fig. 7 & 8.
Assemble the two Inboard Clamps (6305IC)
and the Outboard Clamp (6305OC) according to the
directions that came with them. For now, attach one
Inboard Clamp at each end of the fence and the Outboard
Clamp to the base where shown. See fig. 7.
8