Woodhaven 5434: Frame and Panel Master User Manual
Page 4
MARK & CUT PANEL PROFILE
Place the panel on the base and slide the fences up against
each side of the panel so it's between the straight edges of the
fences. Place the template on the 1-1/4" bolts. See fig. 3 & 10.
Adjust the fences to center the panel on the template so
there is an even amount of template overhanging the panel at
each end. Using the template as a pattern, draw a pencil line on
the panel. See fig. 11. Remove the panel and rough saw it to
shape, staying approximately 1/8" away from the finished line.
Re-install the template and panel on the base. Clamp the
template/panel to the base using the knobs on top of the clamp
pads. The knobs are larger than previous ones so they're
easier to tighten. However overtightening may cause damage
to the jig! Hold the jig by the handles and machine the panel to
shape using a flush trimming bit. See fig. 12.
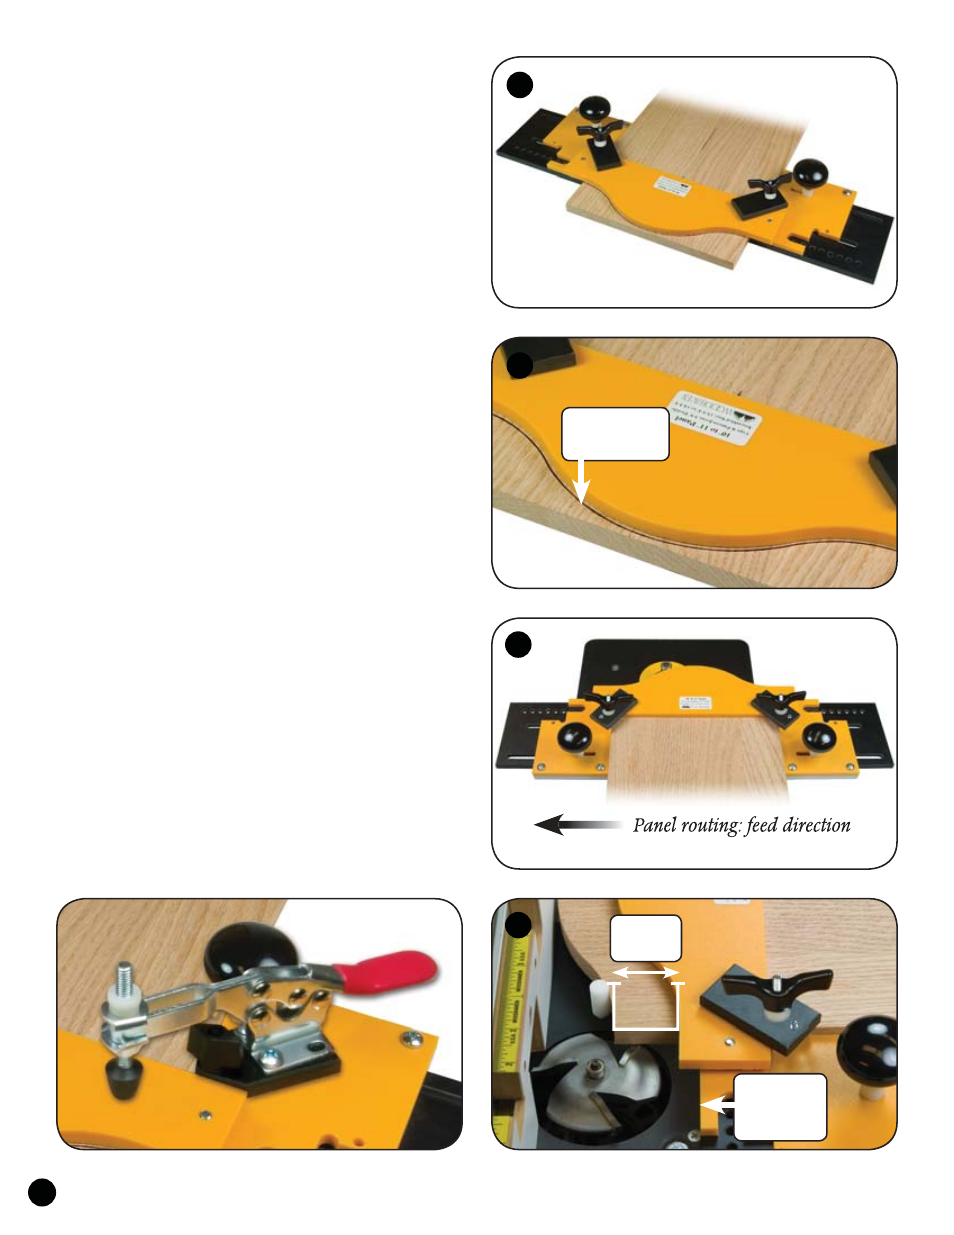
Remove the machined panel and install another. You can
also use the Frame & Panel Master to hold the panel as you
machine the raised panel profile in the curved edge. This will
work only if you install the panel so it projects past the template
at least 1-5/8" to prevent the bit from cutting into the base. See
fig. 13.
For best results, and optimum control, use a fence for sup-
port. Adjust the fence position so that the highest part of the
panel is touching the fence. This lets you slide along the fence,
until the part has reached the bit. See fig. 13.
ACCESSORIES
The optional Clamps take the place of the standard 5560
knobs for faster part clamping.
©Copyright WOODHAVEN INC. 7/16/07
(800) 344-6657 or WWW.WOODHAVEN.COM
Panel routing: feed direction
12
Do not
allow bit to
strike base!
At Least
1-5/8"
13
Draw line for
rough cut
11
10
3